Javascript API Reference
The CustomerLabs Javascript API empowers you to capture user interactions, manage customer identities, and organize group or account-level data in your website or app and send it to CustomerLabs. This reference documentation covers the primary methods available for integrating CustomerLabs into your web application.
Initialization
Section titled “Initialization”To leverage the JavaScript API, the CustomerLabs tracking code must be initialized within your application. This setup instantiates the global _cl object, which serves as the primary entry point for all tracking operations.
Installation
Section titled “Installation”The tracking snippet can be retrieved from the CustomerLabs dashboard via Home → Connect Website → Default Tracking Code
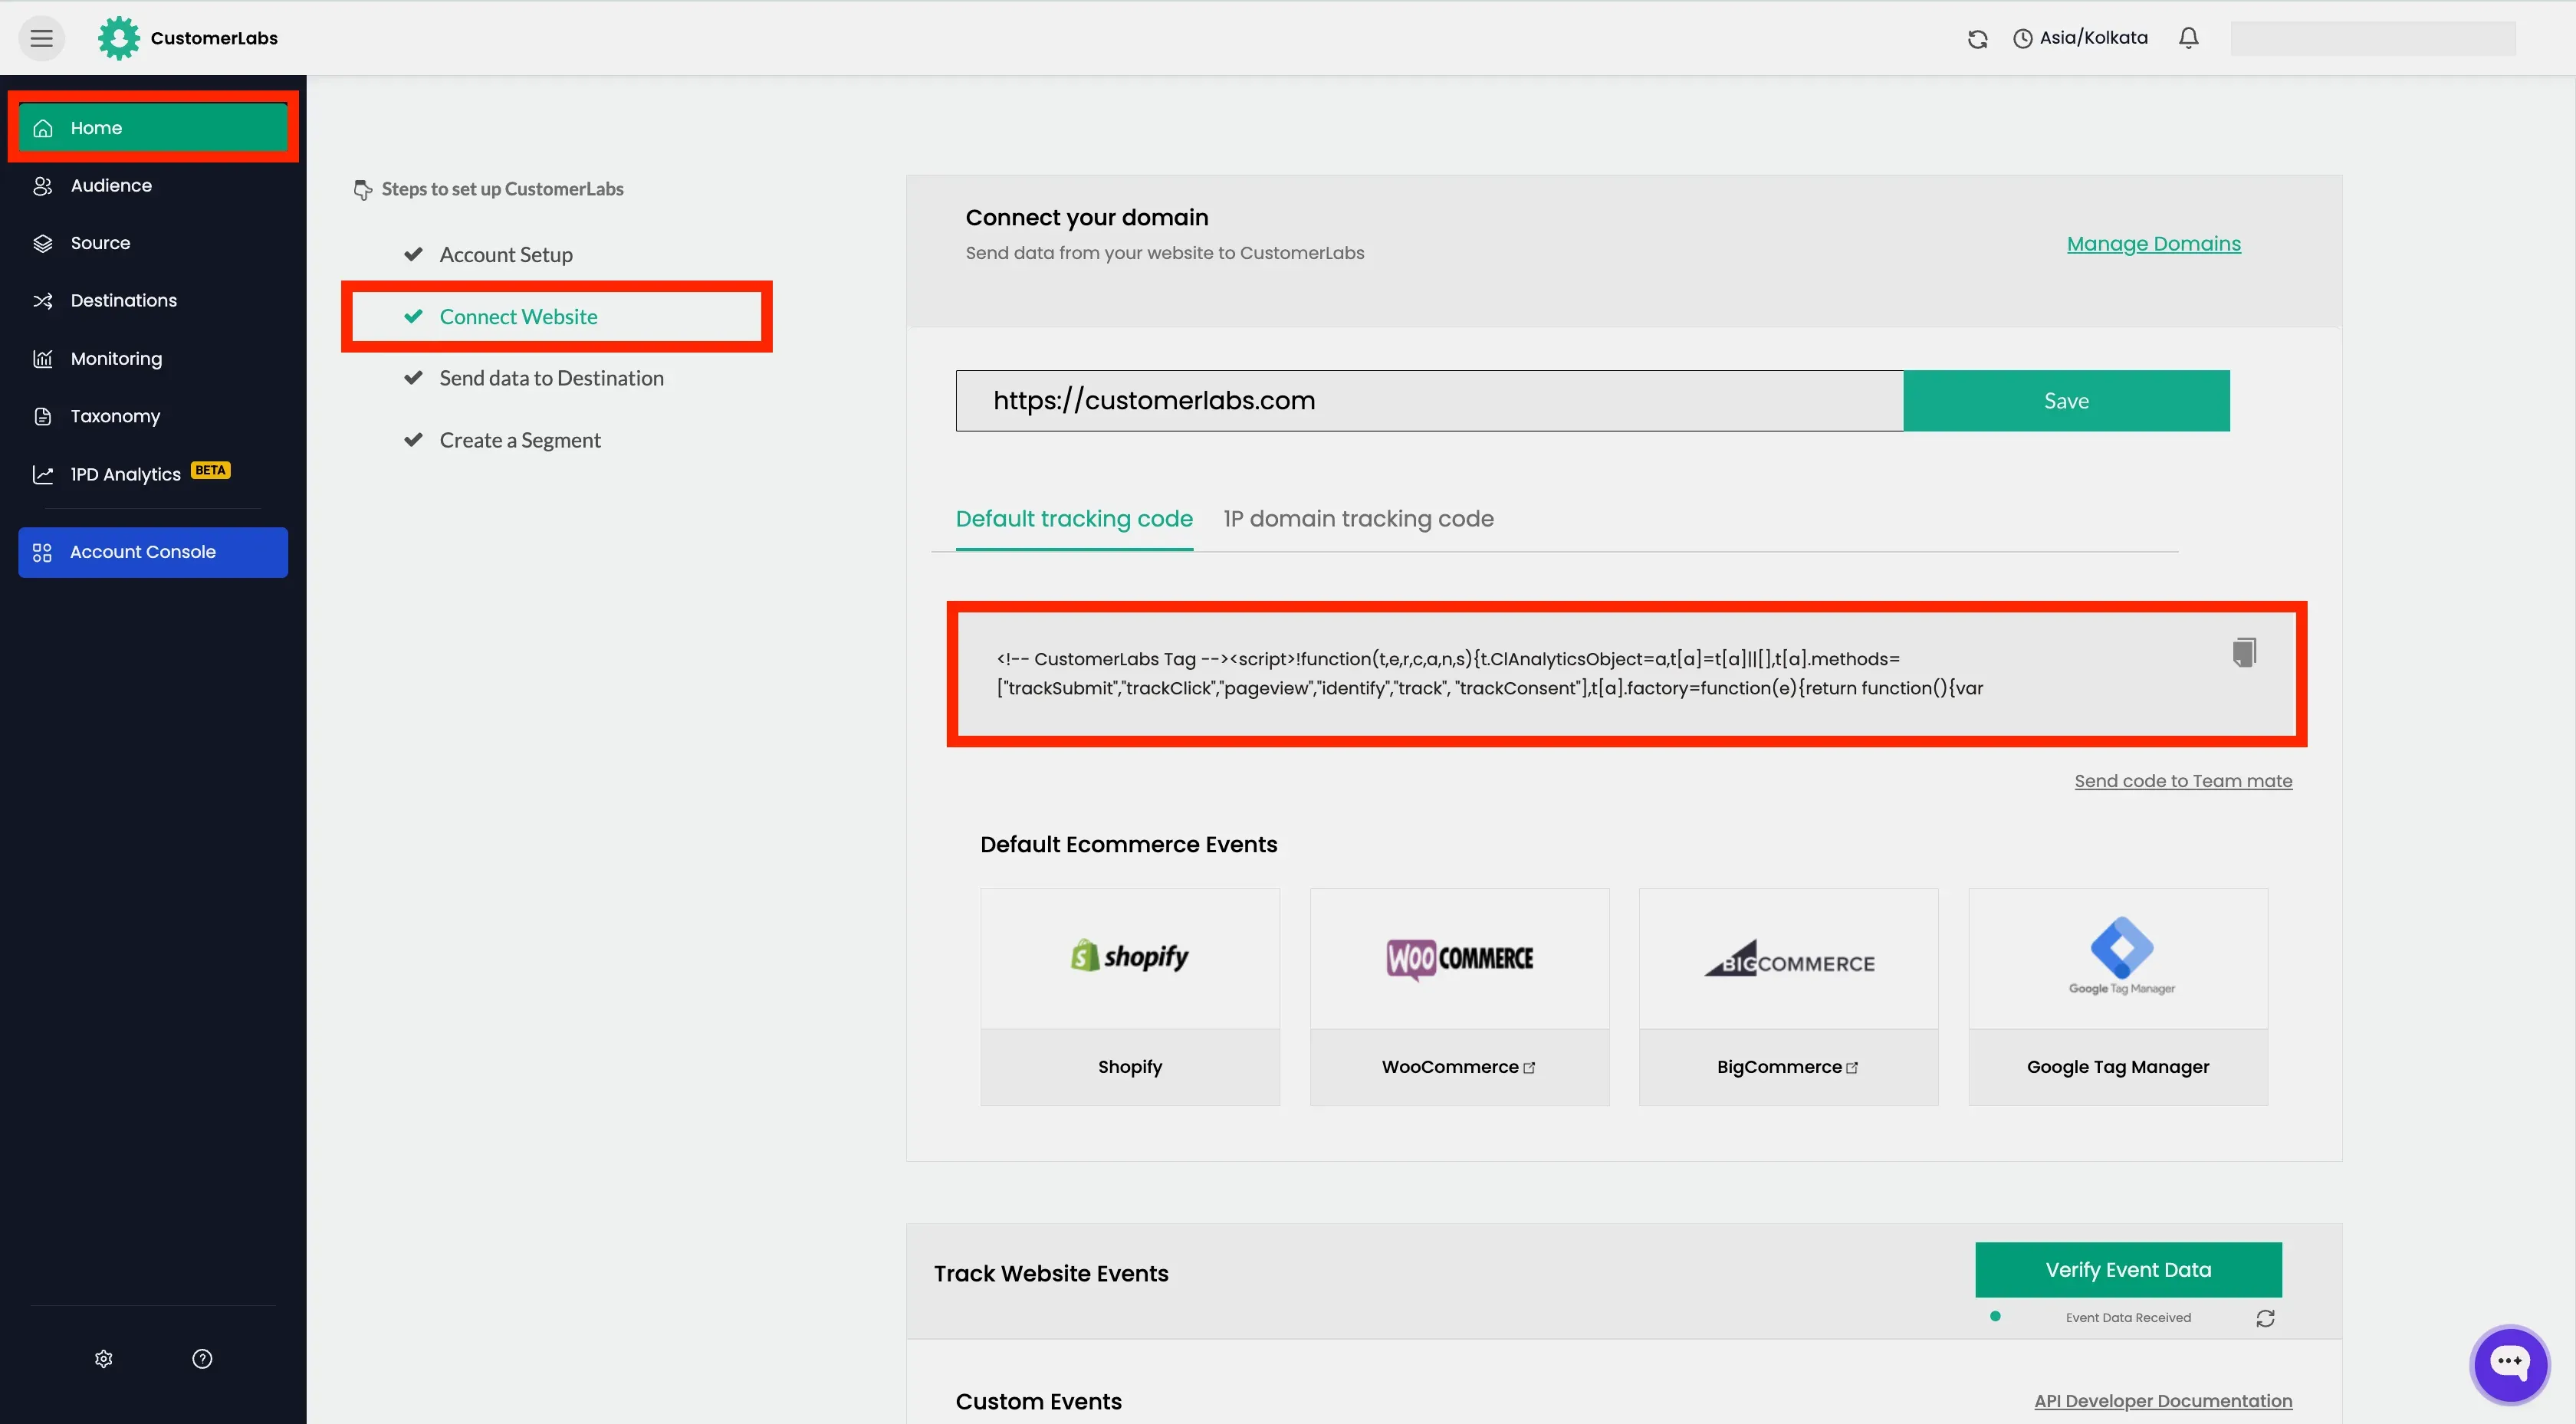
For optimal performance and data integrity, embed the snippet within the <head> section of every page. The following snippet demonstrates the standard implementation:
<script>!function(t,e,r,c,a,n,s){t.ClAnalyticsObject=a,t[a]=t[a]||[],t[a].methods=["trackSubmit","trackClick","pageview","identify","track", "trackConsent"],t[a].factory=function(e){return function(){var r=Array.prototype.slice.call(arguments);return r.unshift(e),t[a].push(r),t[a]}};for(var i=0;i<t[a].methods.length;i++){var o=t[a].methods[i];t[a][o]=t[a].factory(o)};n=e.createElement(r),s=e.getElementsByTagName(r)[0],n.async=1,n.crossOrigin="anonymous",n.src=c,s.parentNode.insertBefore(n,s)}(window,document,"script","https://cdn.js.customerlabs.co/<ACCOUNT-ID>.js","_cl");_cl.SNIPPET_VERSION="2.0.0"</script>Methods
Section titled “Methods”Once the tracking code is installed, the global _cl object becomes available. This object exposes the following methods:
trackSubmittrackClickpageviewidentifytracktrackConsentgroup
Syntax
Section titled “Syntax”_cl.<method>(<parameters>)The parameters includes Event Name and Properties.
Example
Section titled “Example”_cl.pageview(eventName, properties)Building the Properties
Section titled “Building the Properties”properties is a object in CustomerLabs that is triggered with the event. It is a nested object that contains the properties of the event.
Properties Structure
Section titled “Properties Structure”var properties = { "customProperties": { "property_name": { "t": "string", "v": "property_value" } }}The structure has two main parts with property_name
t: This is the type of the property.v: This is the value of the property.
The properties object usually contains,
- Custom Properties
- Product Properties
Cross-Domain Tracking
Section titled “Cross-Domain Tracking”To maintain continuity of user profiles across multiple domains, you can retrieve the CustomerLabs user ID and pass it to the destination domain.
Retrieving the User ID
Section titled “Retrieving the User ID”window.CLabsgbVar.generalProps.uid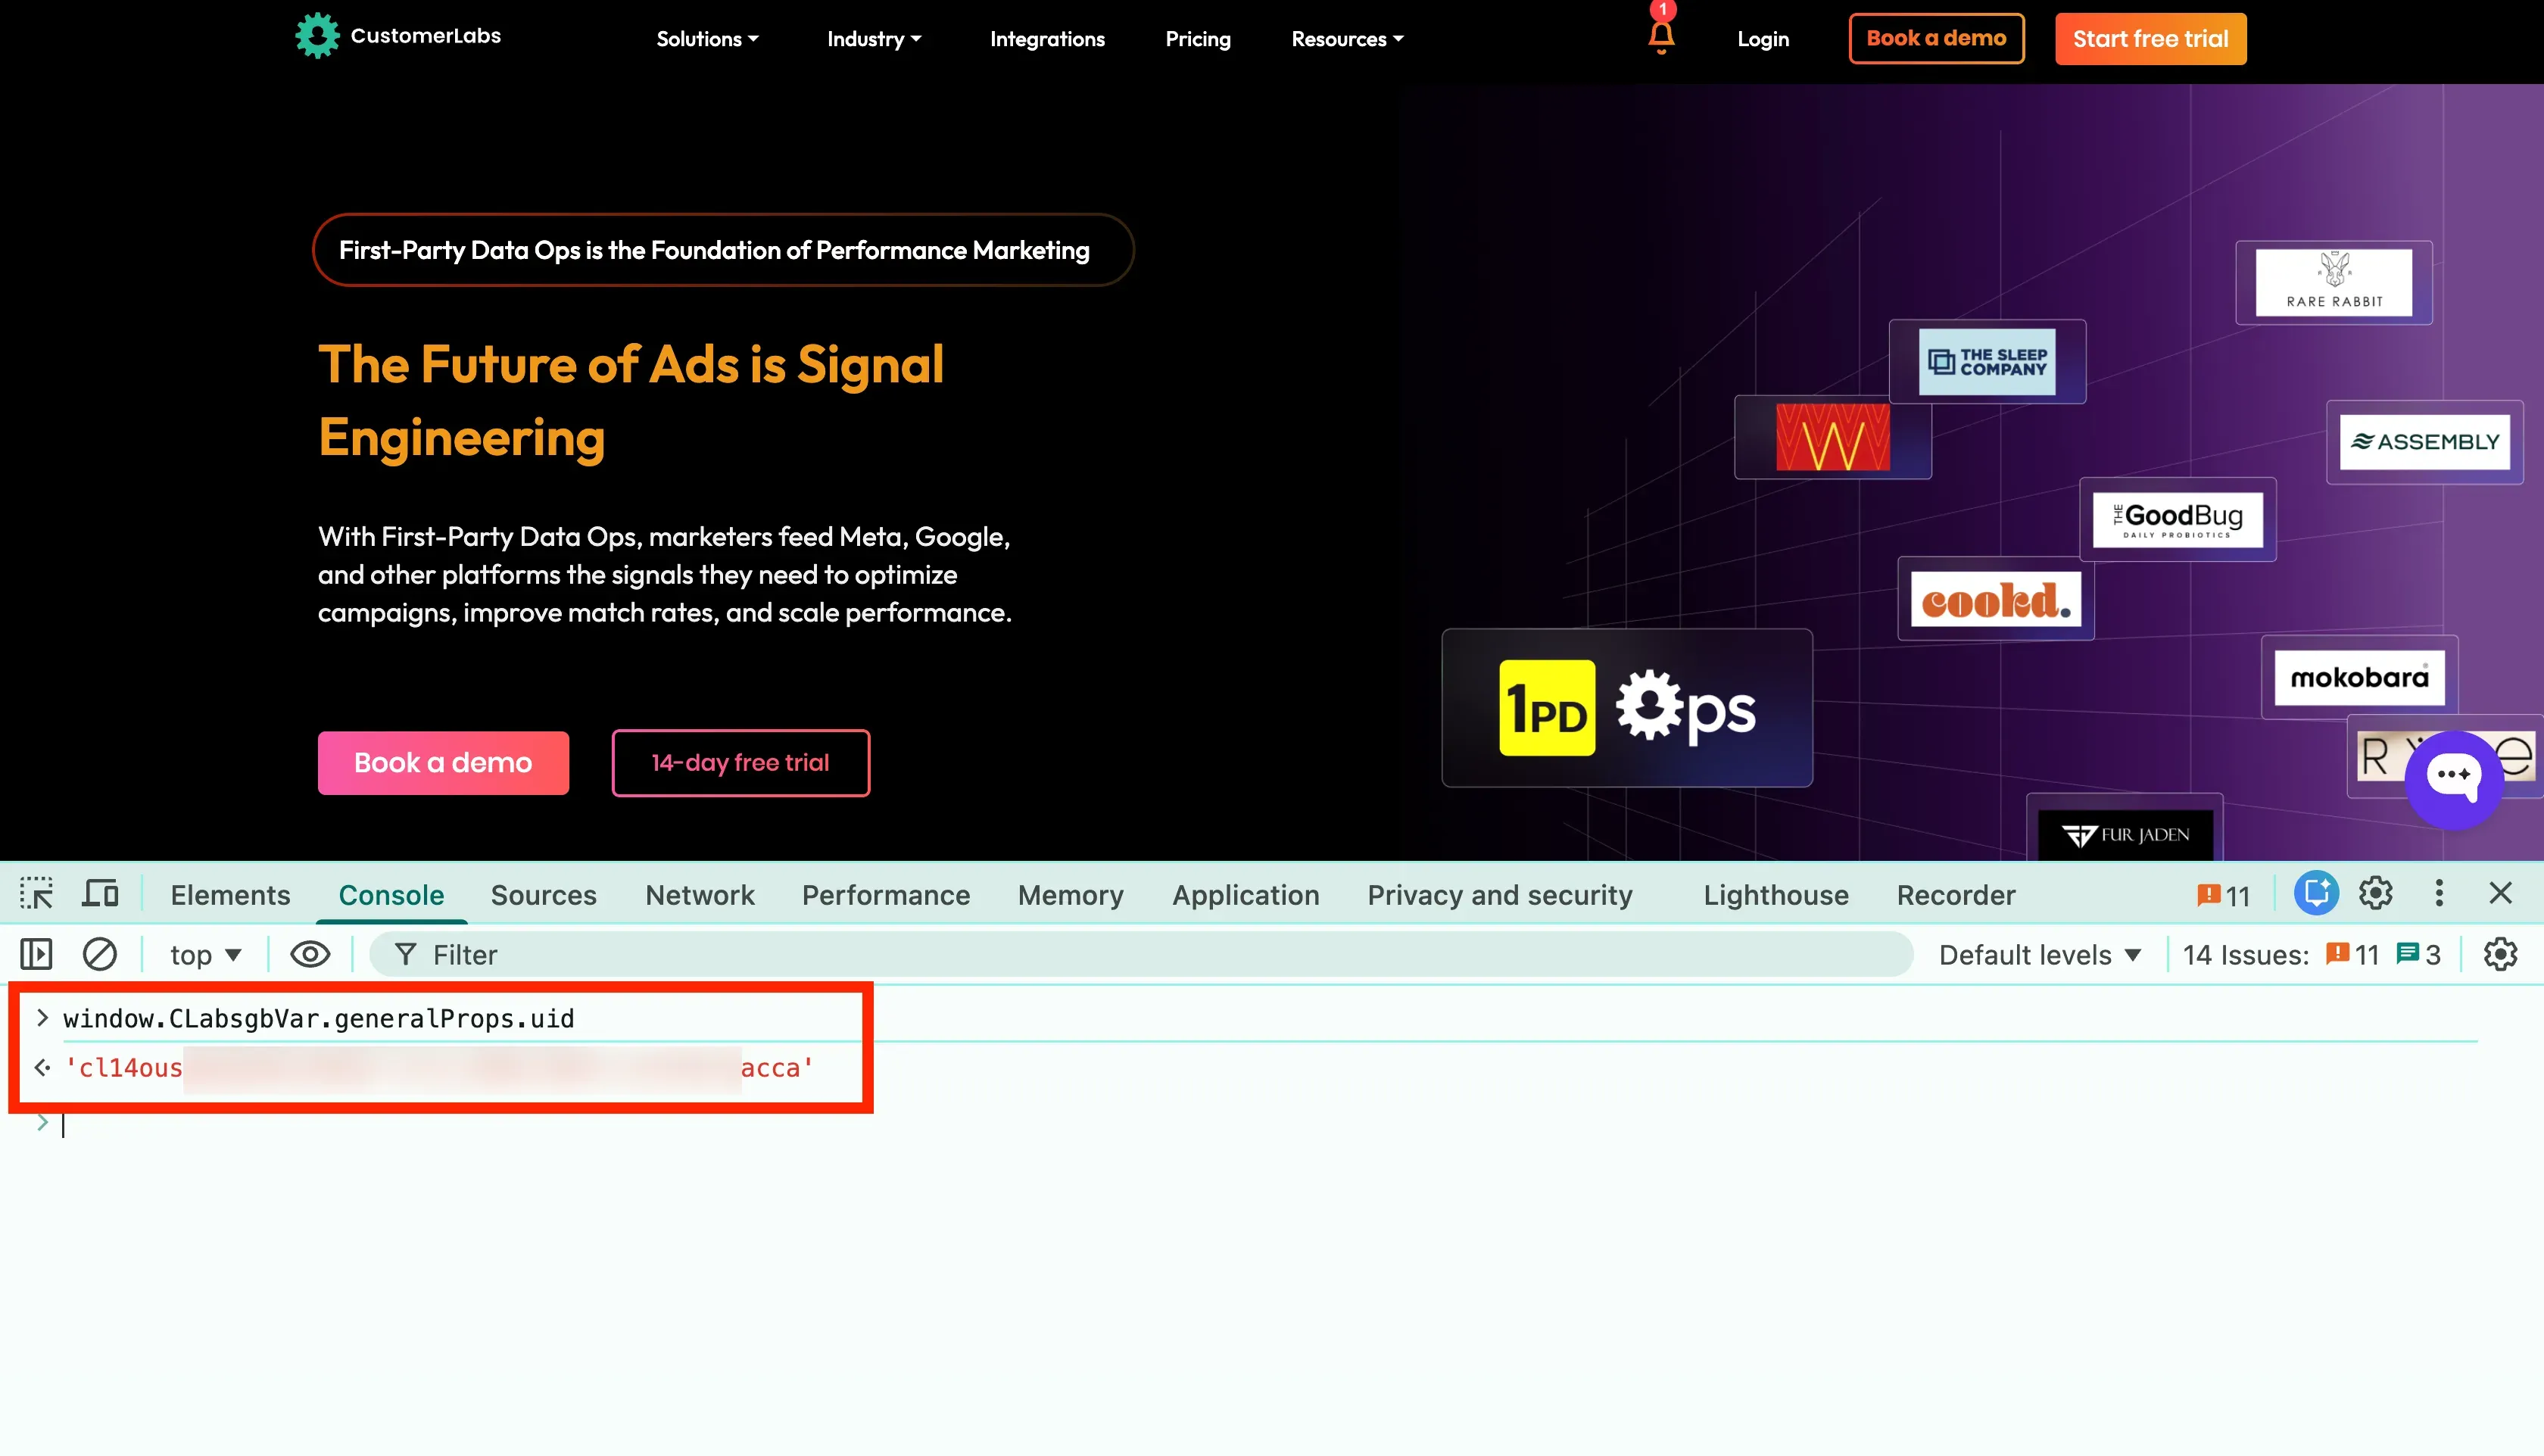
Appending the current URL with the user ID
Section titled “Appending the current URL with the user ID”This customerlabs_user_id can be appended to the current URL using a simple function.
(function() { if (window.location.host === "<your-domain.com>" || window.location.host === "<your-sub-domains.com>") { var cluid = window?.CLabsgbVar?.generalProps?.uid; var queryParams = new URLSearchParams(window.location.search); if (!queryParams.has('cluid') && cluid) { queryParams.append('cluid', cluid); window.location.search = queryParams.toString(); } }})();Appending CLUID to a button URL
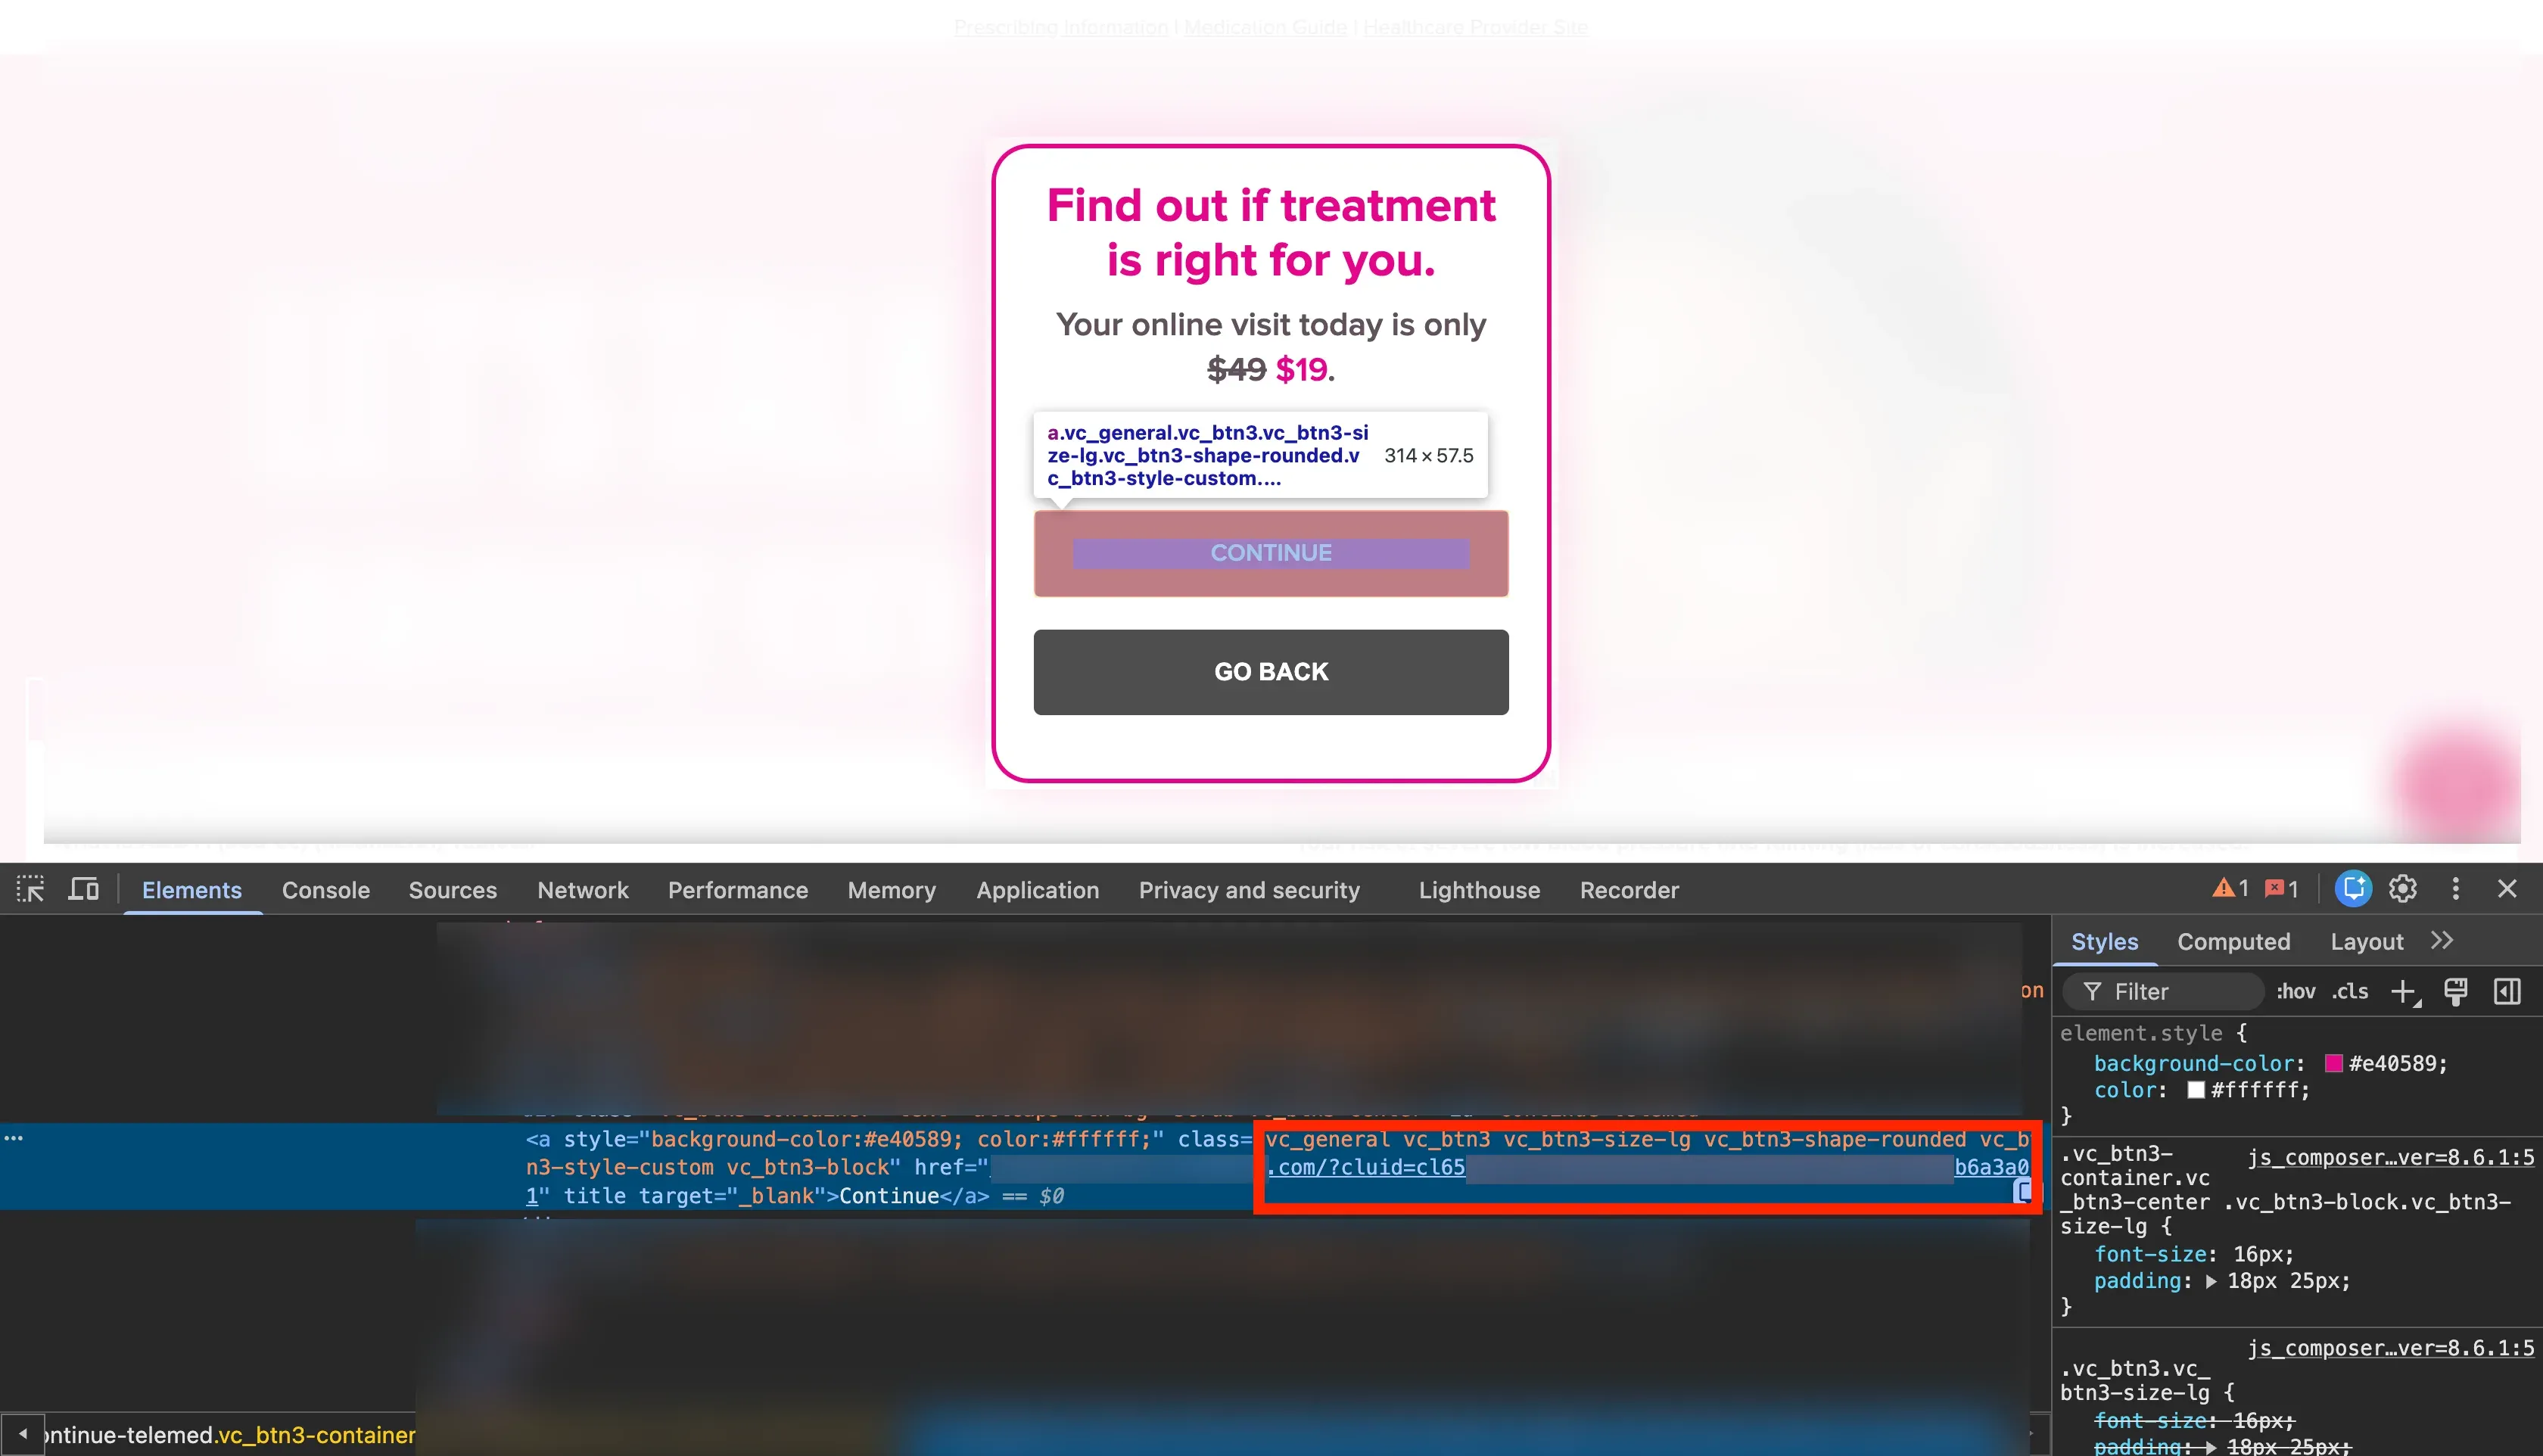
Section titled “Appending CLUID to a button URL”This customerlabs_user_id can be appended to a <a> or <button> in href after retrieving the user ID.
In the below screenshot, the customerlabs_user_id is appended as cluid to the href of the <a> tag of “Continue” button.
So, when the user clicks the “Continue” button in the website, the customerlabs_user_id appended to the URL of href is passed on the other domain.
Use cases with appending the CLUID to a button URL
Section titled “Use cases with appending the CLUID to a button URL”- There will be continuity of user profiles across your related domains, where tracking code can be placed.
- If the redirection is to a third-party domain, this CLUID can be captured in the form field as a hidden field in third-party domain and passed back to CustomerLabs via webhook. This event can be unified using cluid parameter.
Callback Functions
Section titled “Callback Functions”Callback functions allow for real-time data transformation before events are dispatched to your enabled destinations. This flexibility ensures that data formats align with the requirements of various third-party tools.
Function Syntax
Section titled “Function Syntax”function(p1, p2, p3, p4, p5, p6, mid) { // function logic}| Parameter | Description | Javascript Type |
|---|---|---|
p1 | Event name | String |
p2 | Event attributes | Object |
p3 | Products | Array |
p4 | identify | Boolean |
p5 | user external_id | String |
p6 | group external_id | String |
mid | message_id (Default id set by CustomerLabs) | String |
Accessing the Callback Function
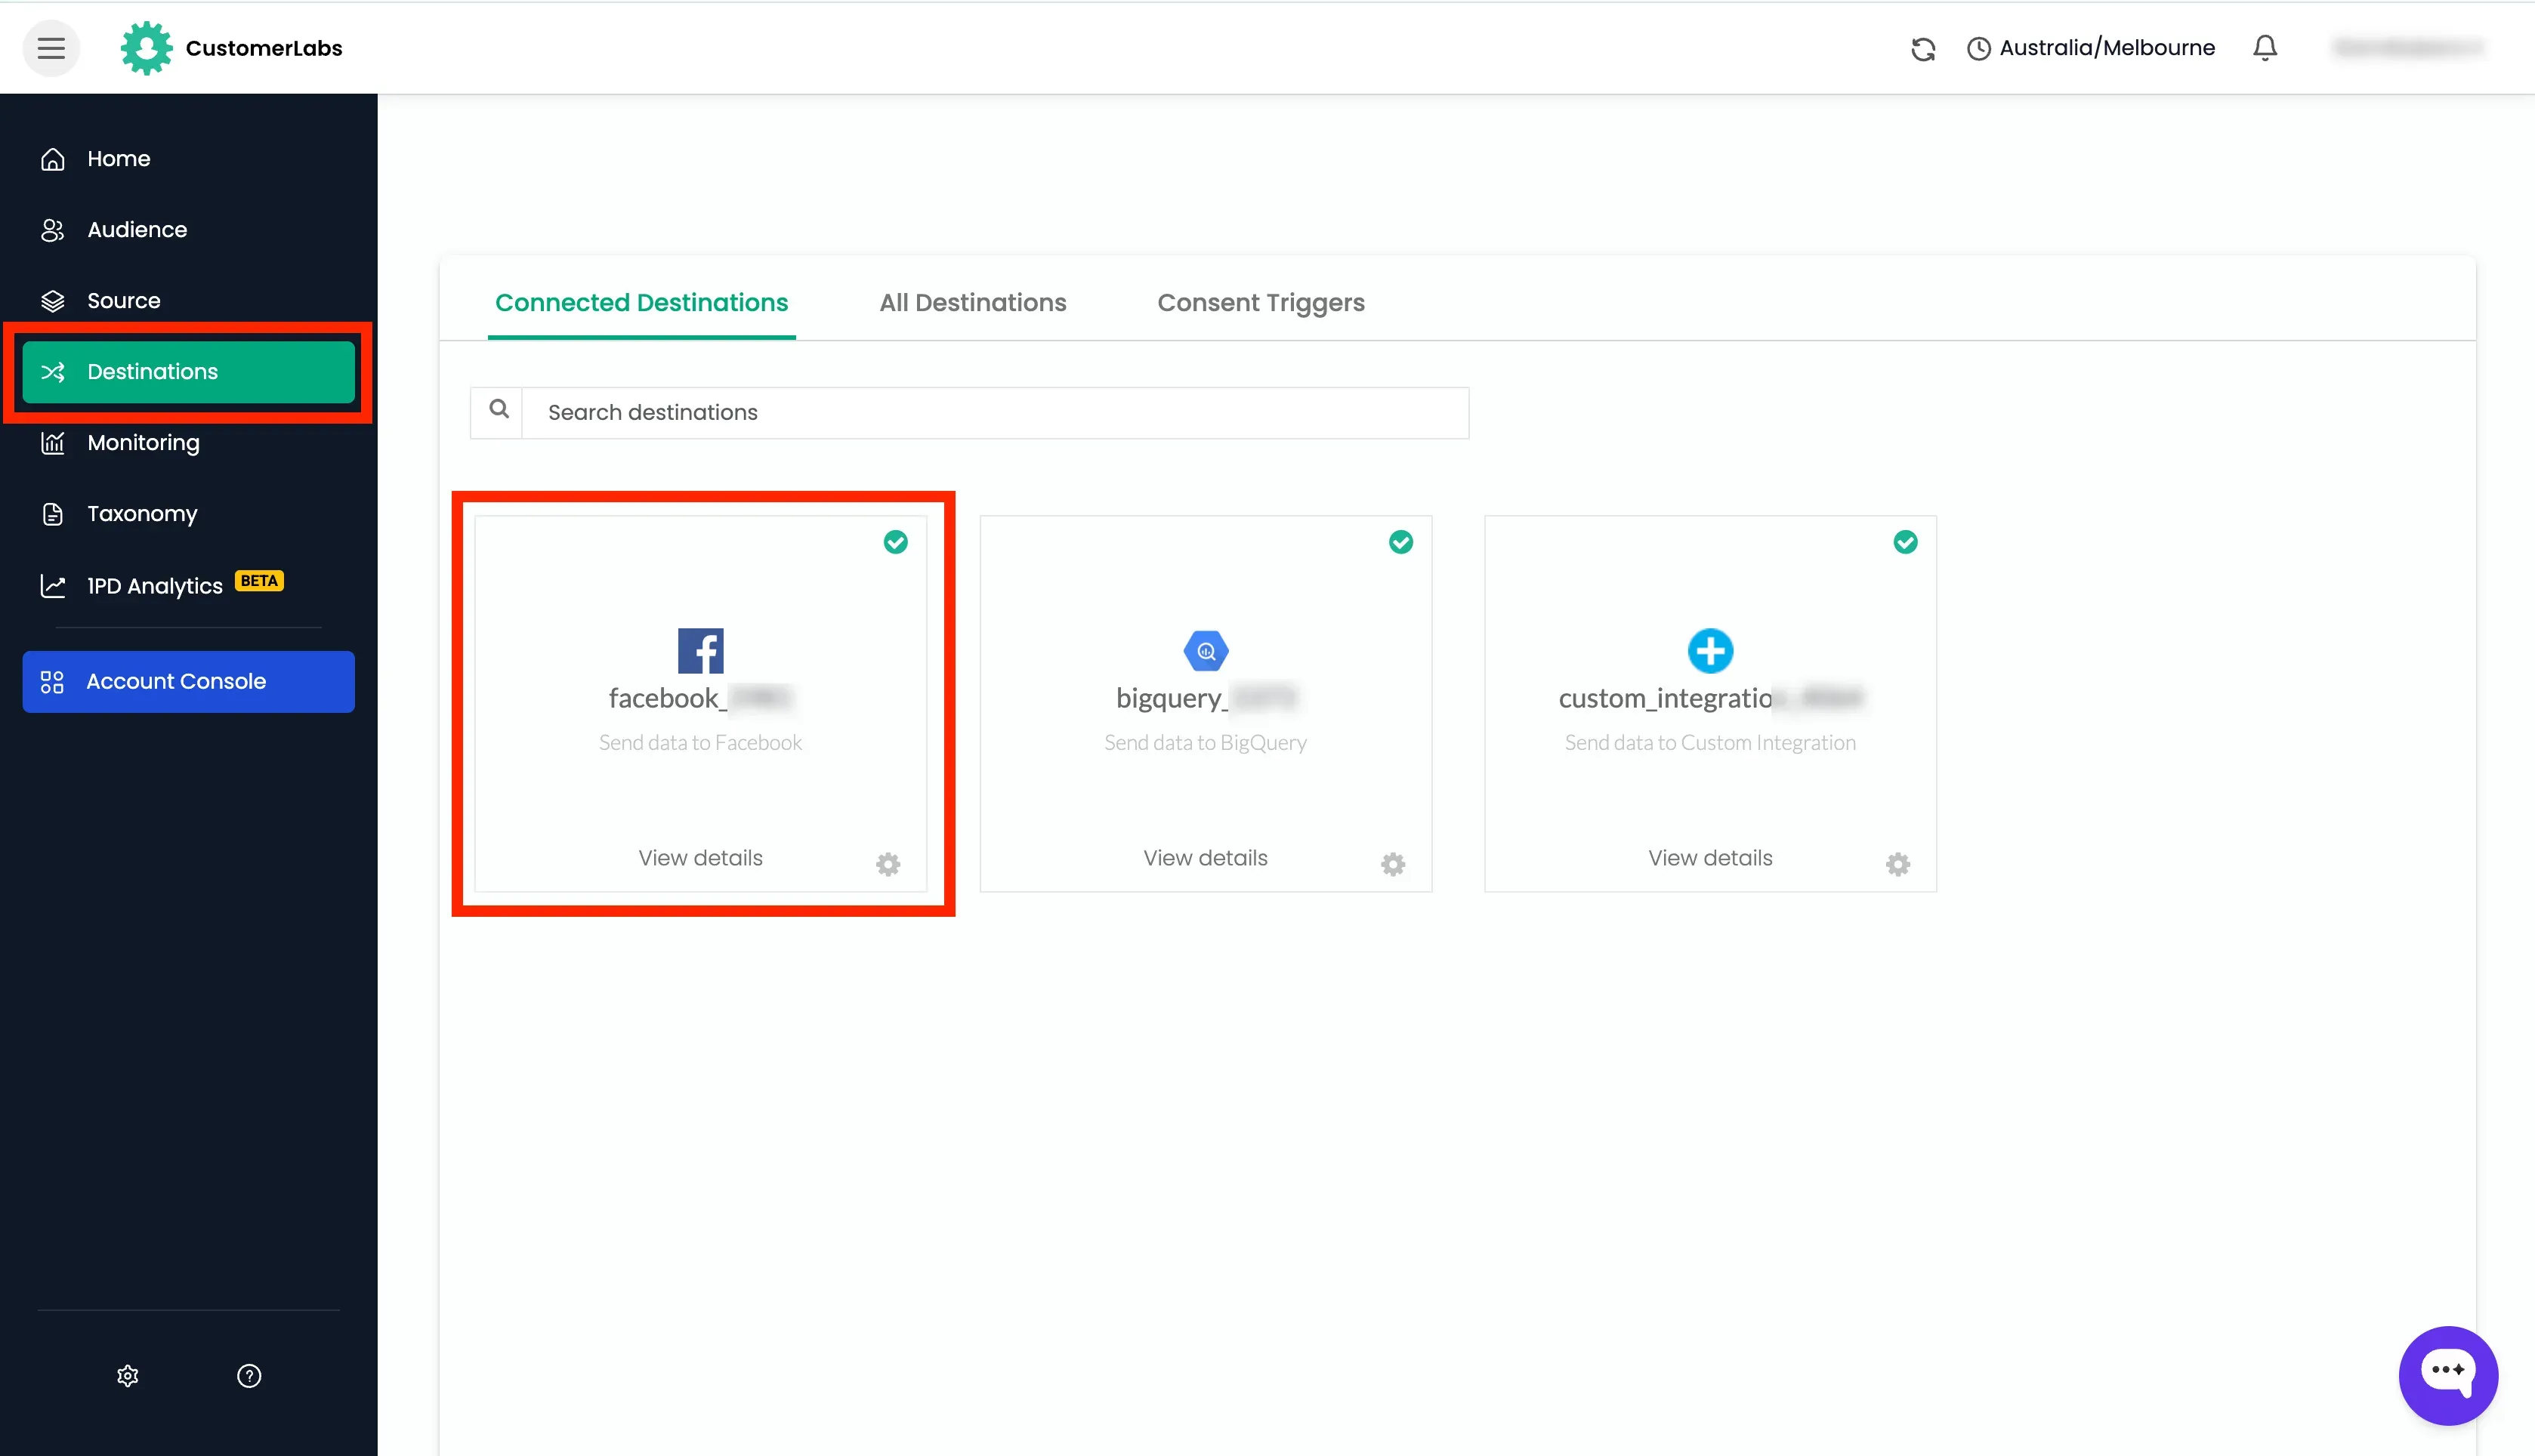
Section titled “Accessing the Callback Function”Manage these transformations in the CustomerLabs application under
- Destinations on the left side menu → Click on the Destination that you wish to edit.
- Setup Event Workflow → Identify the event you wish to edit.
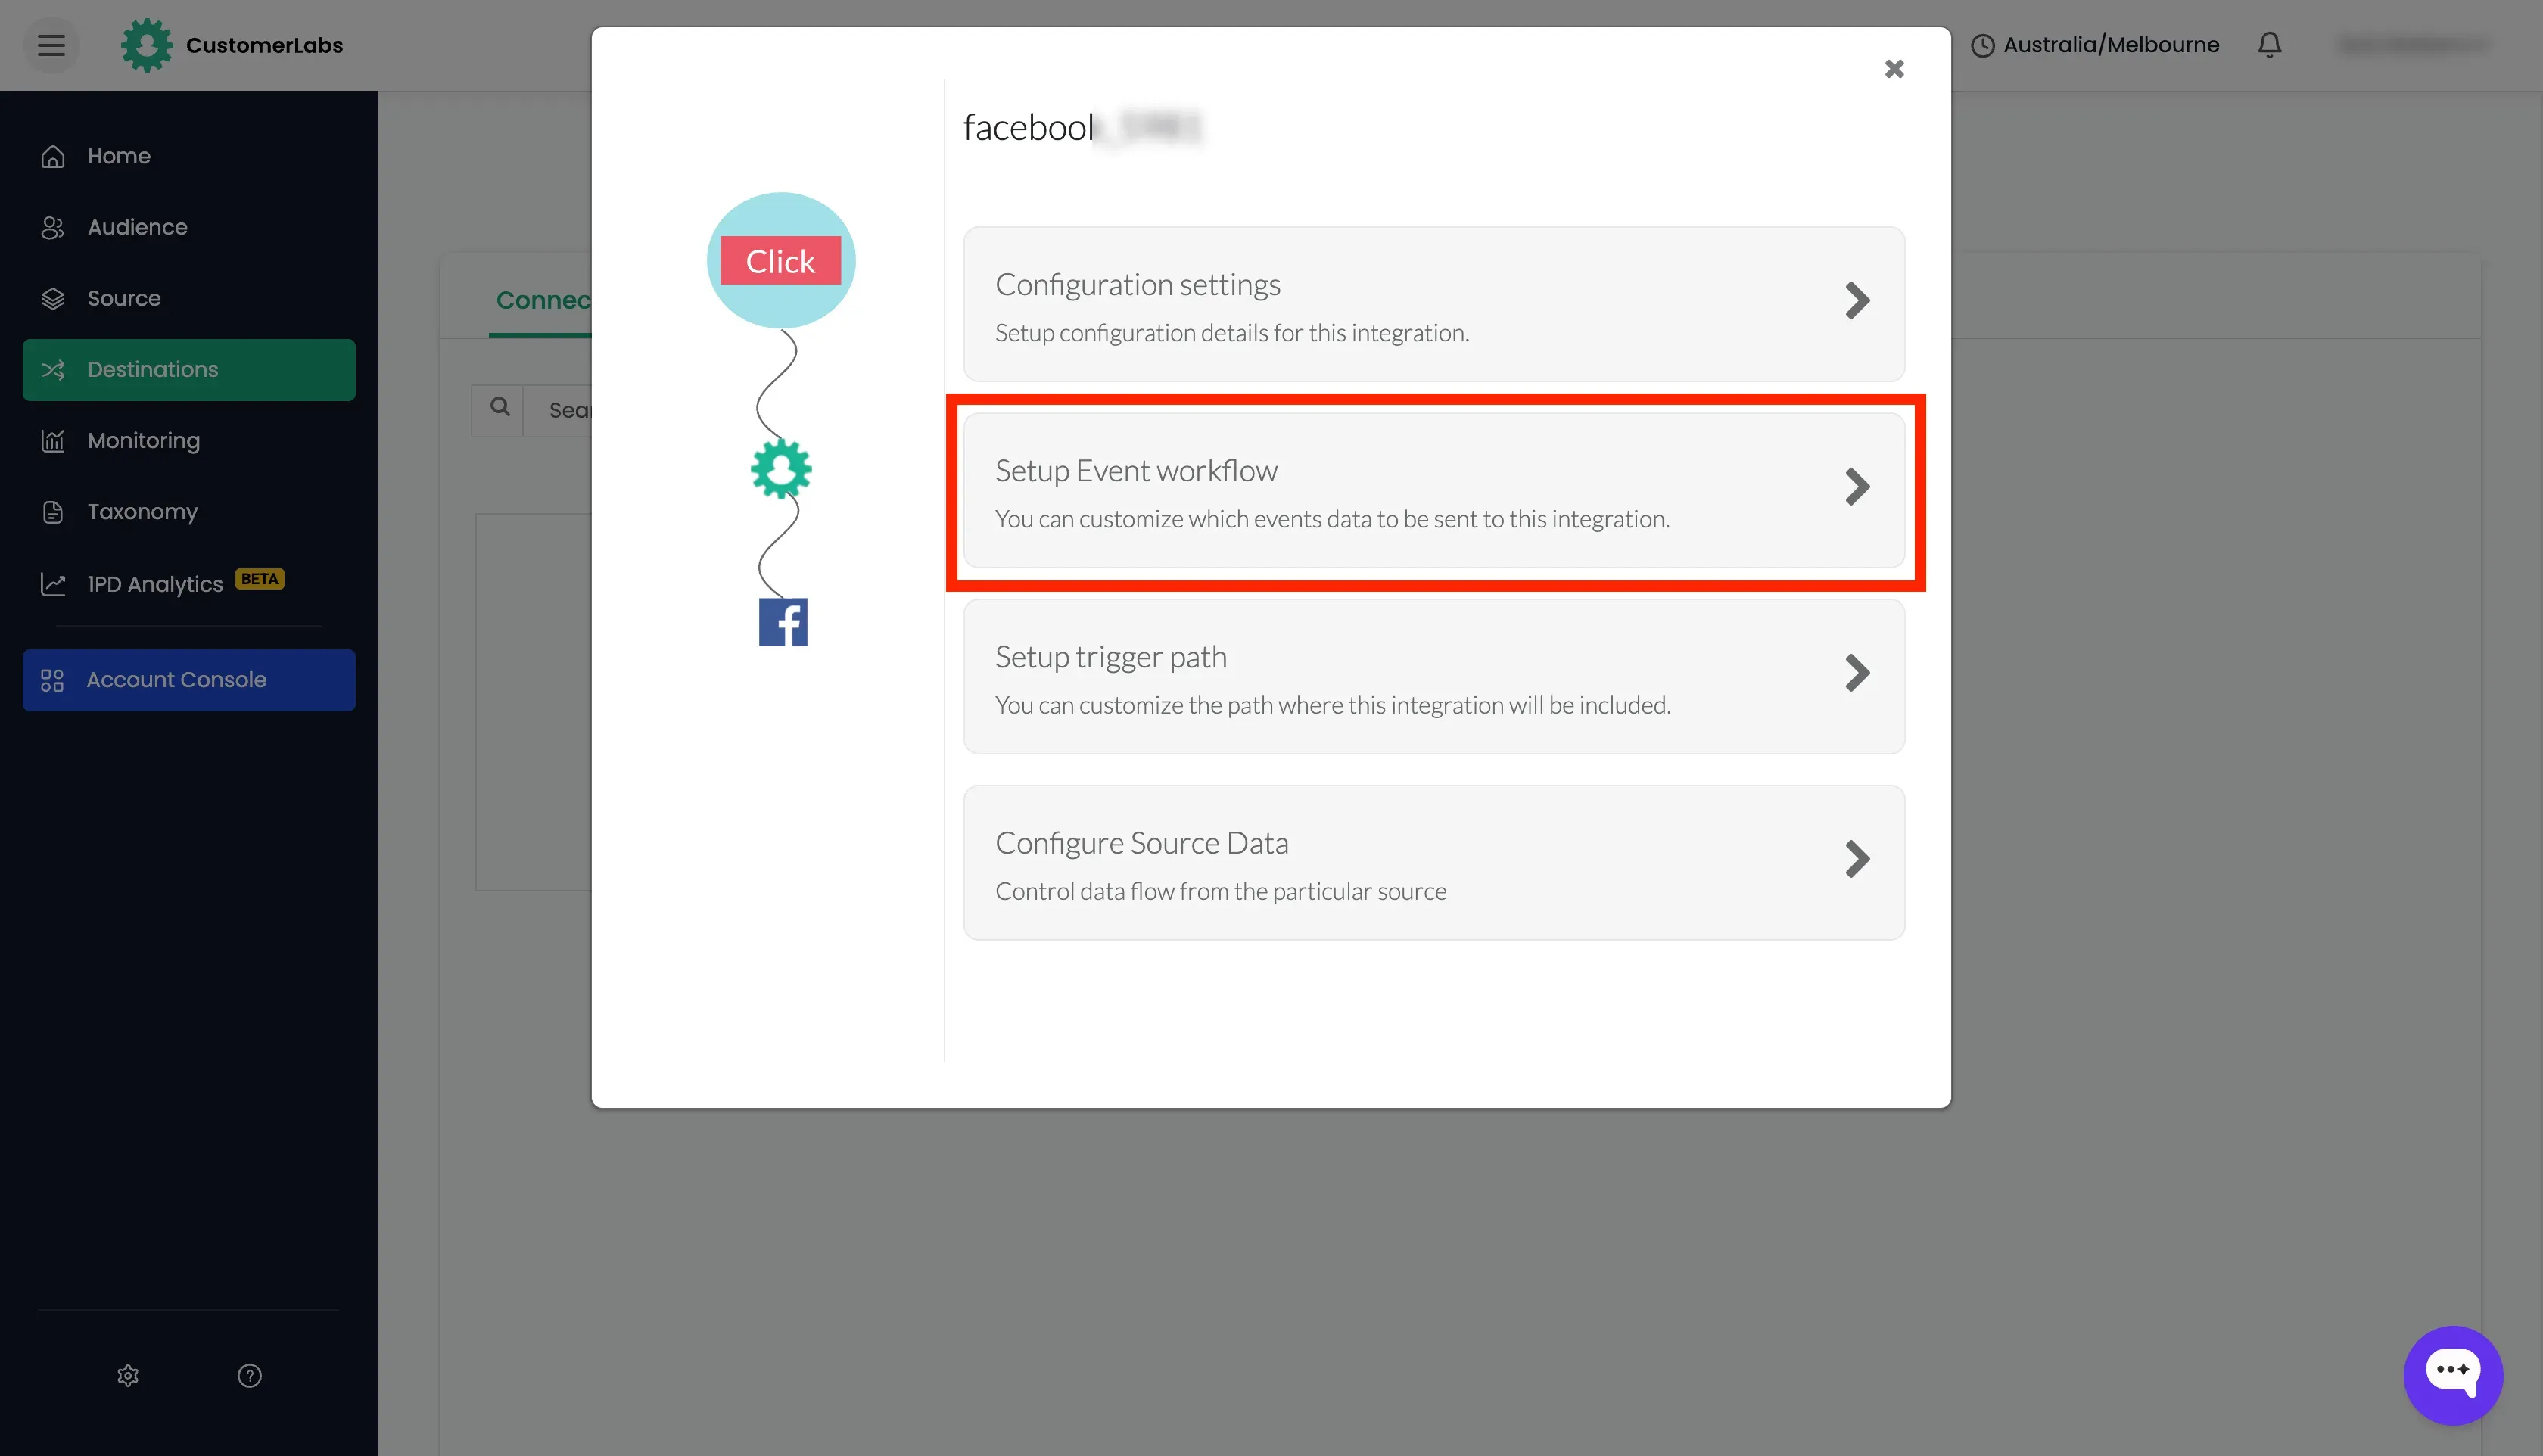
- Click the Edit Code Icon
</>.

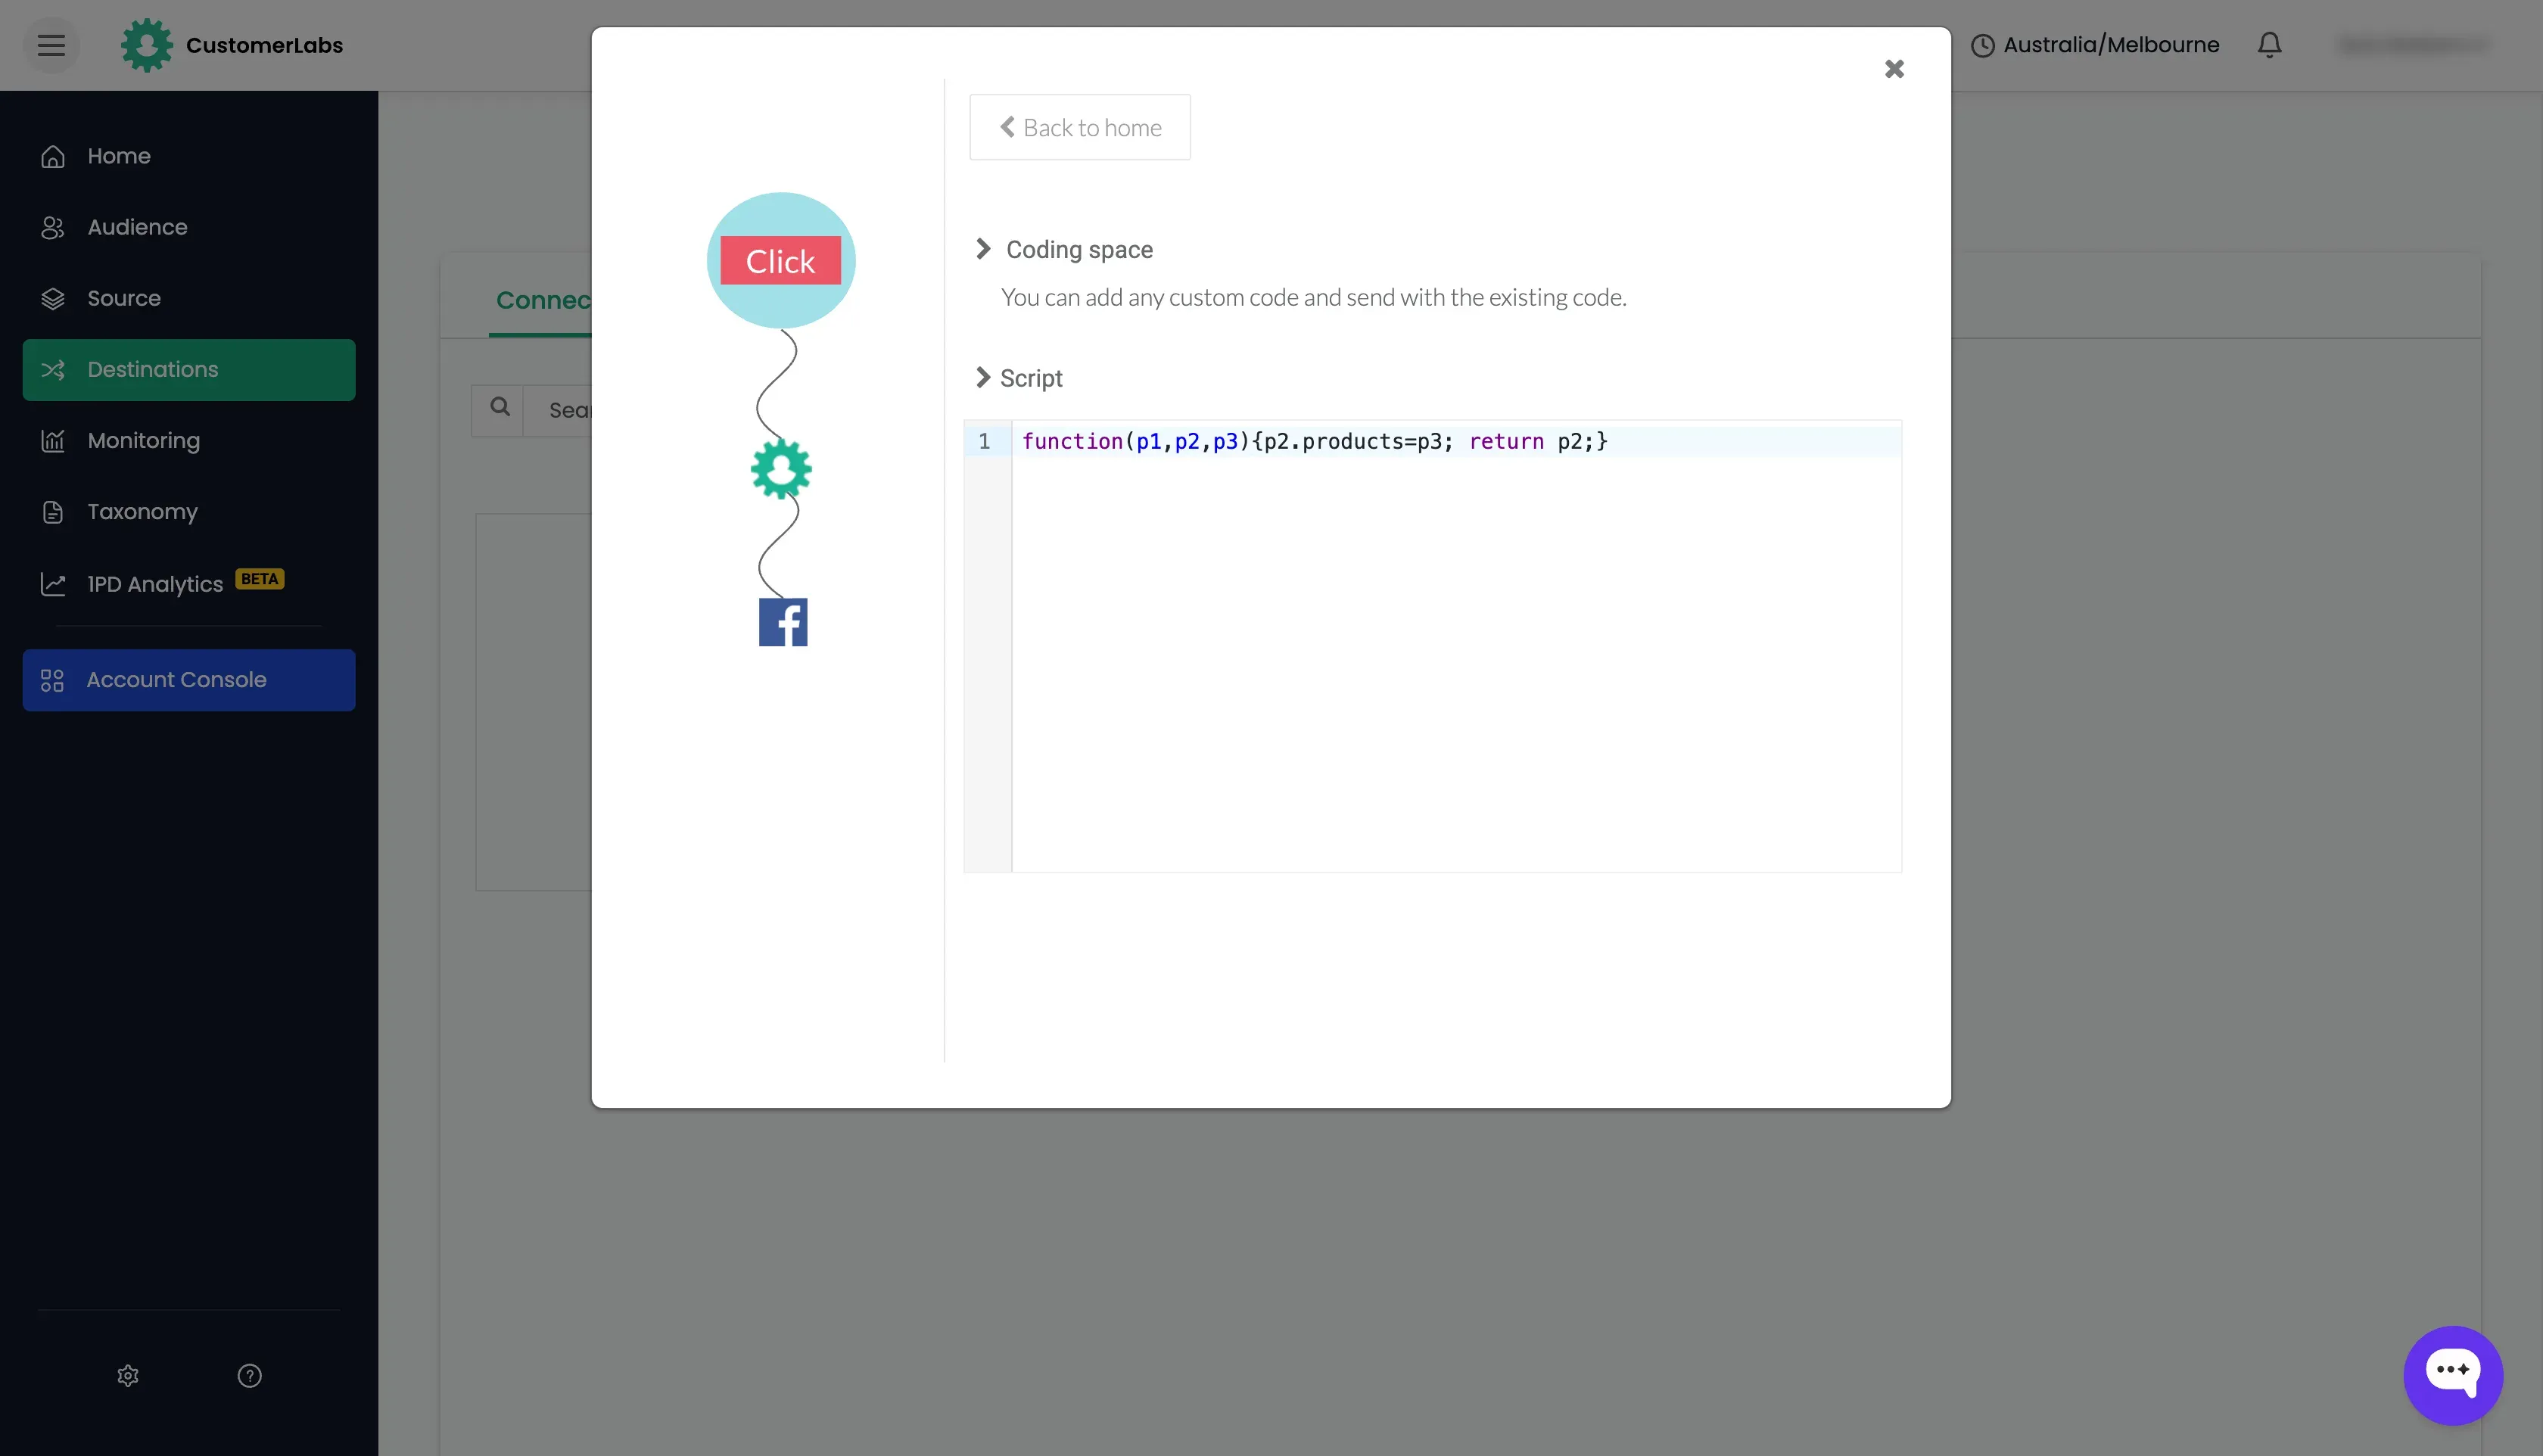
Modifying the callback function
Section titled “Modifying the callback function”function(p1, p2, p3, p4, p5, p6, mid) { // Custom logic and data transformation}Examples
Section titled “Examples”Modifying the event name and URL while sending to ad platforms
Section titled “Modifying the event name and URL while sending to ad platforms”Here we are modifying the event name from “purchase” to “Purchased” and adding a URL to the event.
function(p1,p2,p3){ reqData.data.p1='App Purchase'; p2.link="https://example.com"; p2.products=p3; return p2;}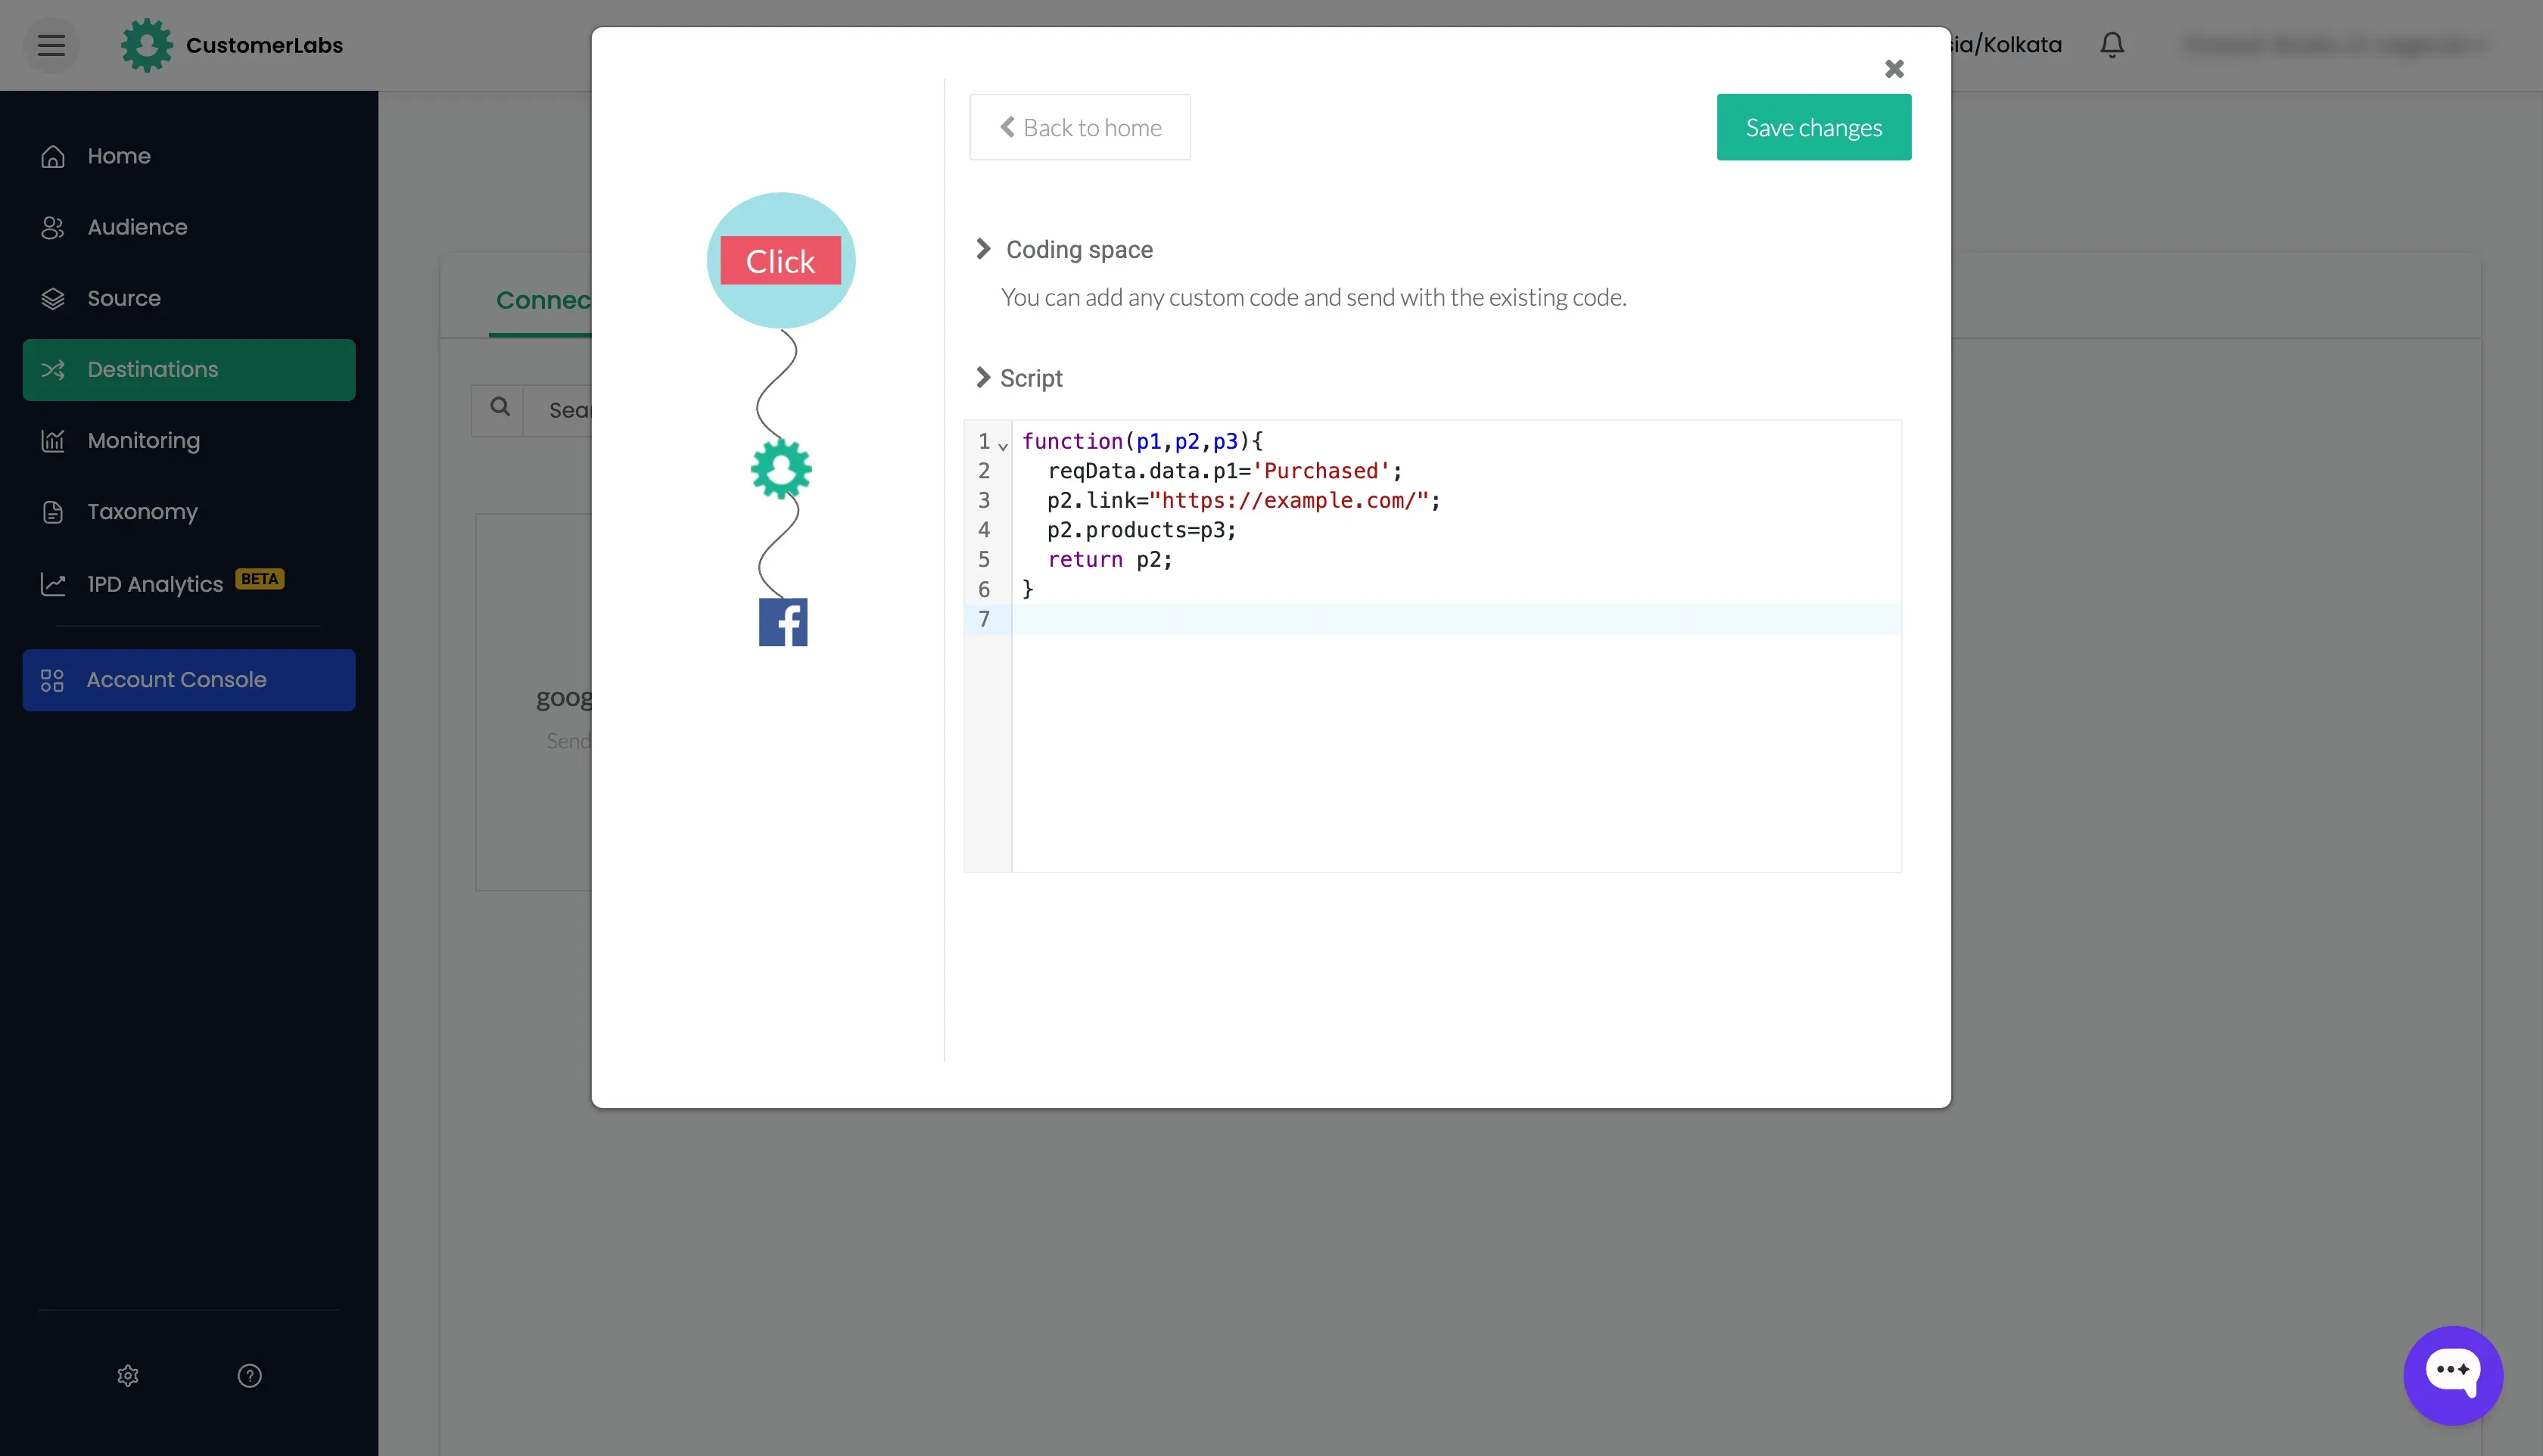
Sending the data if acquisition is from a specific source
Section titled “Sending the data if acquisition is from a specific source”Lets consider if the source is “google” or “youtube”, then the data should be sent to the destination. Otherwise, the data should not be sent to the destination.
function (p1, p2, p3, p4, p5, p6) { p2.products = p3; if (p2.acquisition && p2.acquisition.source) { const source = p2.acquisition.source.toLowerCase(); if (source.includes("google") || source.includes("youtube")) { return p2; } } return {};}