Setting up 1P Domain Tracking
Once you have subscribed to 1P Domain Tracking, you need to configure your domain settings depending on where your website is hosted.
Initial Steps
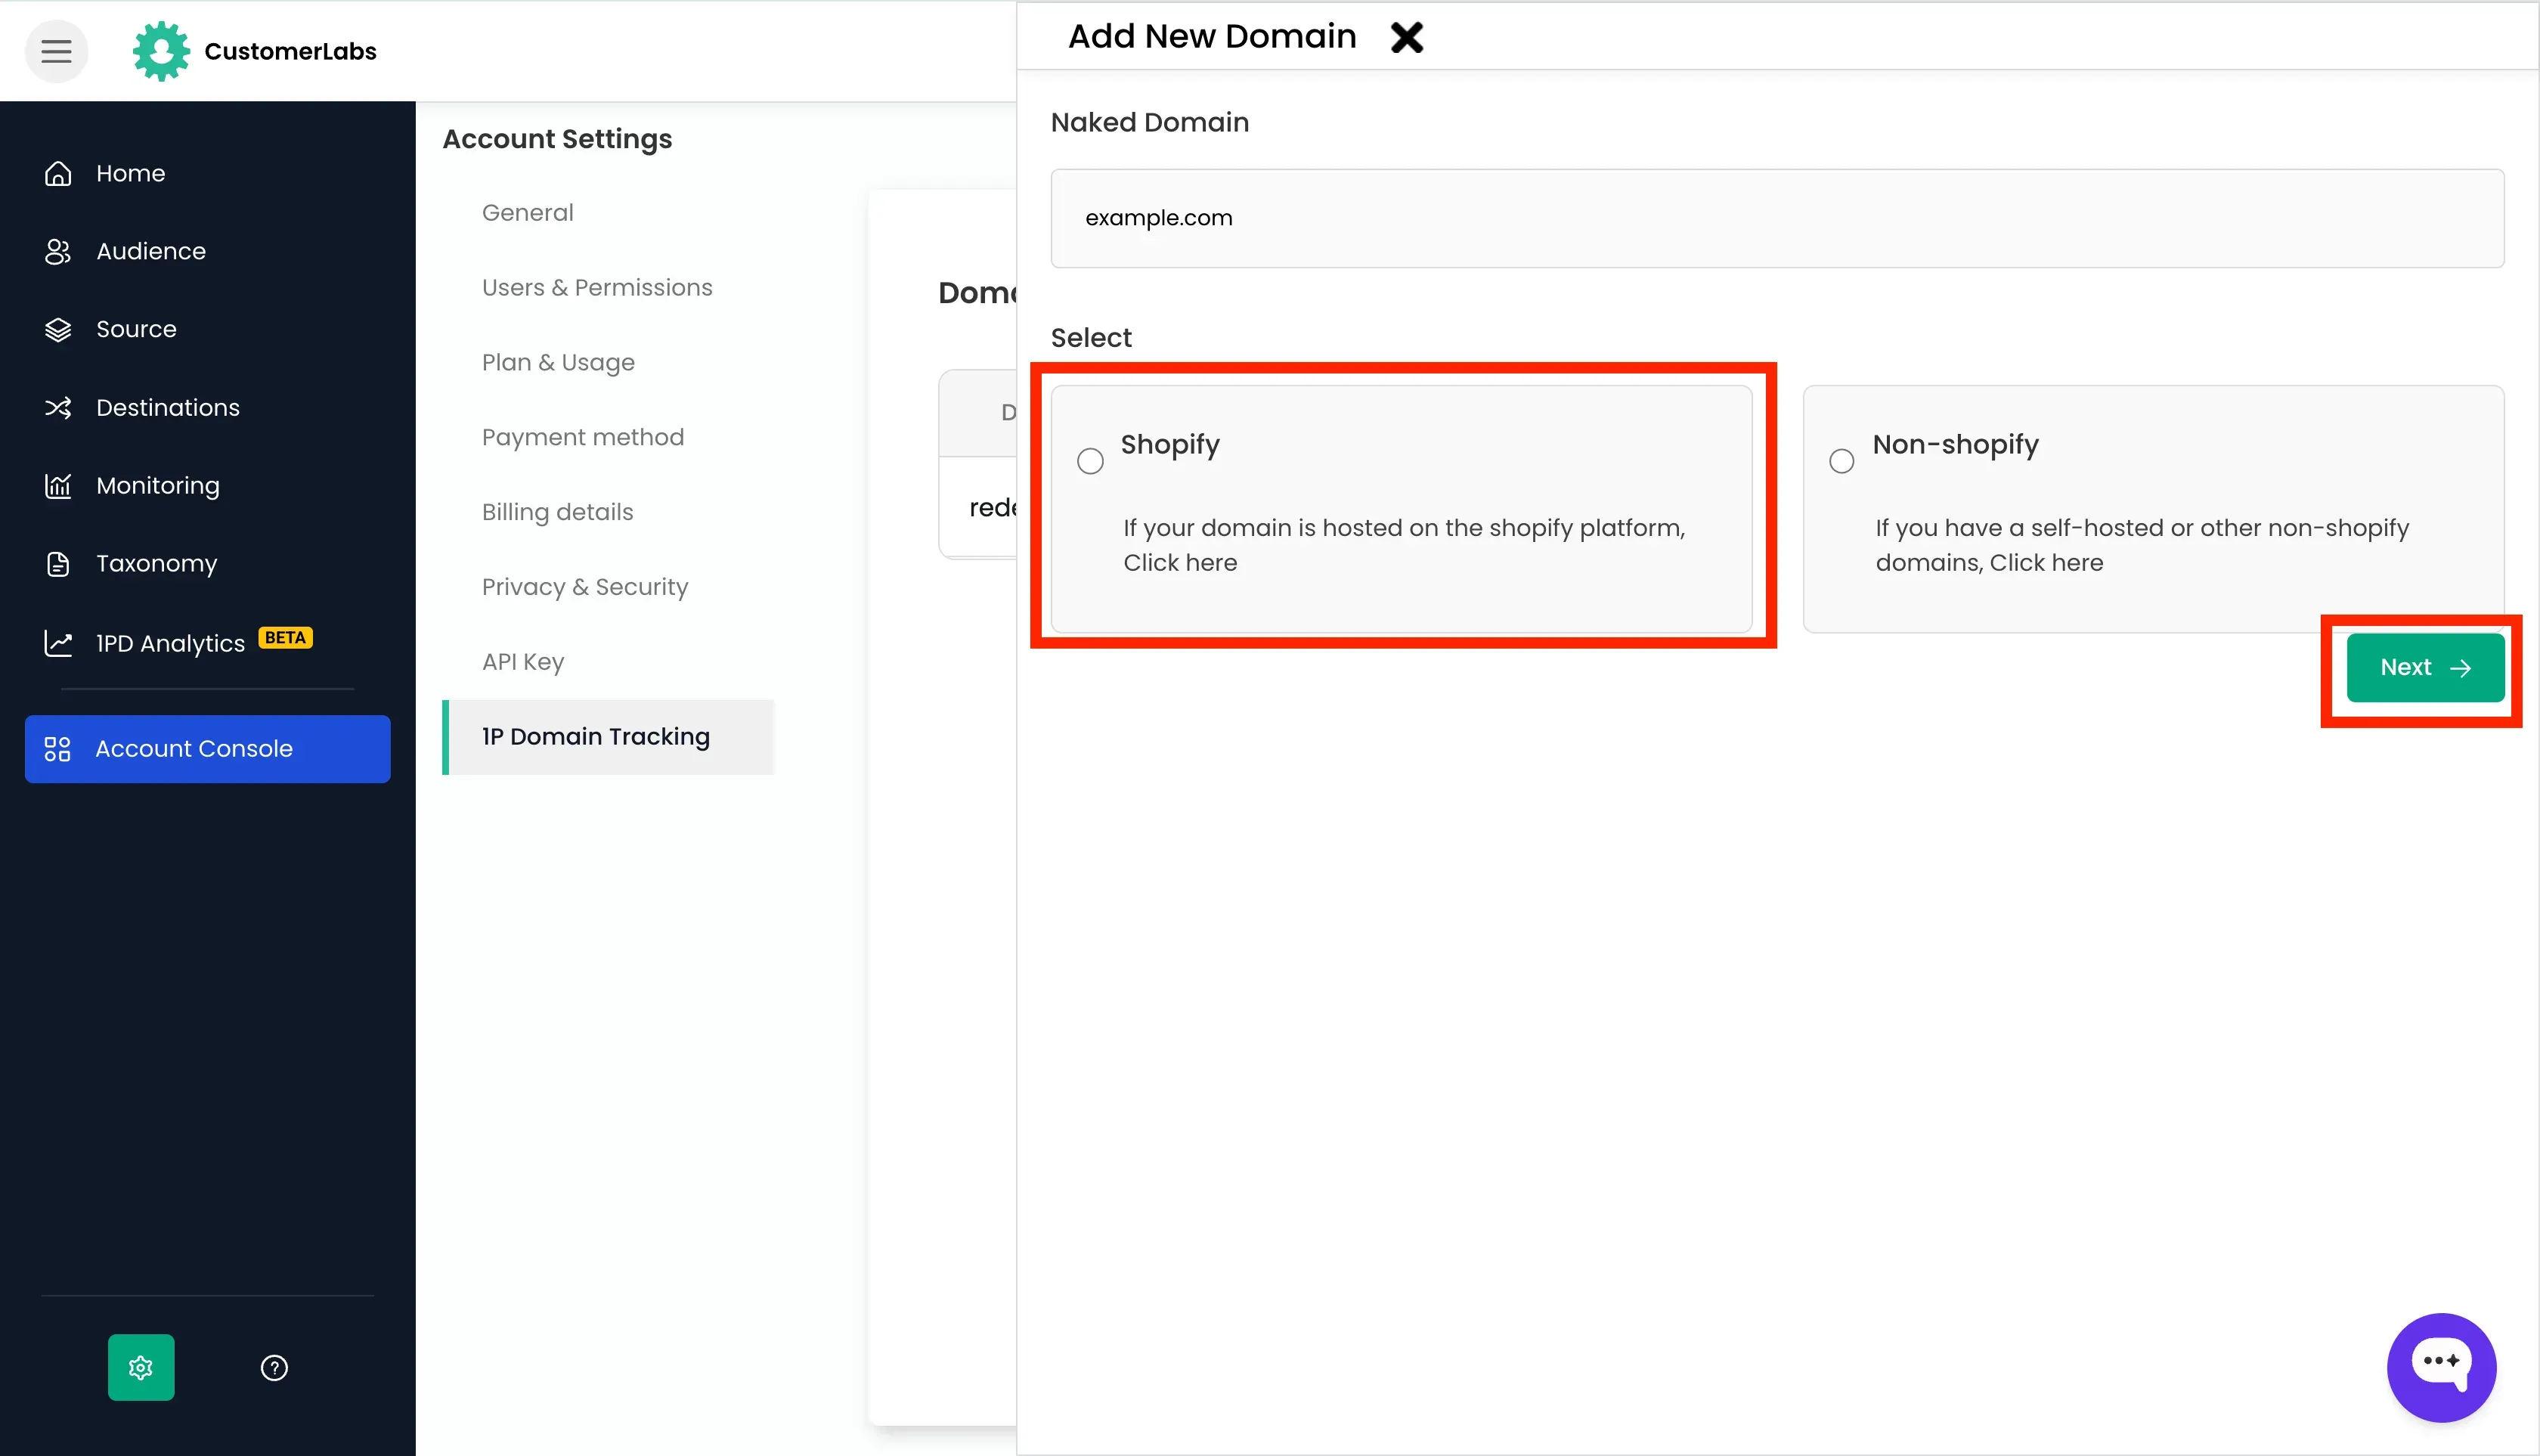
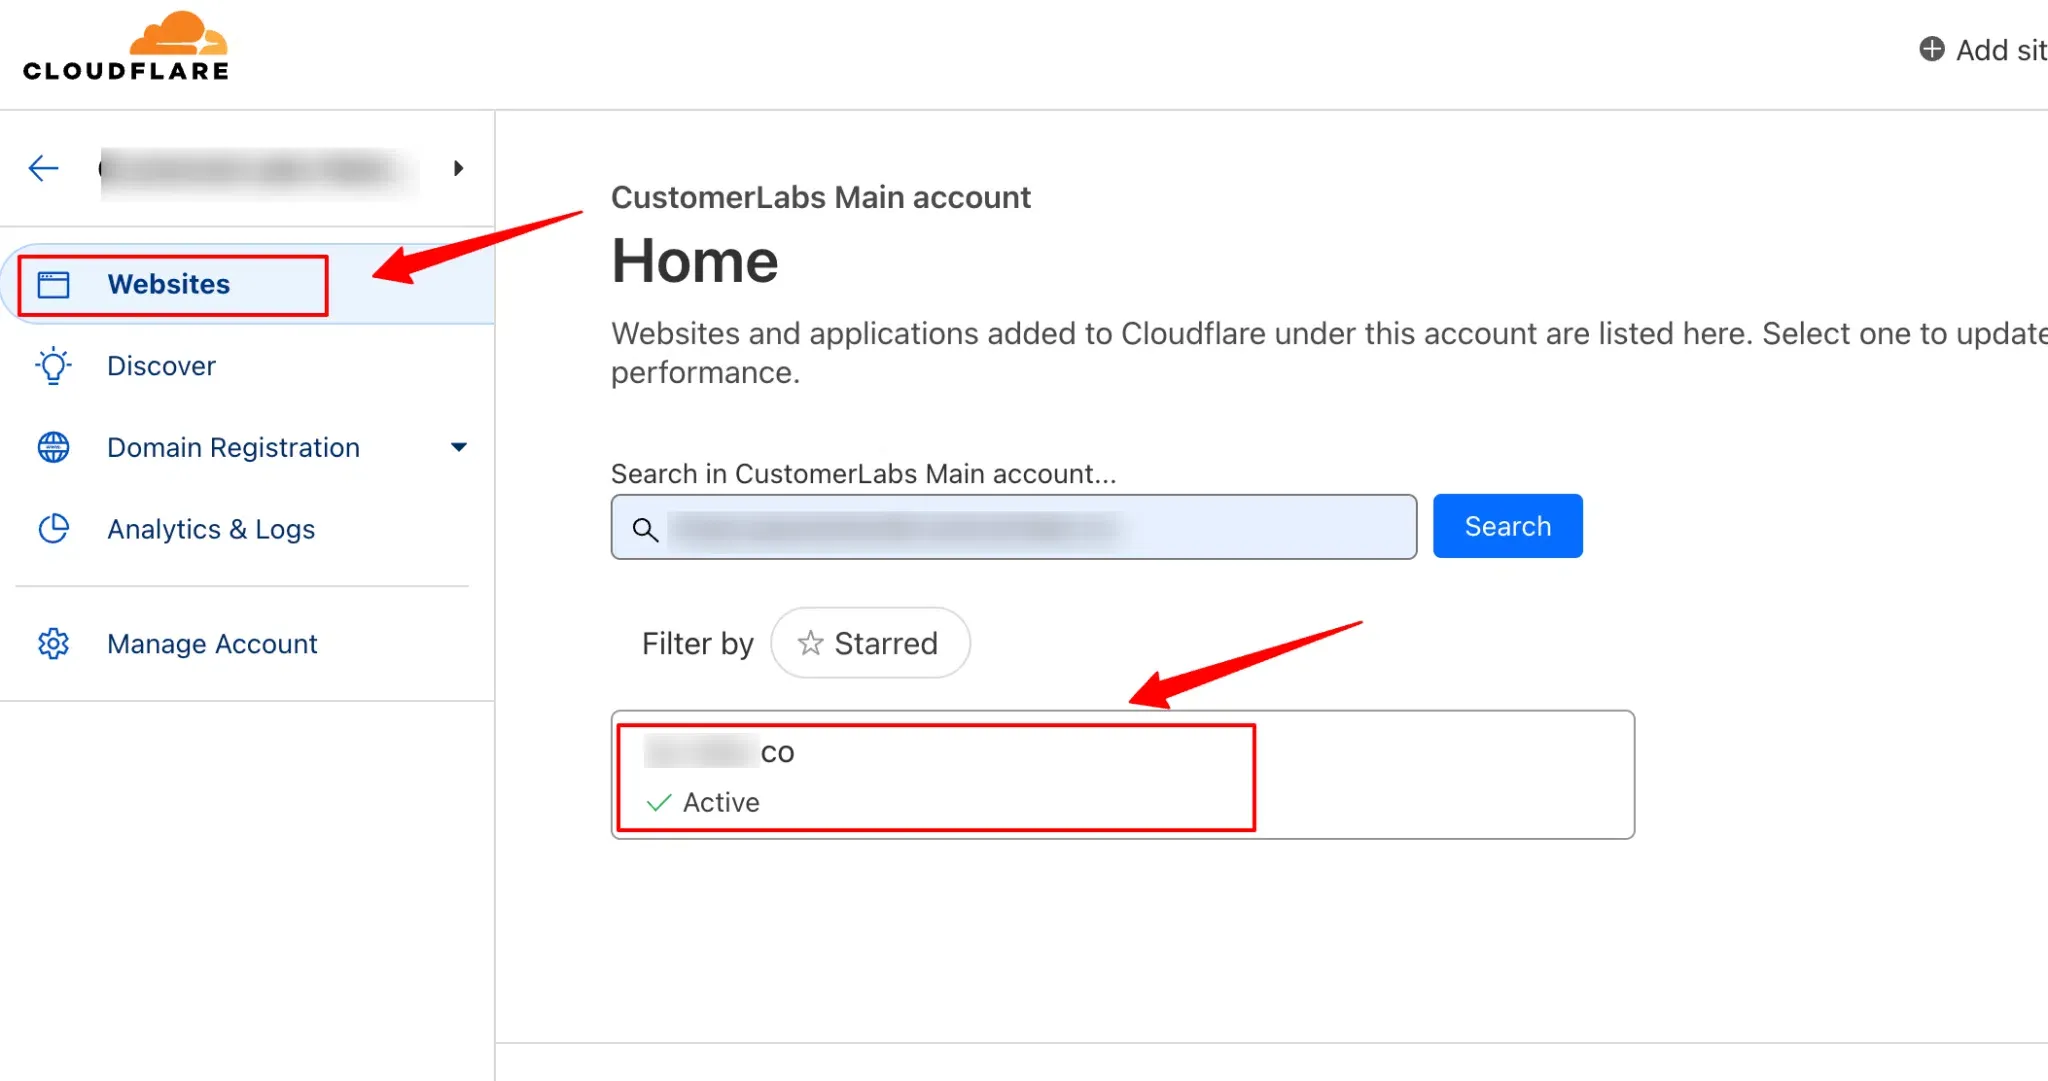
Section titled “Initial Steps”- Go to the account for which you’ve subscribed to 1P Domain Tracking.
- Navigate to Settings → 1P domain tracking and click on + Add domain.
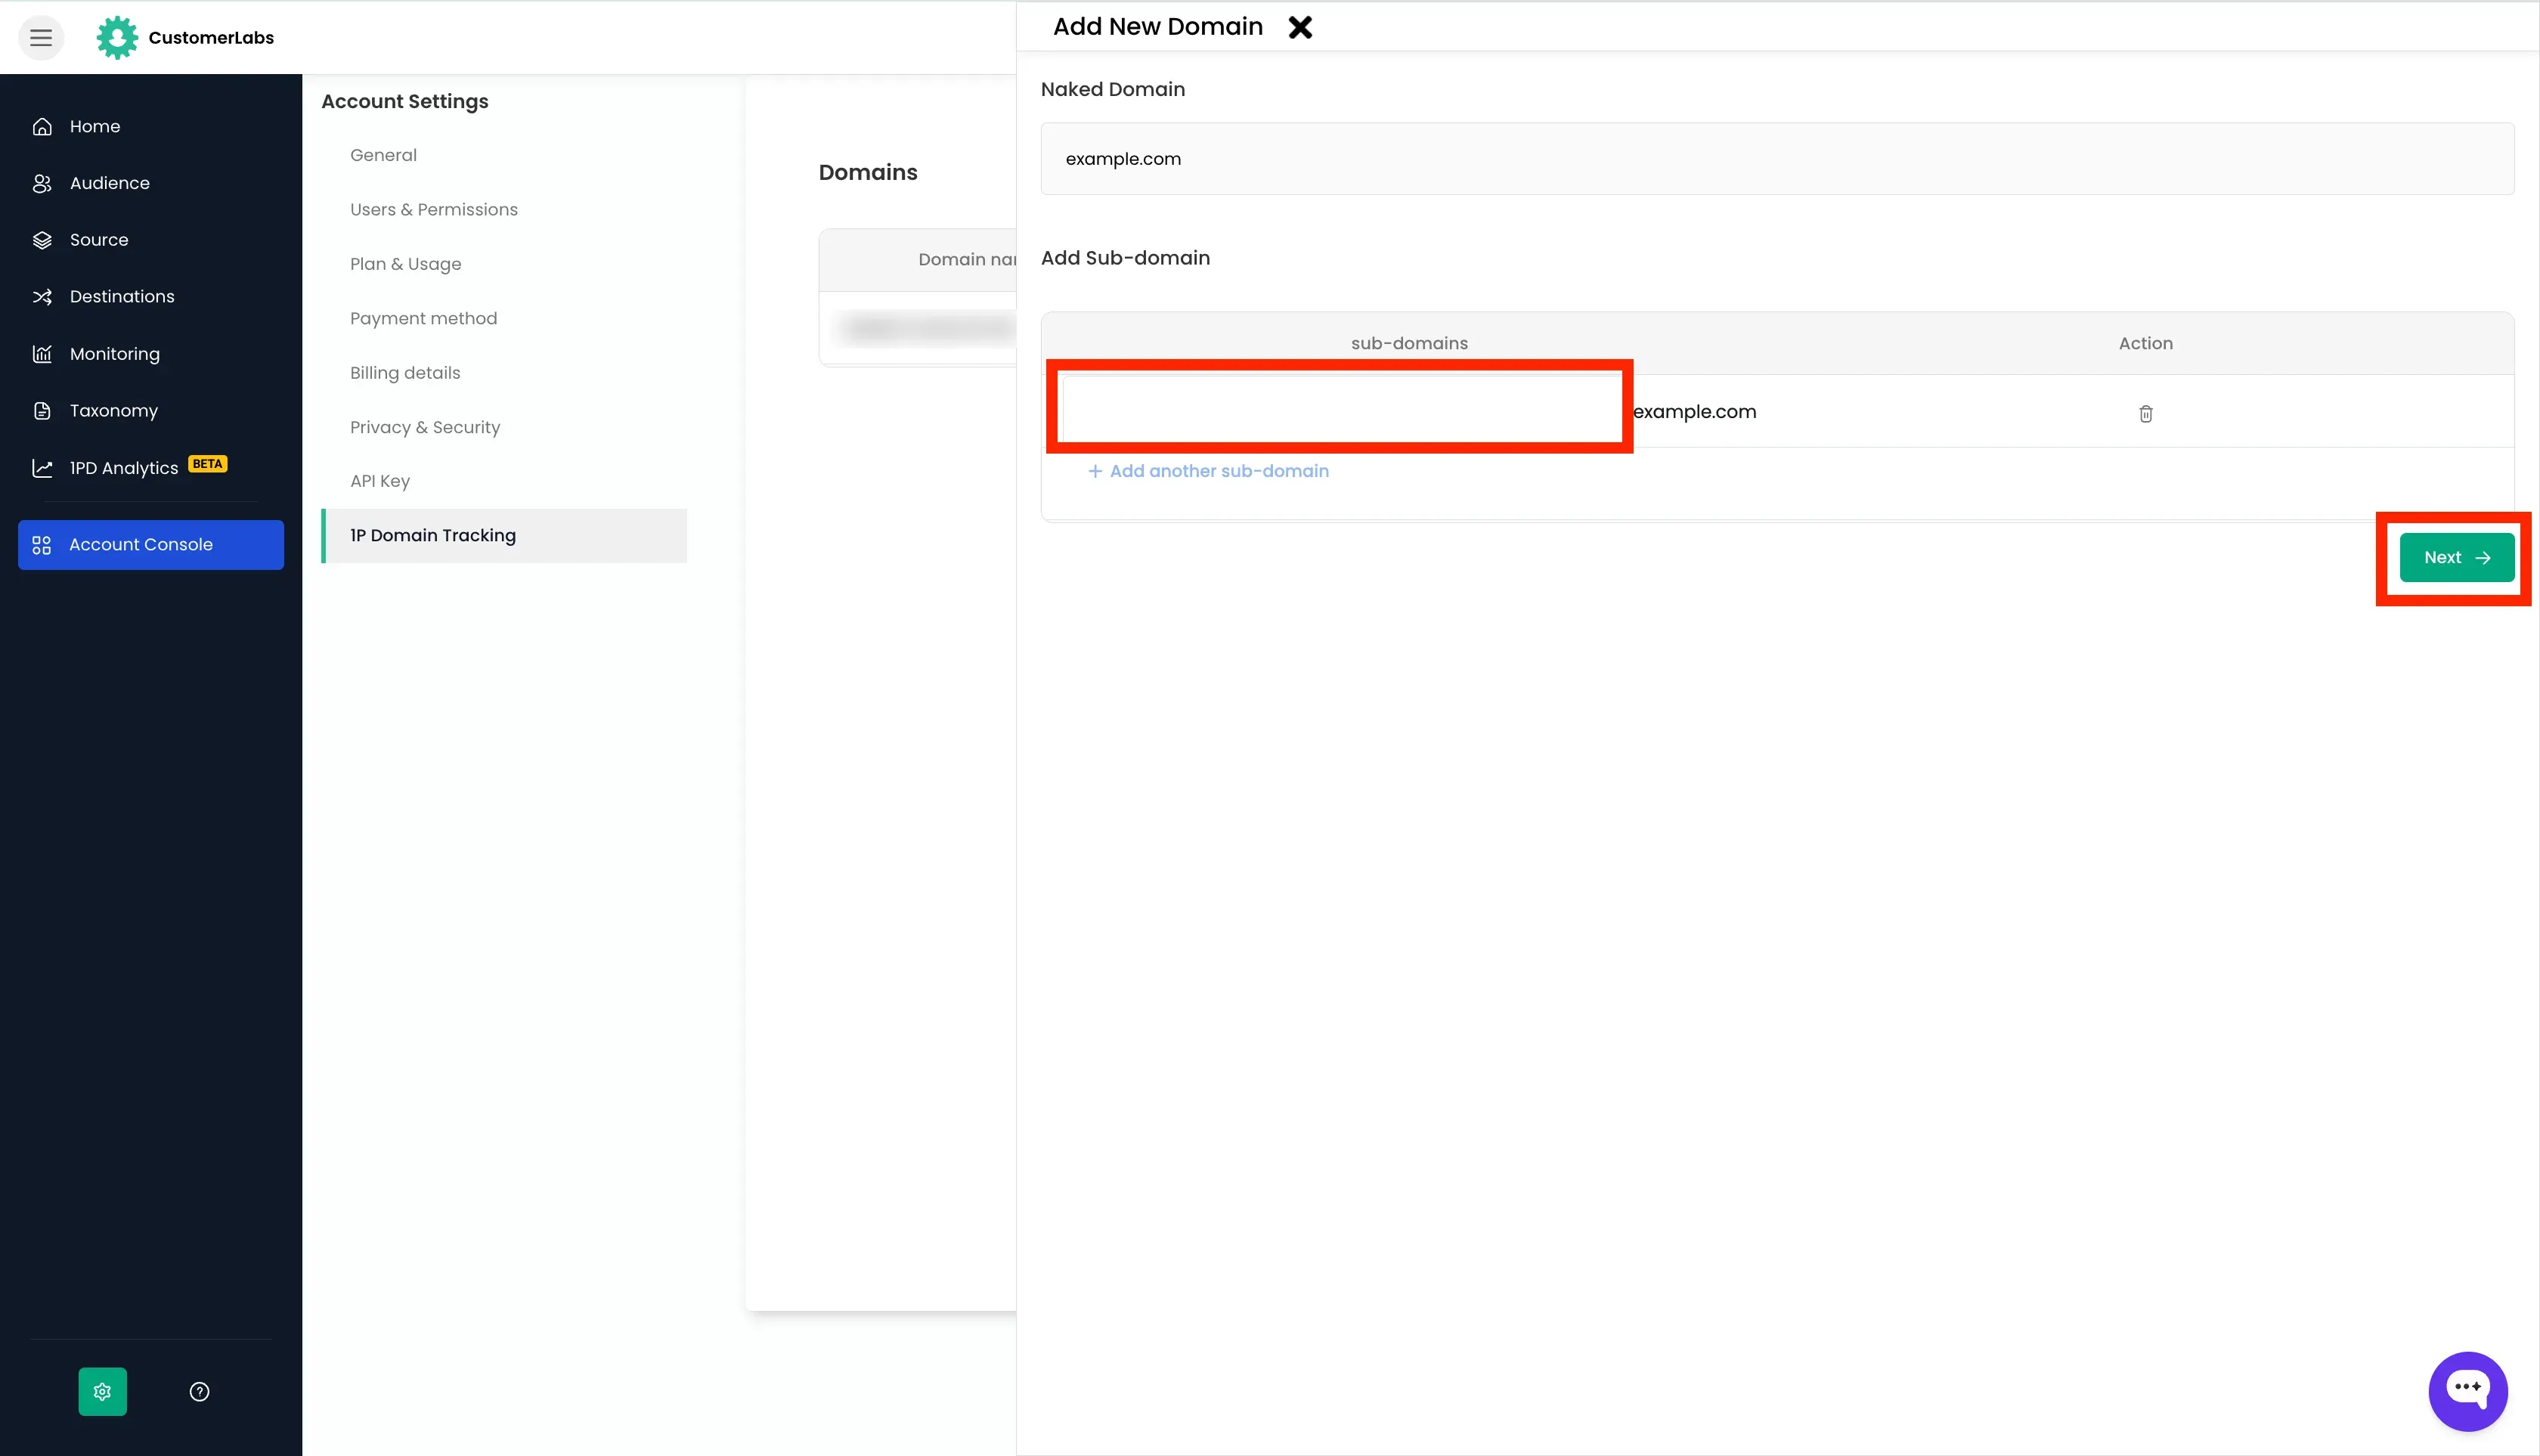
- Add a Naked Domain by entering the domain name without
http://,https://, orwwwand choose whether your website is a,
- Shopify hosted website
- Non-shopify hosted website
- Click Next.
Depending on your website platform, choose the appropriate setup procedure below.
Shopify Hosted Websites
Section titled “Shopify Hosted Websites”If your website/domain is hosted on the Shopify, follow these steps:
-
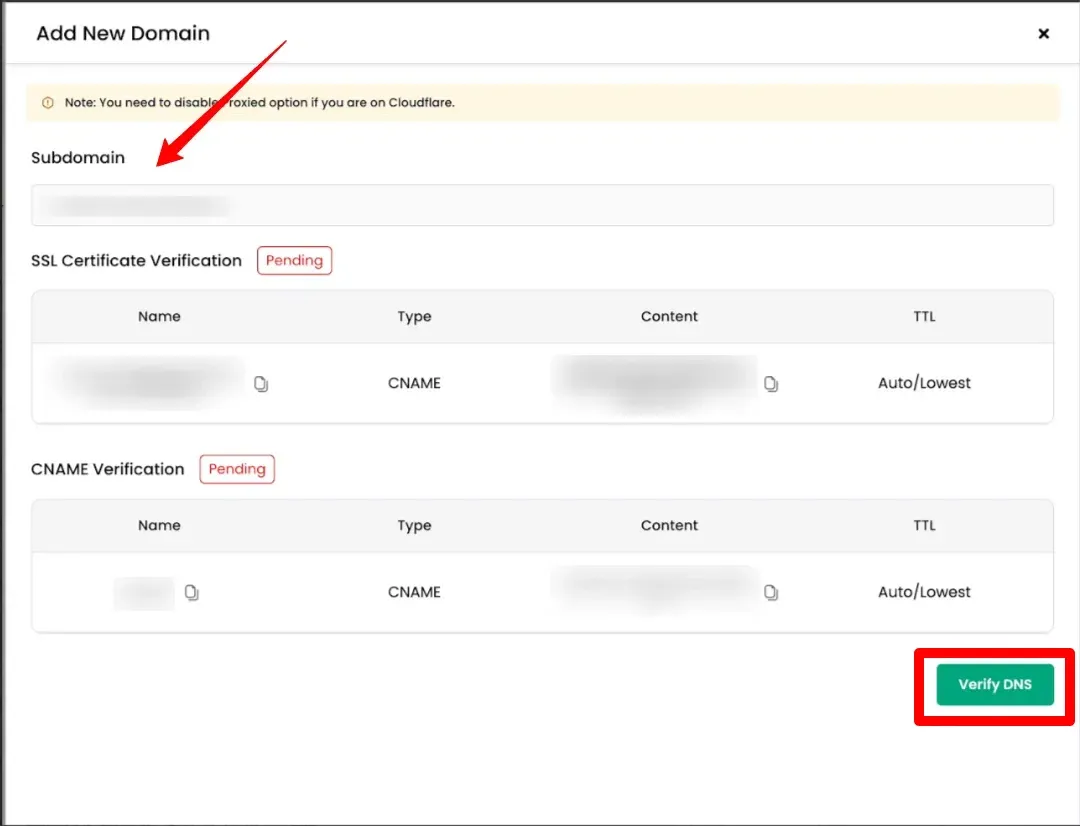
After the naked domain is added, the subdomain is auto-populated with other necessary details.
-
Log in to your DNS (Domain Name System) provider, Verify the
CNAMEandSSLcertificates. -
After the CNAME and SSL Certificate are added to your DNS provider, return to CustomerLabs and click Verify DNS to verify the domain.
-
After successful DNS verification, go back to the home screen.
-
Click on the 1P Domain Tracking Code tab, and click on the Shopify card.
-
Continue with the steps mentioned in the Shopify installation to complete the set up.
Non-Shopify Websites (Custom-built or other platforms)
Section titled “Non-Shopify Websites (Custom-built or other platforms)”If your website/domain is self-hosted, on WordPress, or any platform other than Shopify, follow these steps:
-
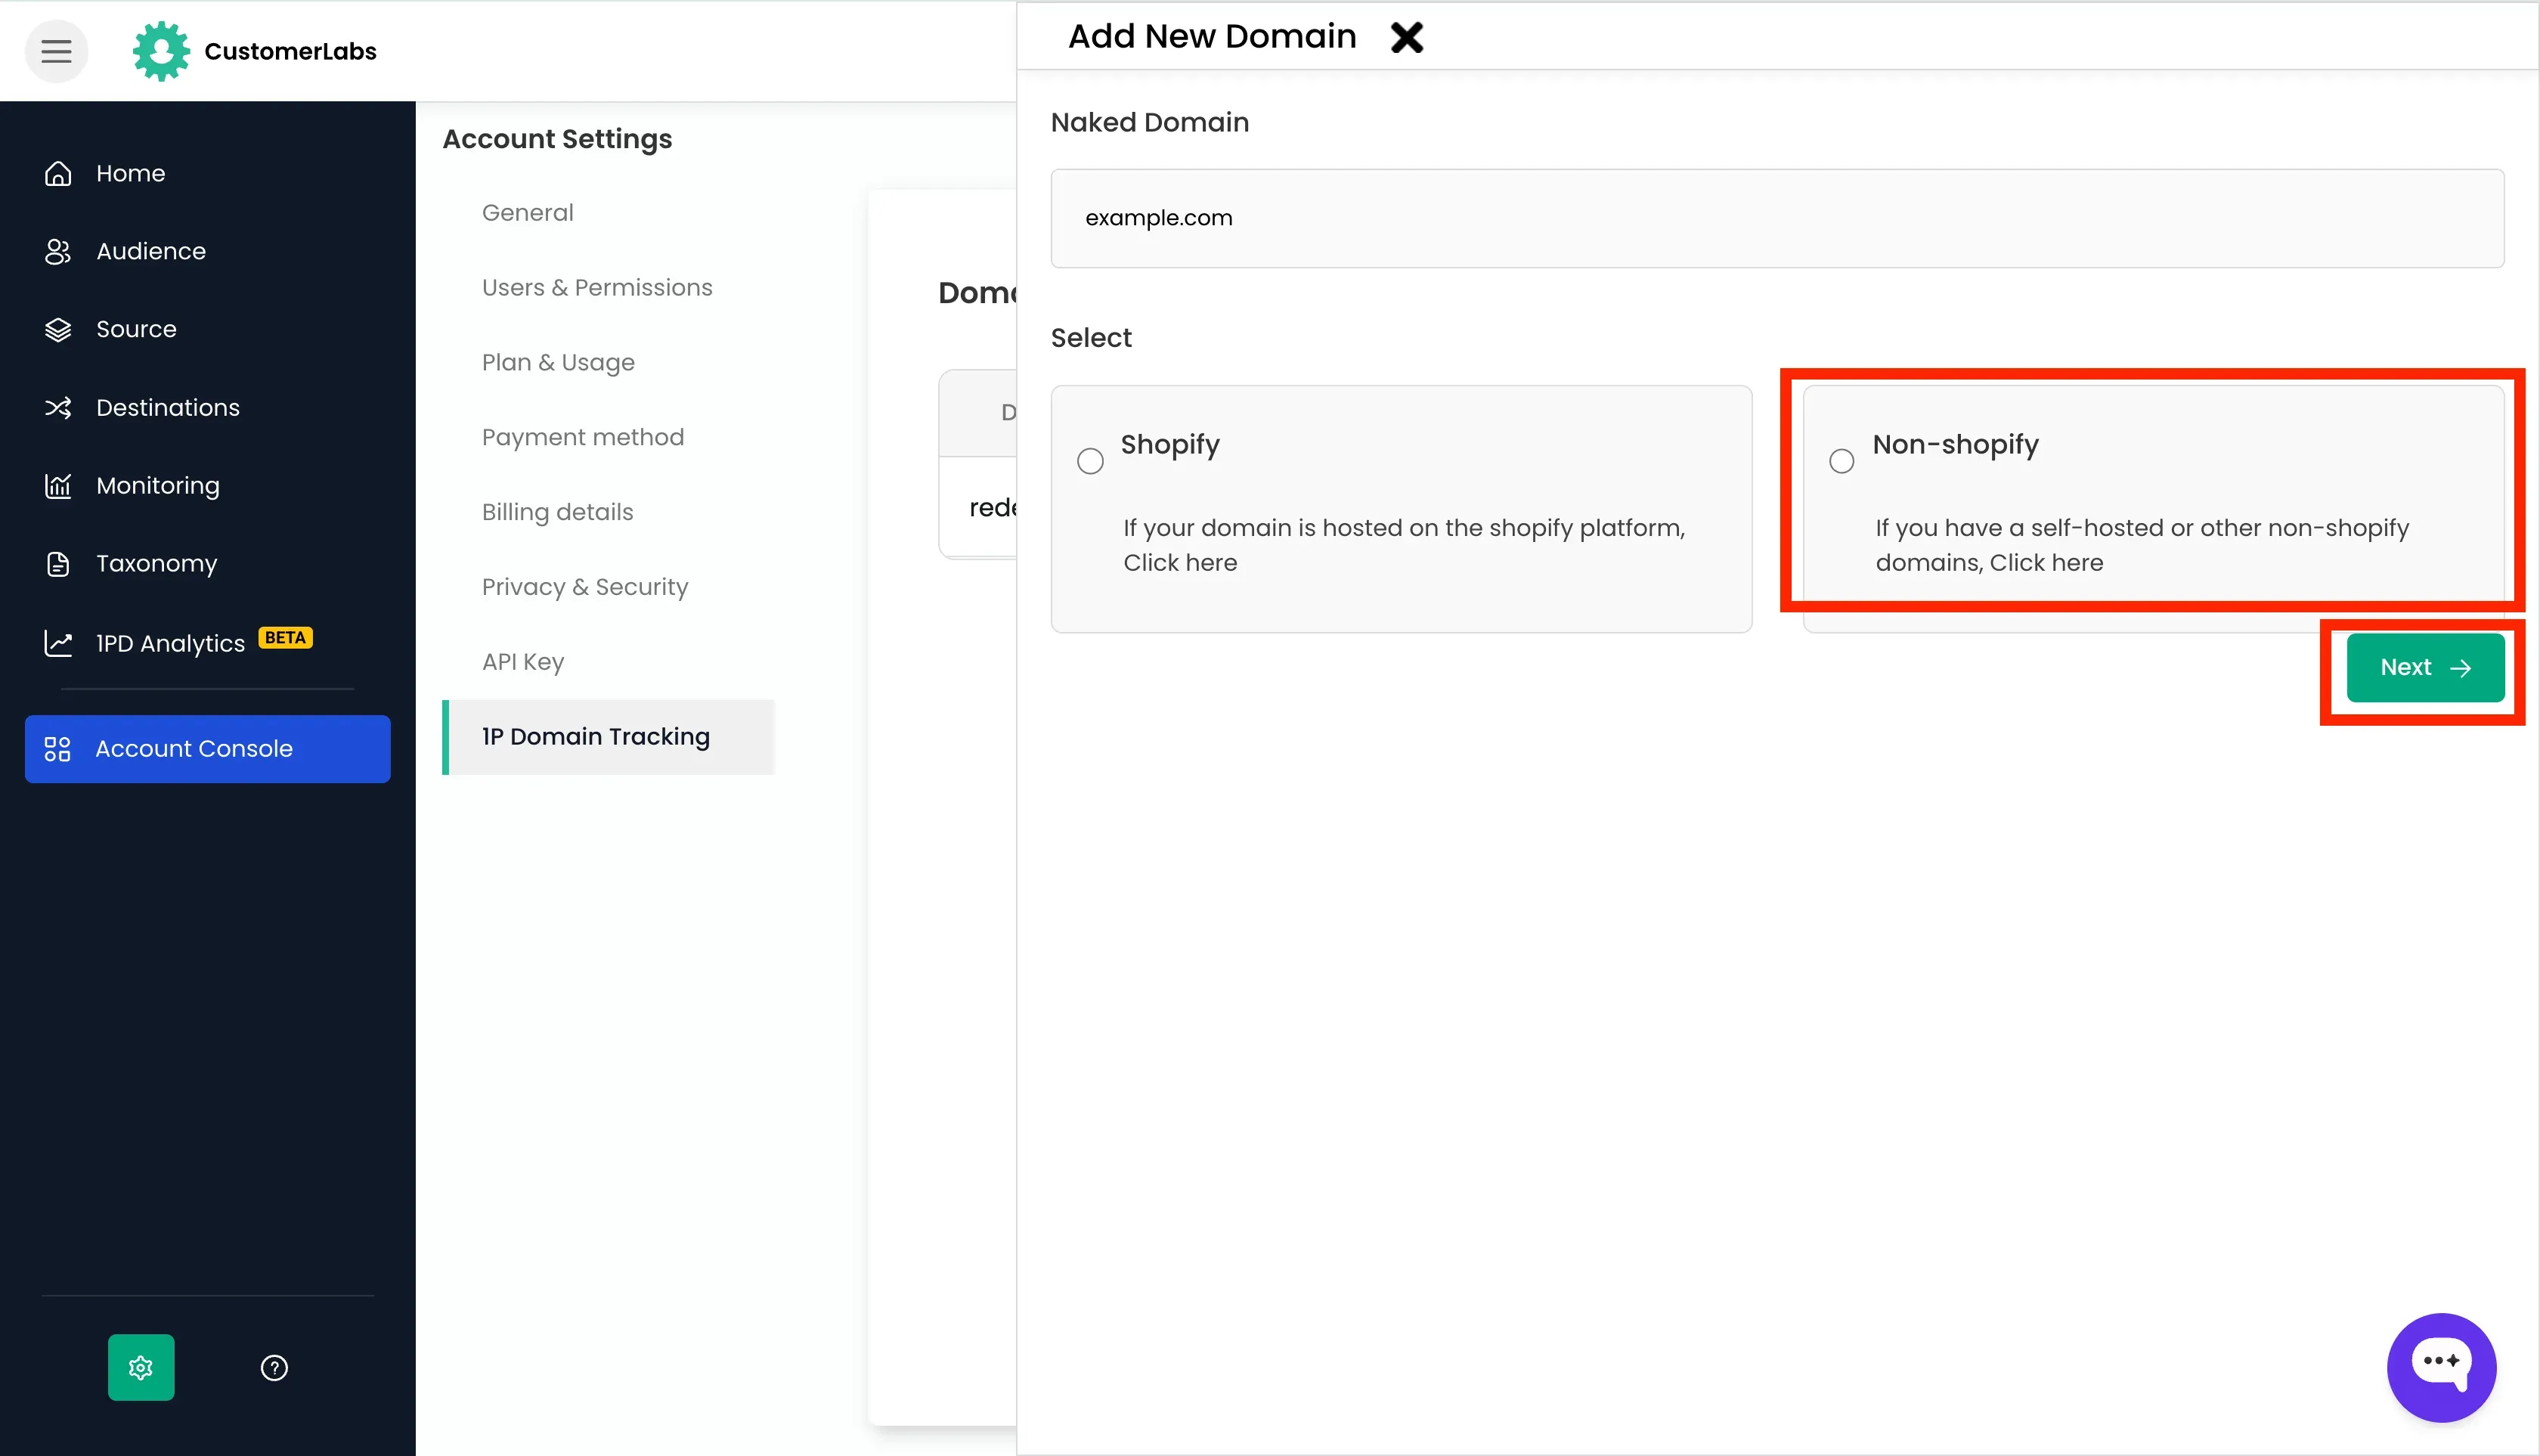
After adding the naked domain, choose Non-Shopify.
-
Click Next.
-
Add sub-domain for the CDN for the domain and click Next.
This CDN can be managed in one of two ways:
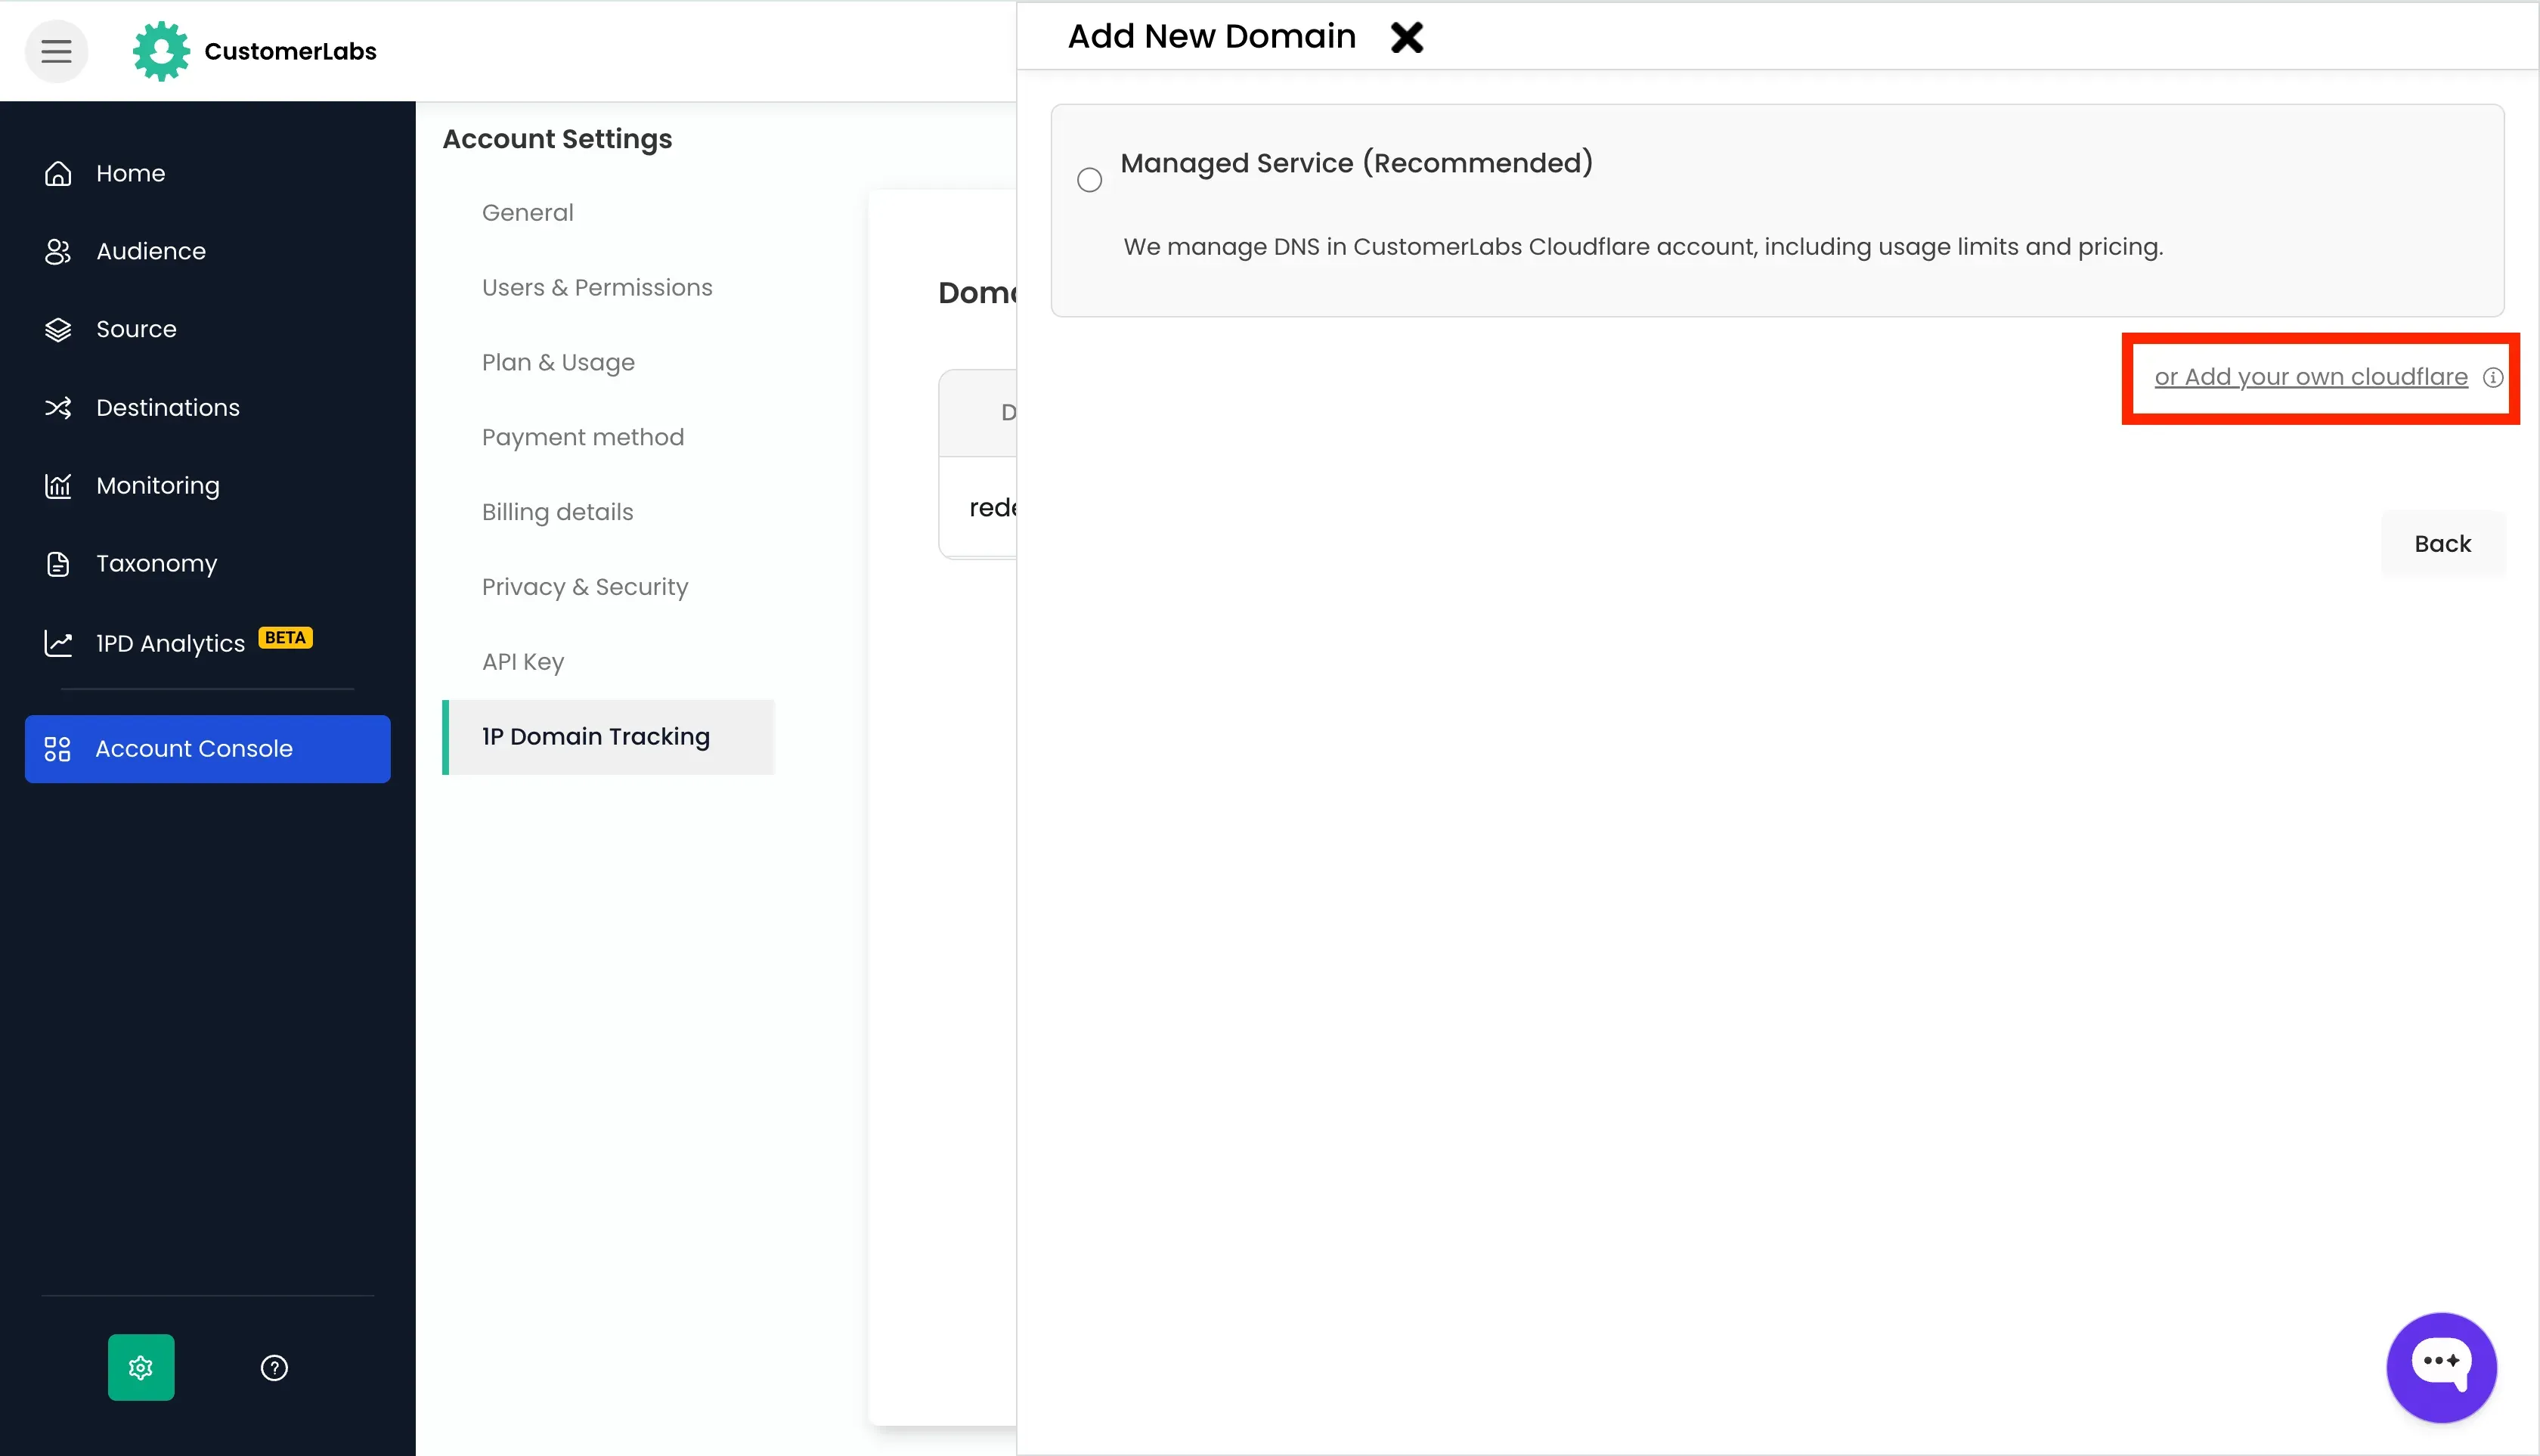
- Managed Service – Cloudflare account managed by CustomerLabs (Recommended)
- Adding your own Cloudflare account
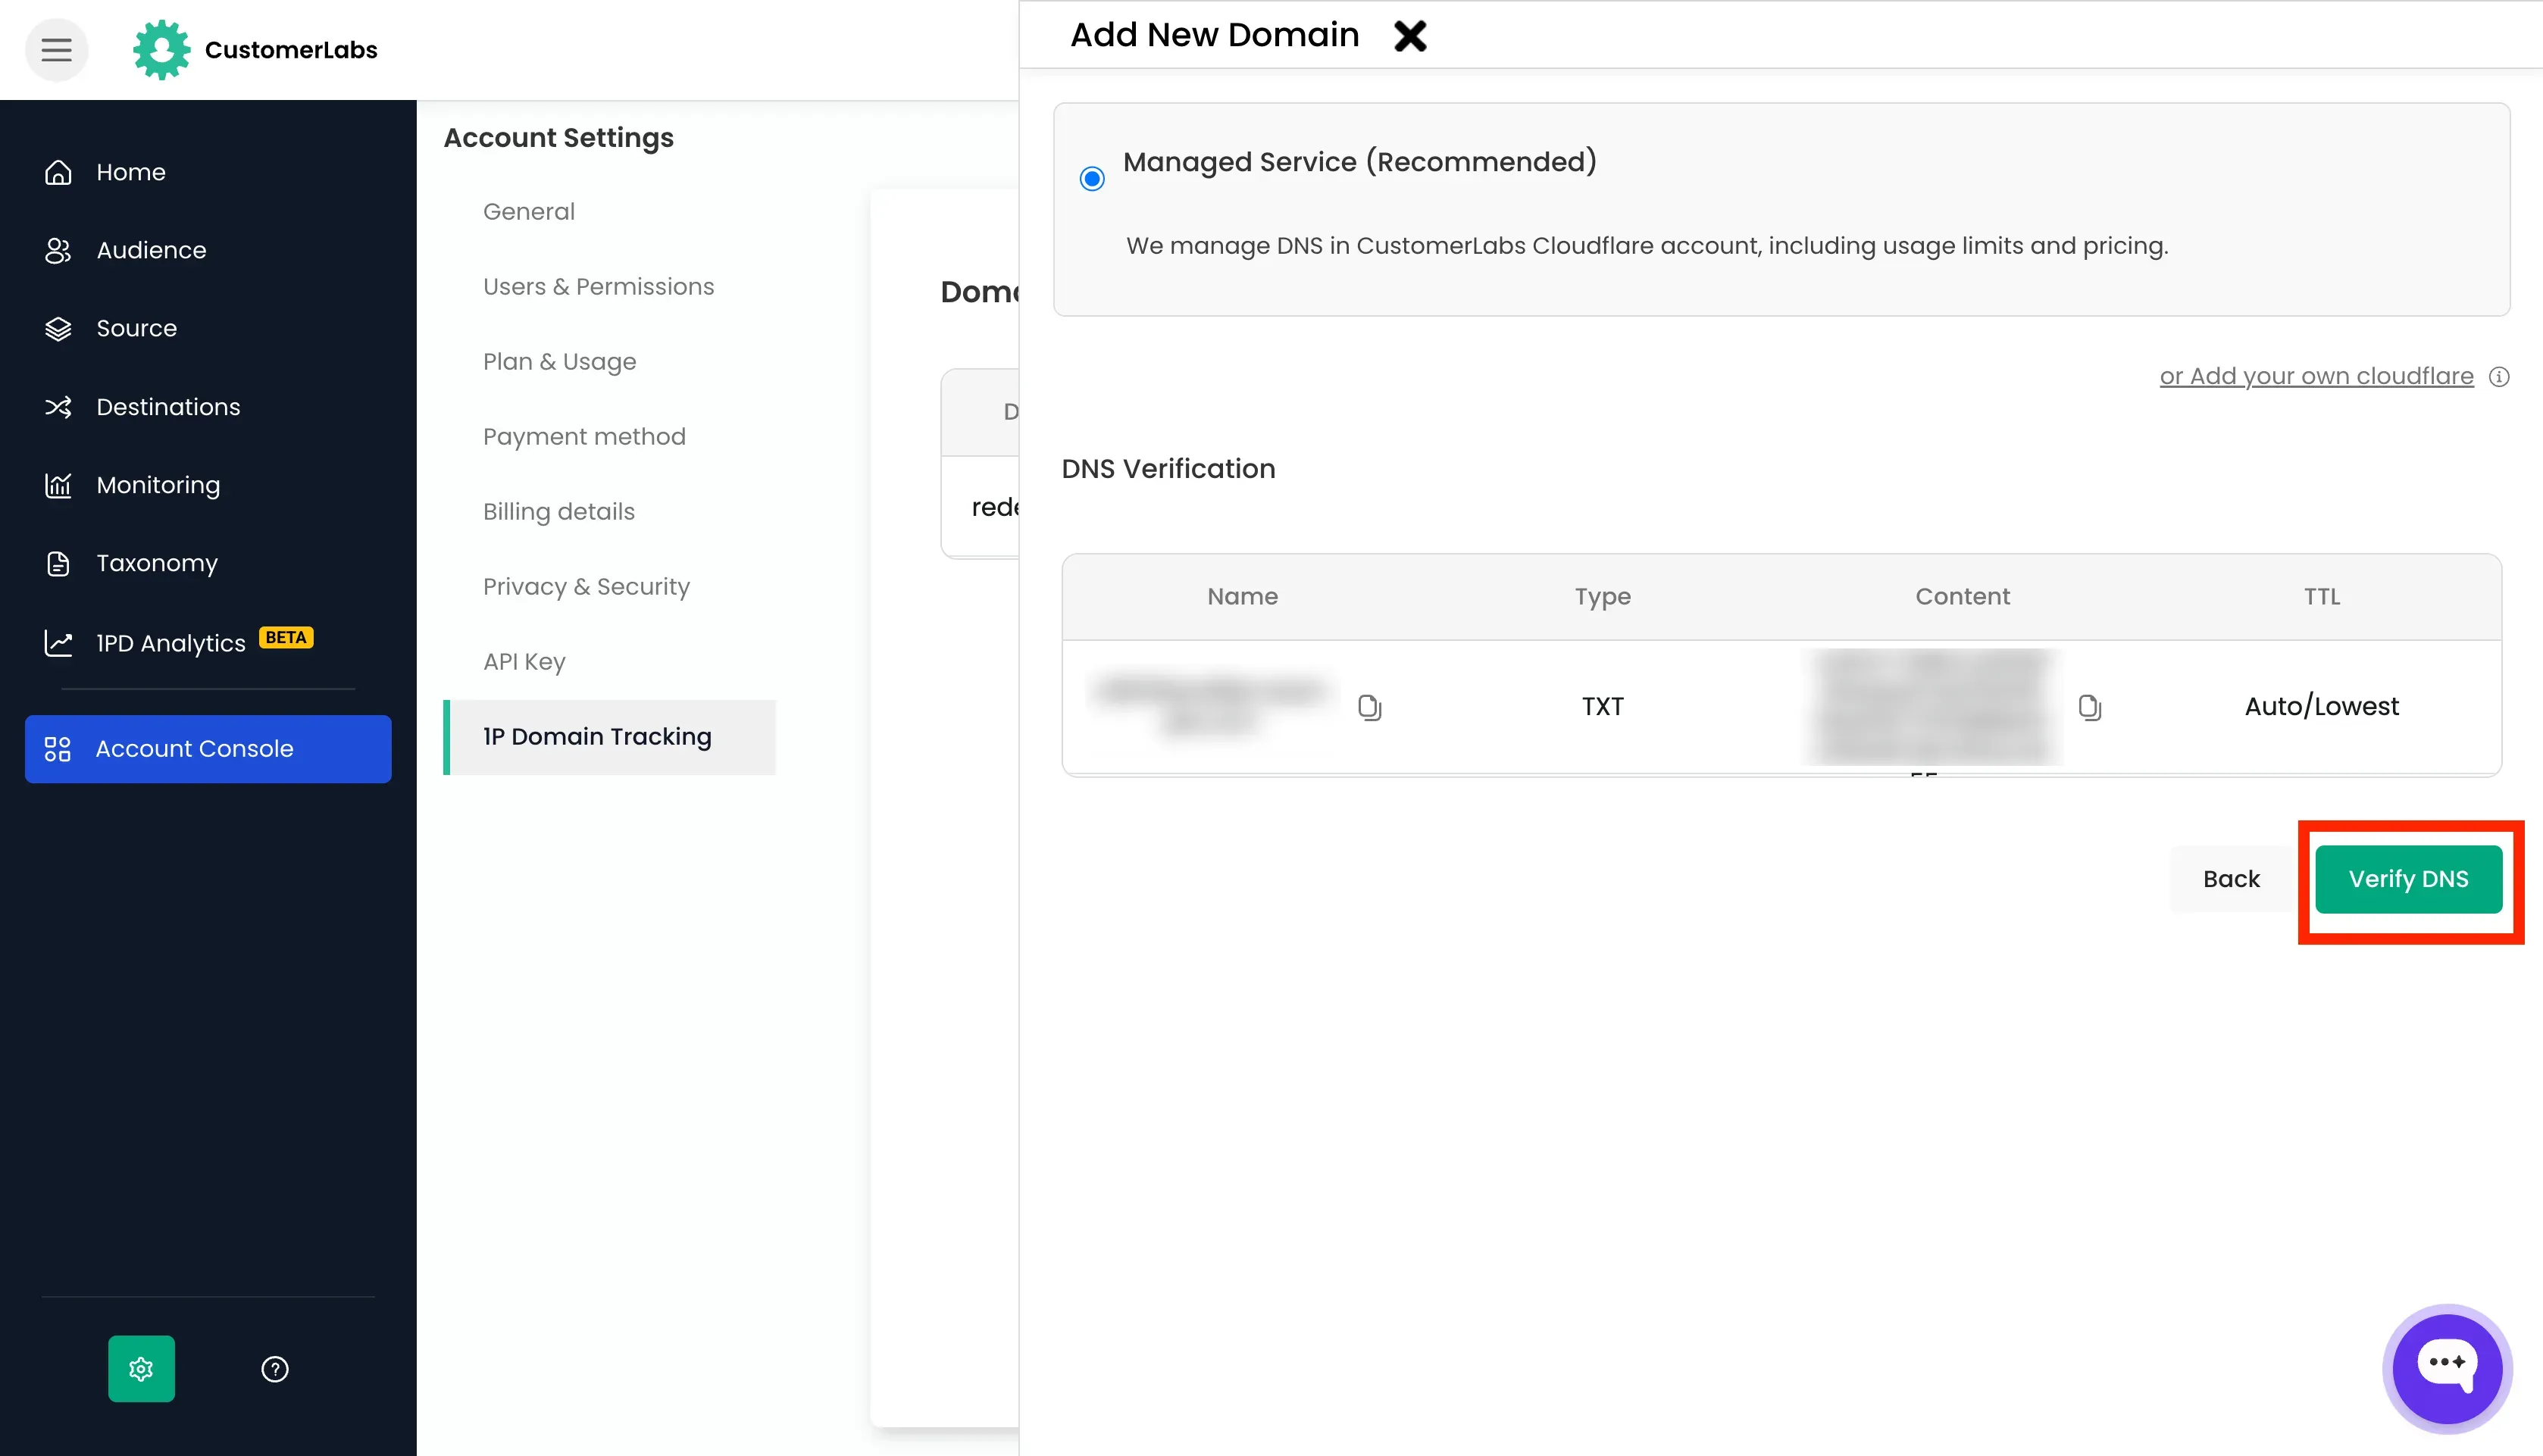
Option A: Managed Service
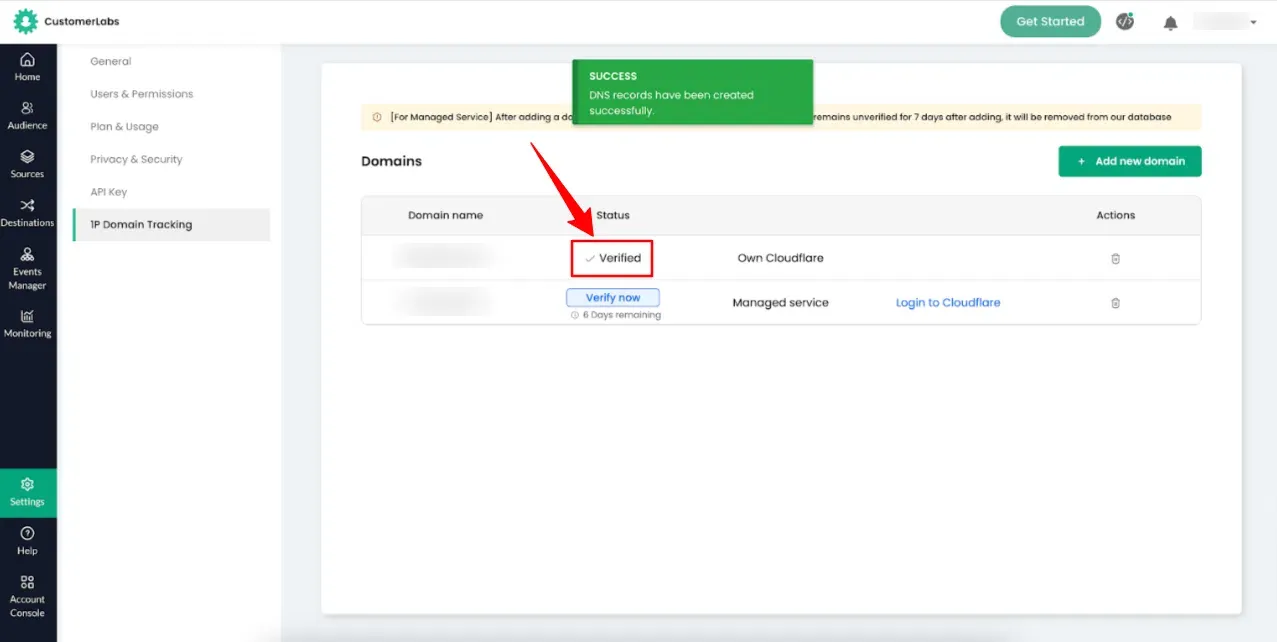
Section titled “Option A: Managed Service”If you choose to use the Managed Service, you first have to verify that you are the owner of the domain before proceeding with the DNS migration to our Cloudflare network. (Note: Verification must be done within 7 days)
-
After verifying ownership of the domain in your DNS provider, click Verify DNS in CustomerLabs.
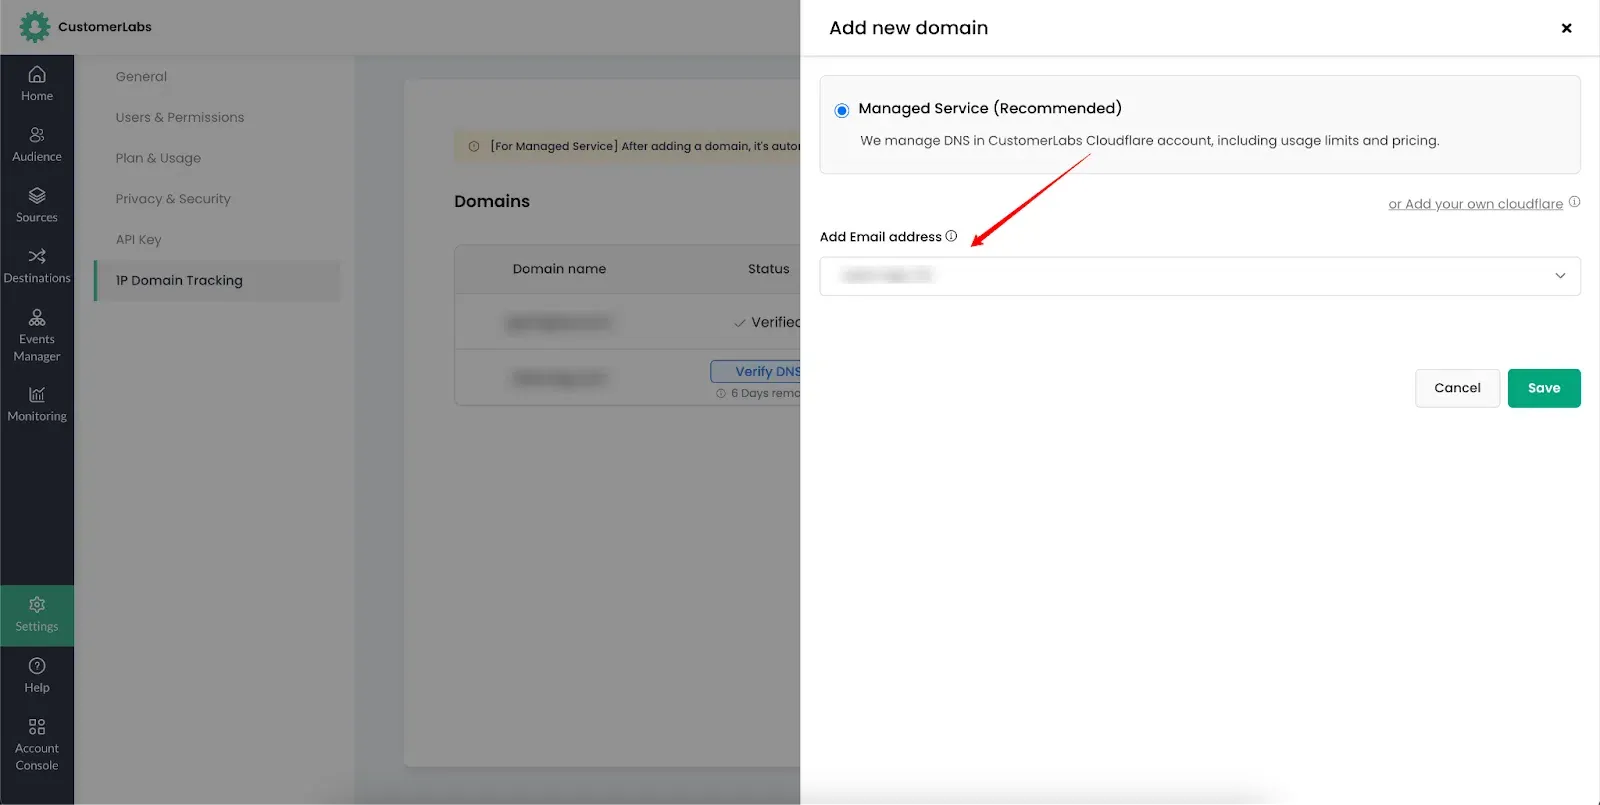
-
Once DNS verification is done, you will be prompted to enter an email address to provide access to the Cloudflare account. (Note: You can only choose an admin user’s email address from the drop-down)
-
Click Save.
-
You will be sent an invite from CustomerLabs to access your Cloudflare account (If you don’t receive an email within 24 hours, please contact support@customerlabs.co)
-
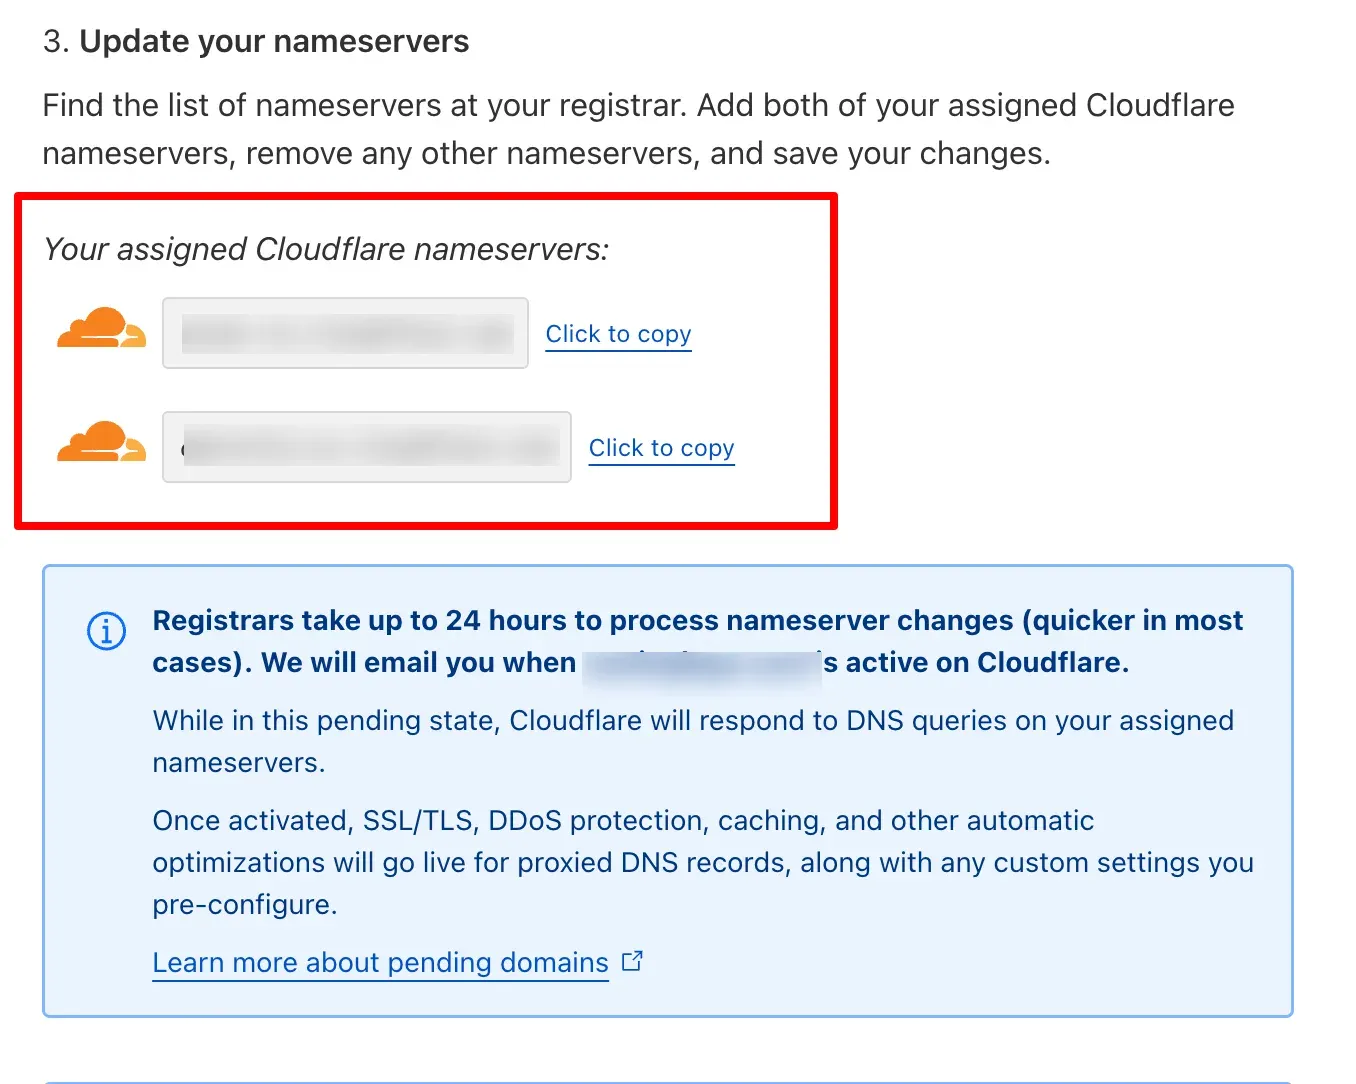
After accepting the Cloudflare invite, map the assigned name servers in your domain registrar.
-
Once the name servers are mapped, go back to the 1P Domain Tracking dashboard in CustomerLabs and click Verify now against the domain you recently added.
-
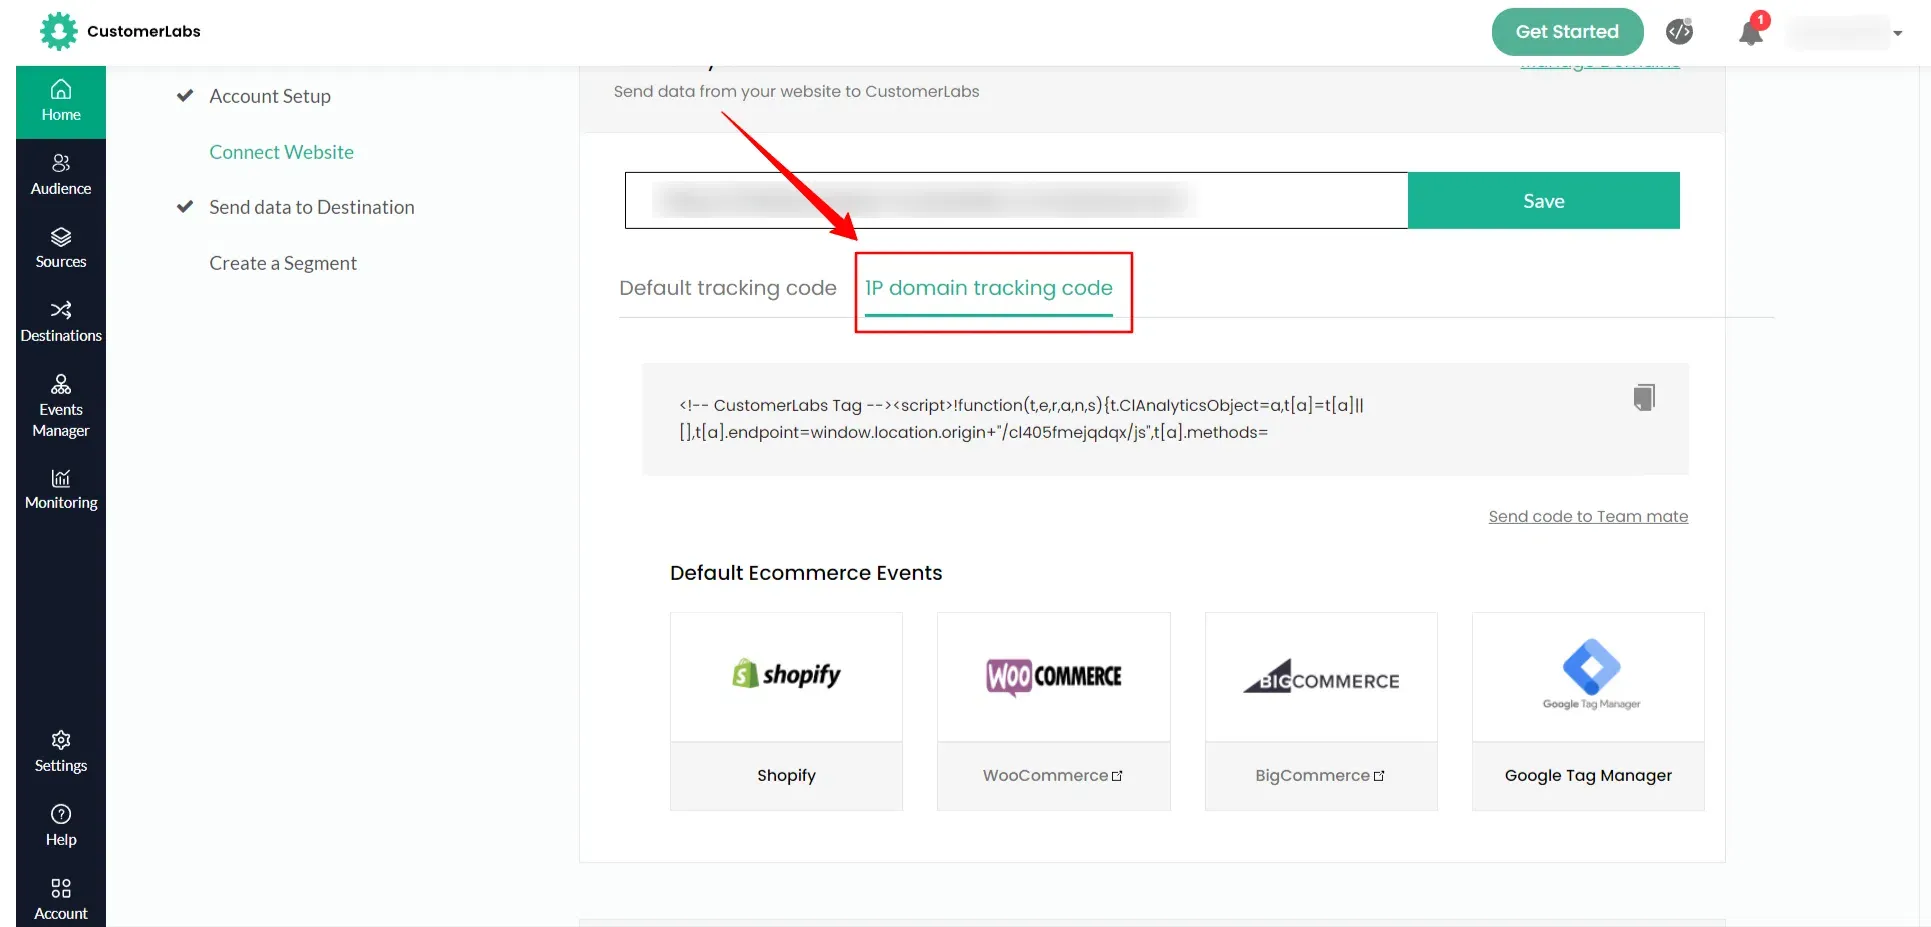
Finally, go to the CustomerLabs home screen, click the 1P Domain Tracking Code tab, and reinstall the tracking script on your website.
Option B: Adding your own Cloudflare Account
Section titled “Option B: Adding your own Cloudflare Account”-
Click on the “Add your own Cloudflare” hyperlink during the setup.
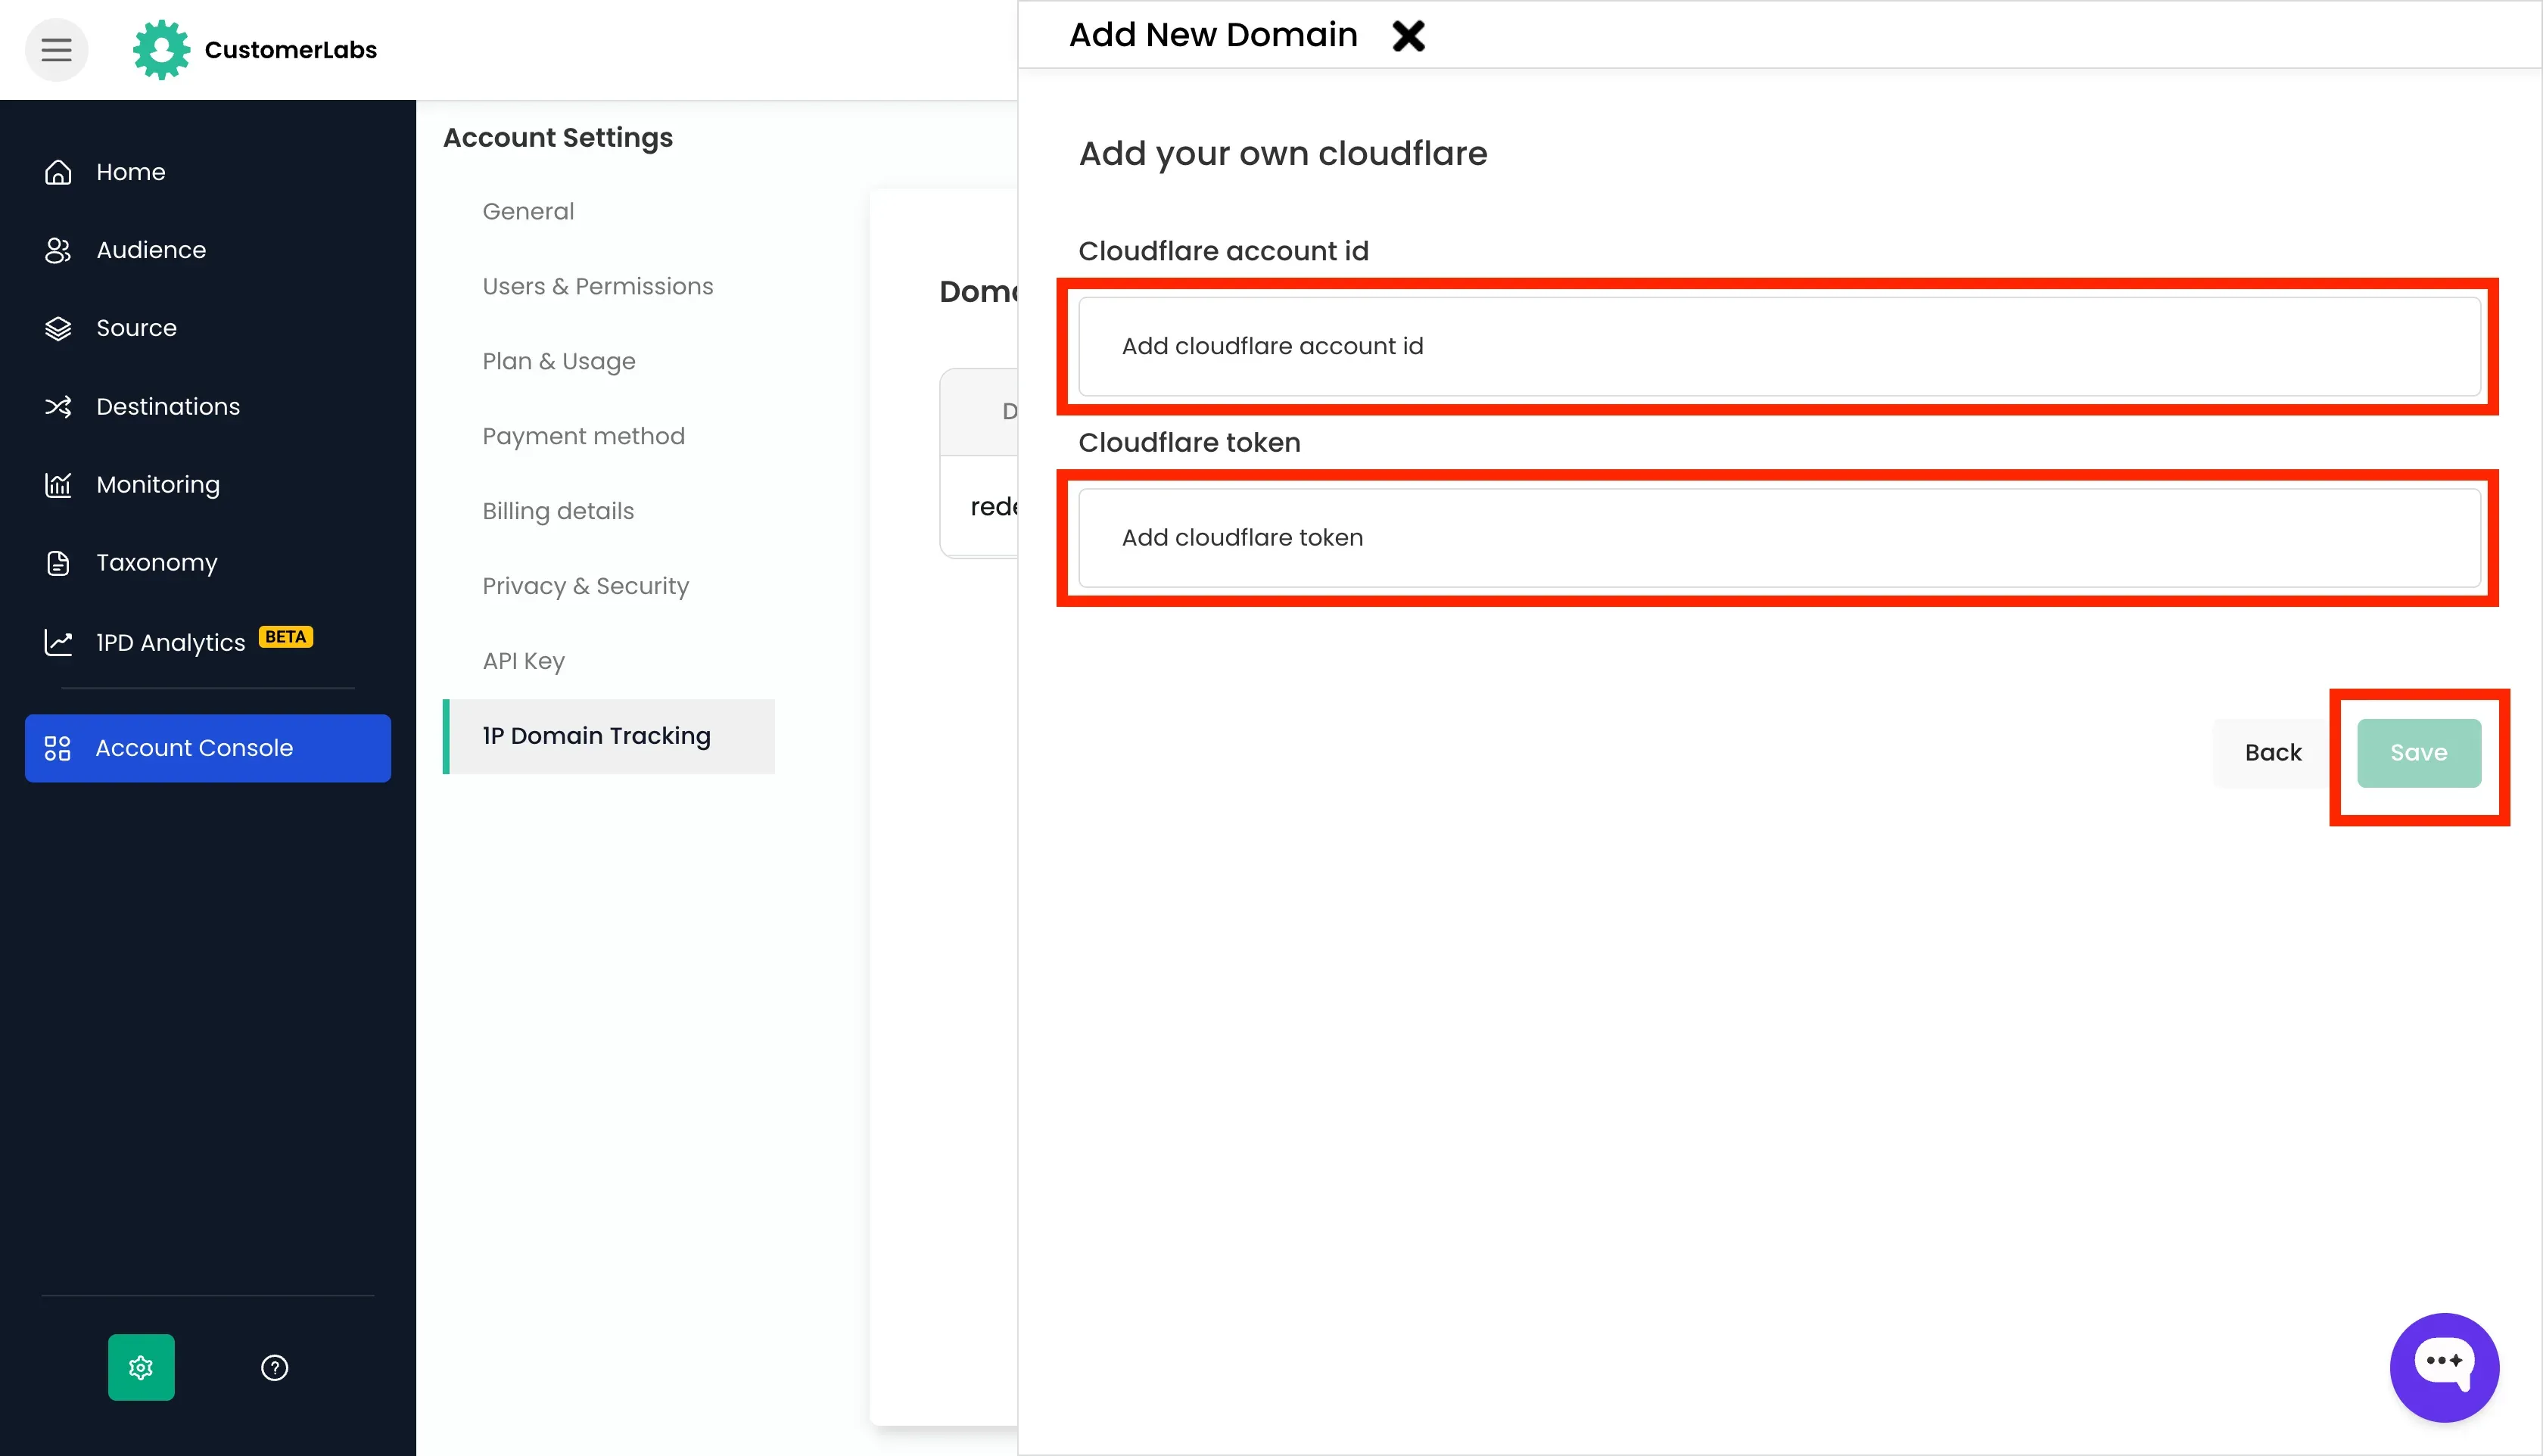
-
You will be asked to enter your Cloudflare Account ID and API Token.
Finding your Cloudflare Account ID
Section titled “Finding your Cloudflare Account ID”-
Log in to your Cloudflare account.
-
Go to Websites → Choose your domain.
-
Click Overview from left sidebar. The Account ID can be found in the right-sidebar (as shown on screenshot below).
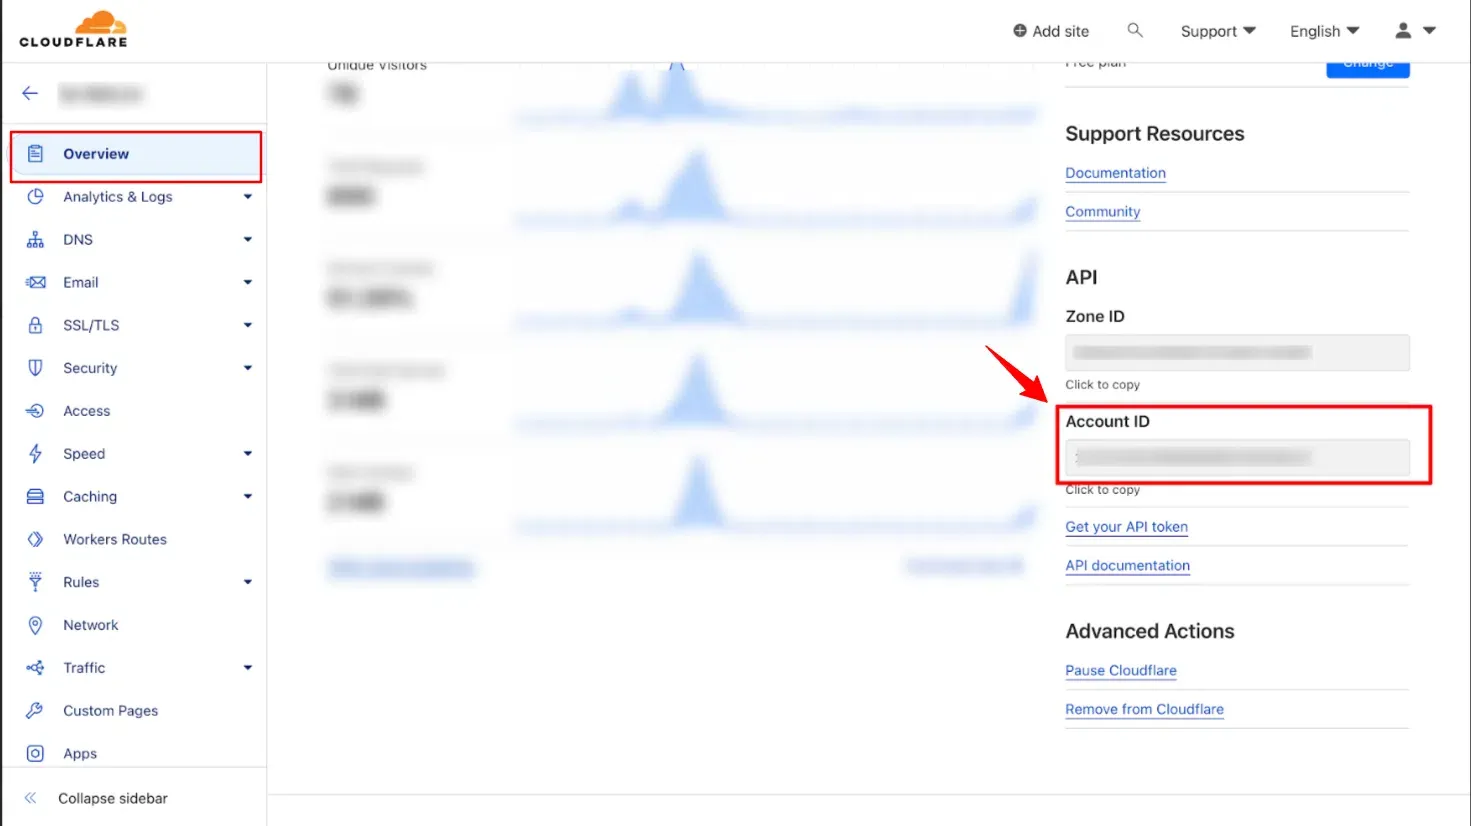
-
Copy the Account ID from the right sidebar and paste it into the Cloudflare Account ID field in CustomerLabs.
Generating a Cloudflare API Token
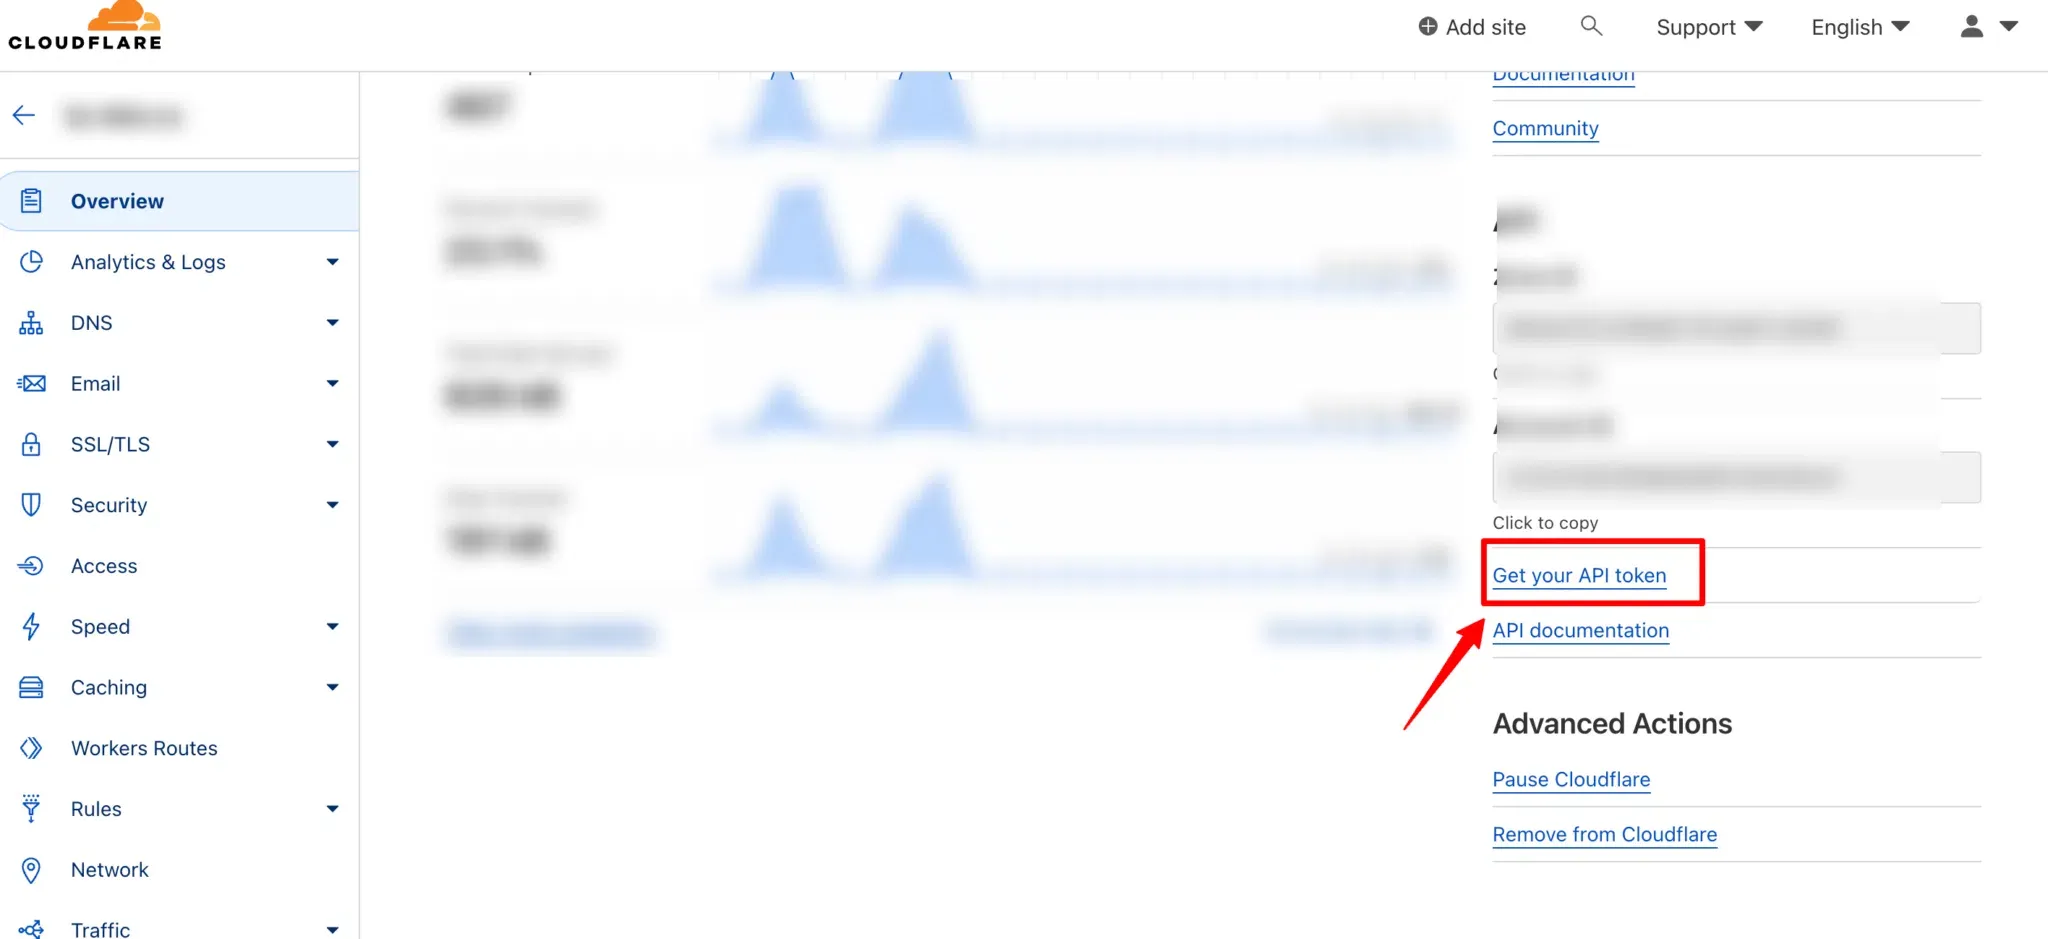
Section titled “Generating a Cloudflare API Token”To allow CustomerLabs to manage Workers and DNS records on your Cloudflare zone, generate an API token with the correct permissions:
-
Under the Overview tab, click on “Get your API token” on the right sidebar.
-
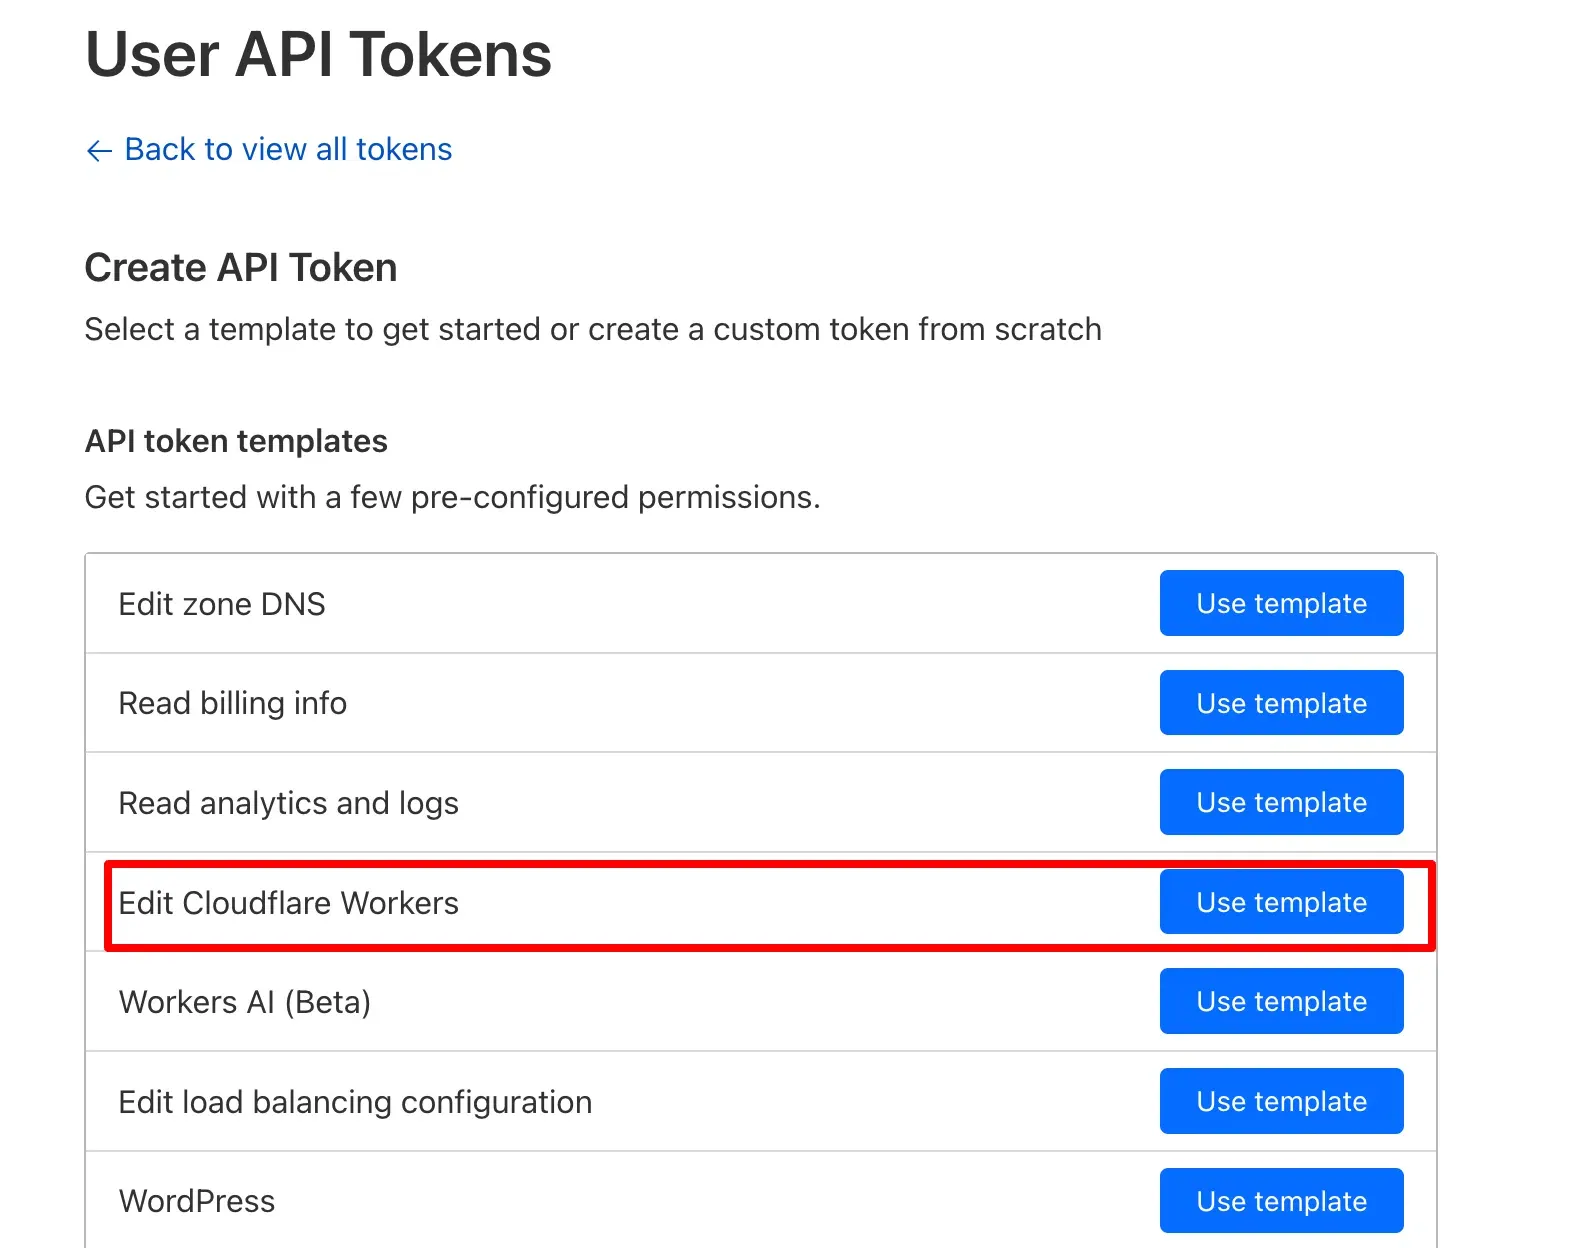
Click “Create Token” button.

-
From the list of templates, find “Edit Cloudflare Workers” and click “Use template”.
-
Click ”+ Add more” to add an additional Zone permission.
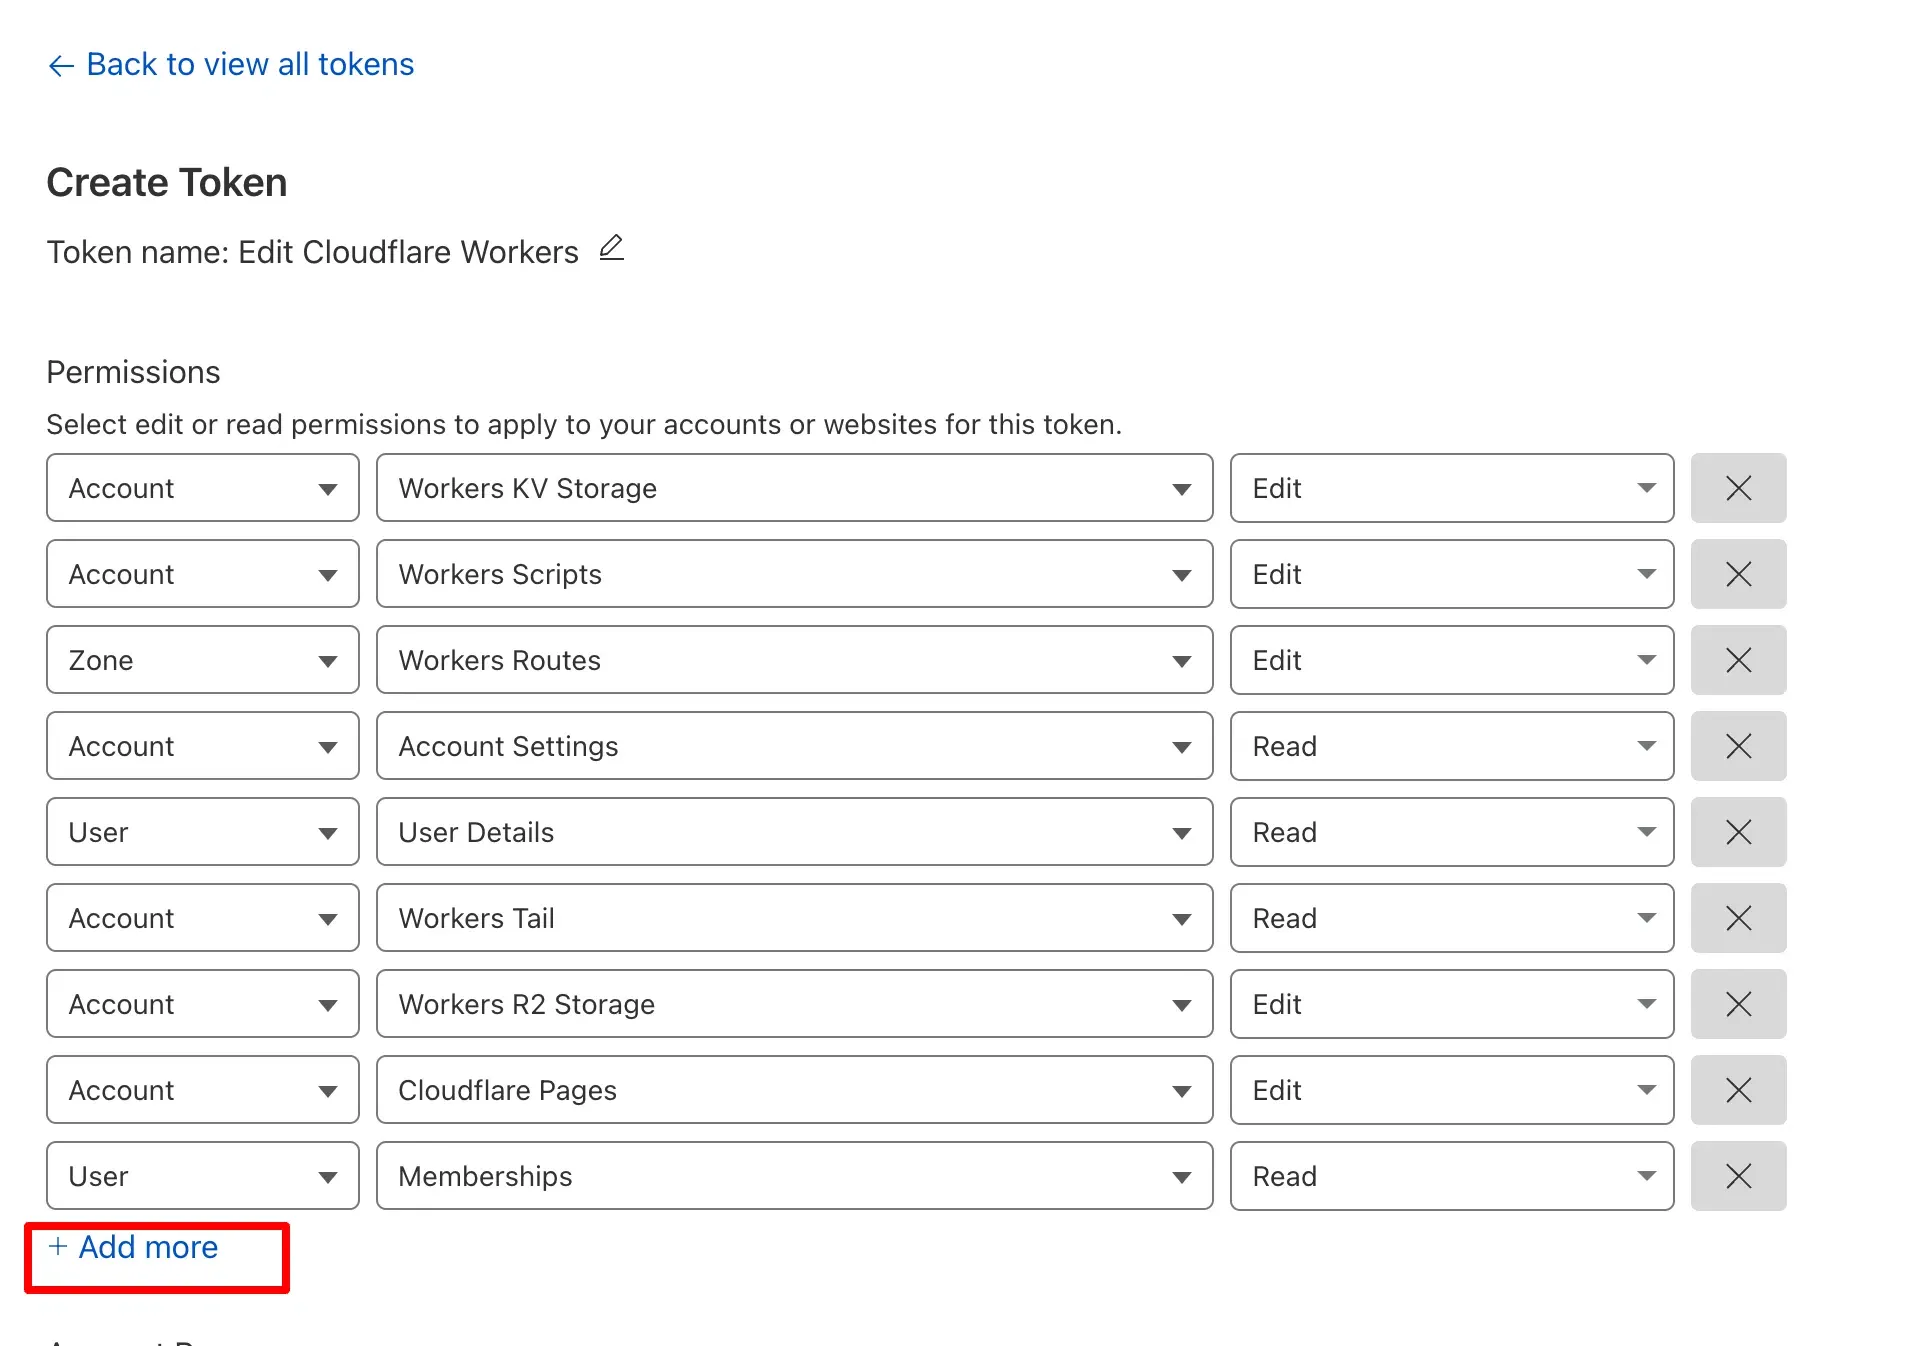
-
For the Zone permission, set DNS → Edit (required to create DNS records that link the Worker to your domain).

-
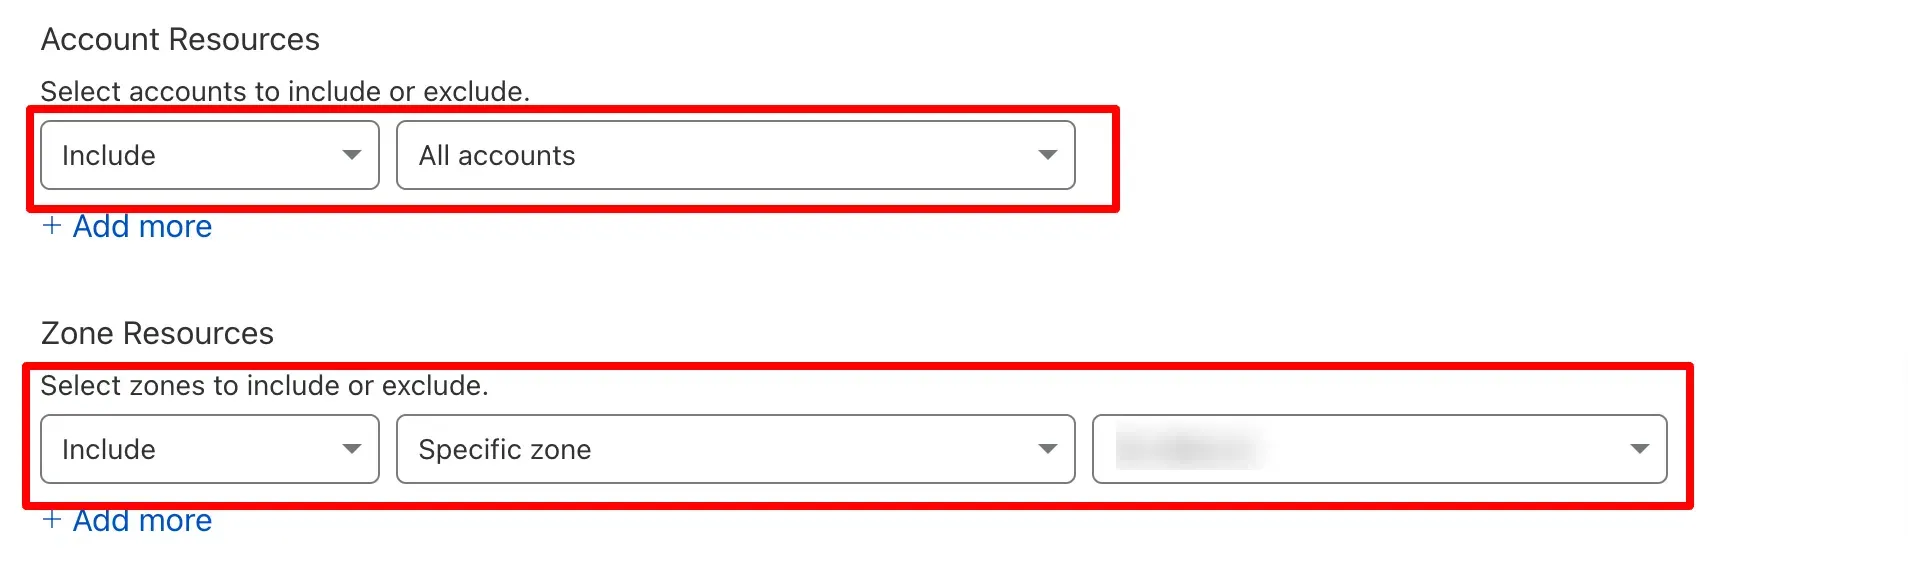
Under Account Resources, set Include → select the Cloudflare account you want to link.
-
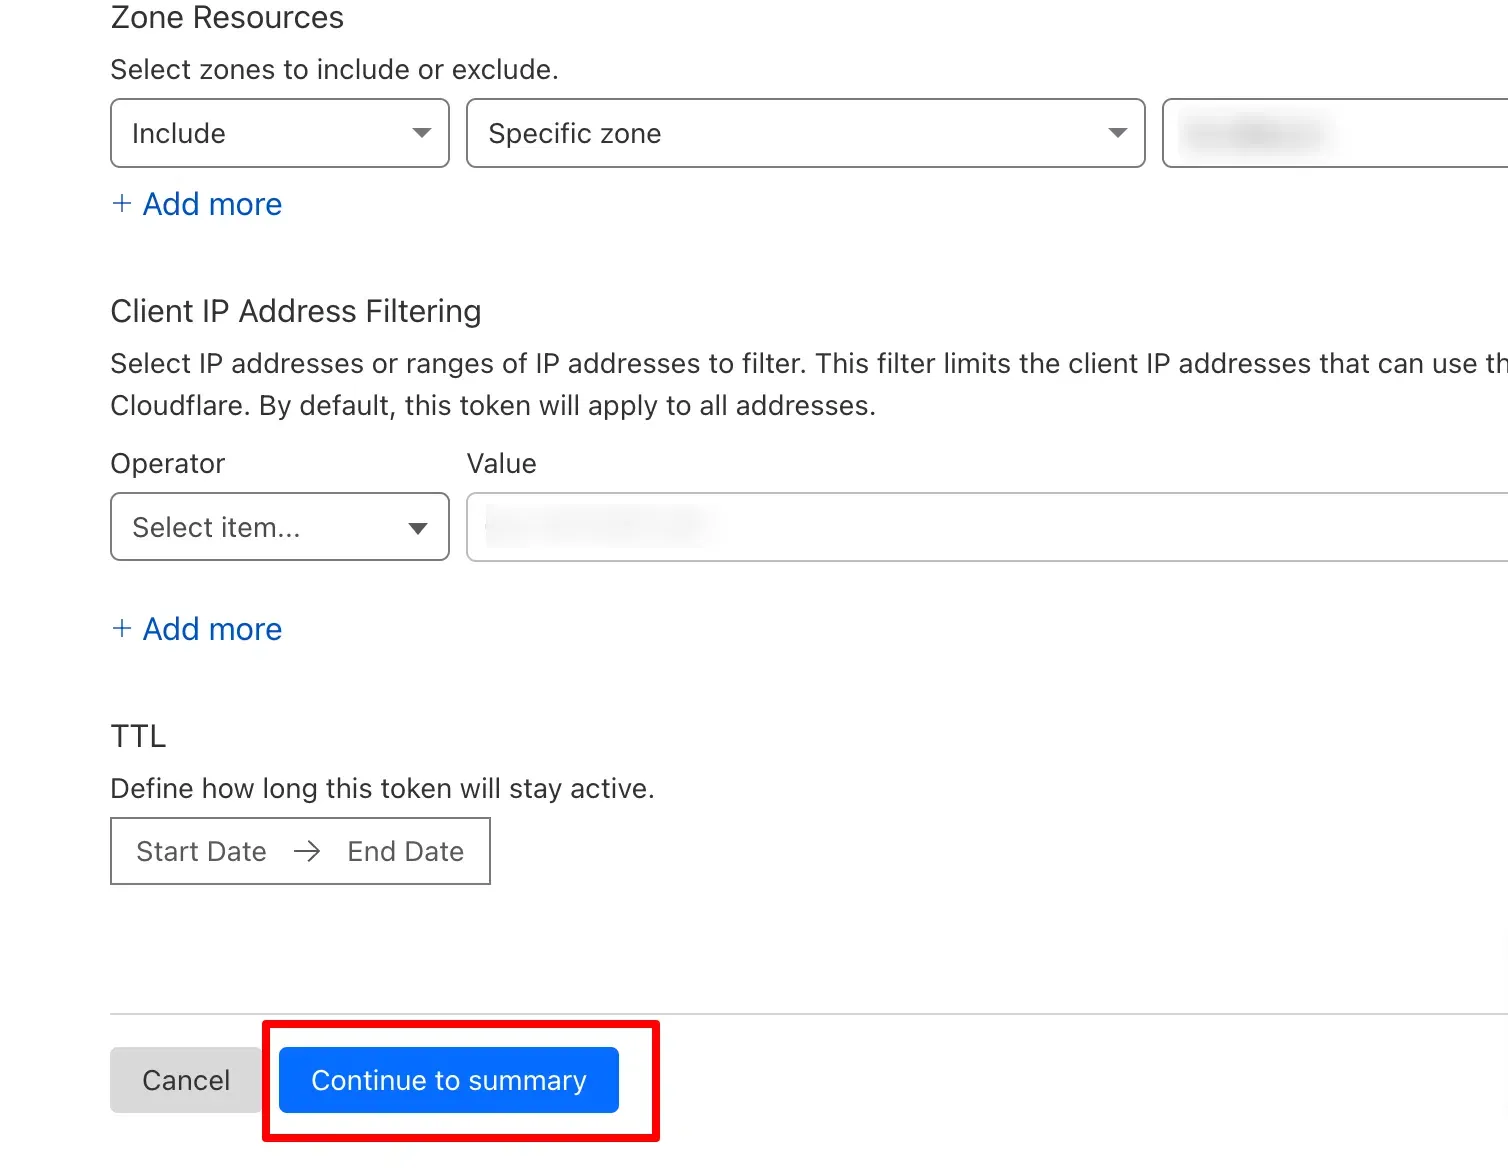
Under Zone Resources, set Include → Specific Zone → select the domain you are adding.
-
Click “Continue to Summary” to review the permissions.
-
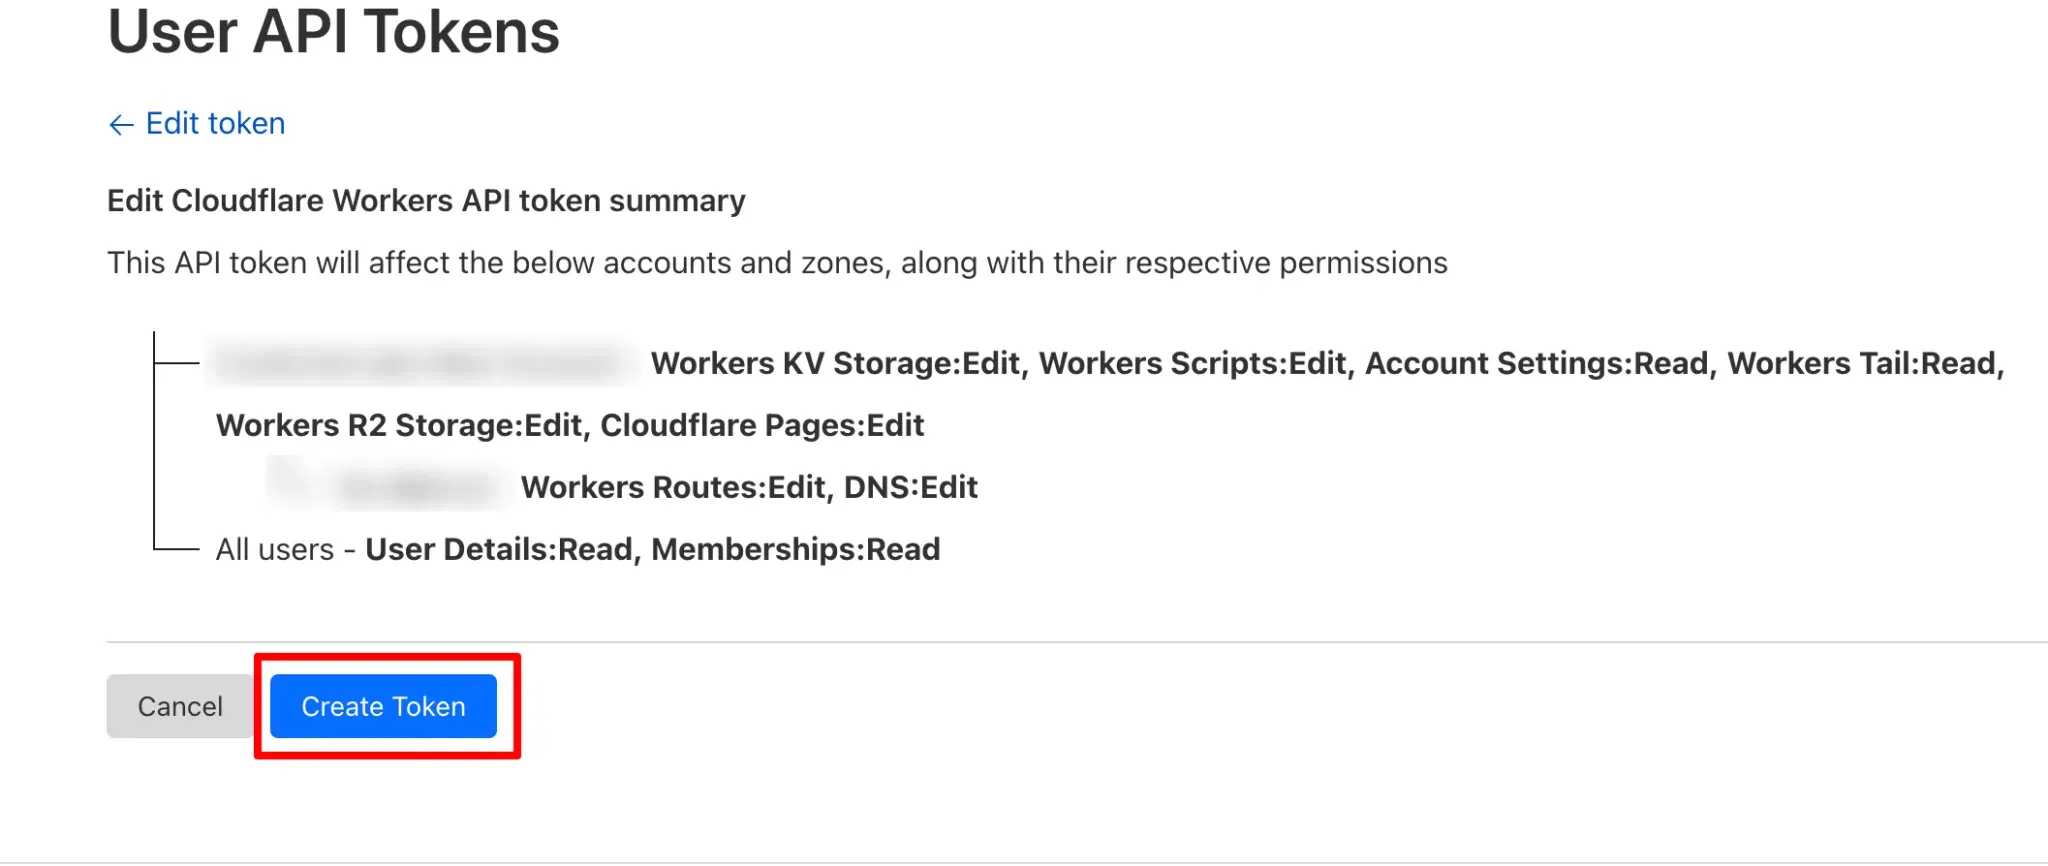
Confirm the summary and click “Create Token”.
-
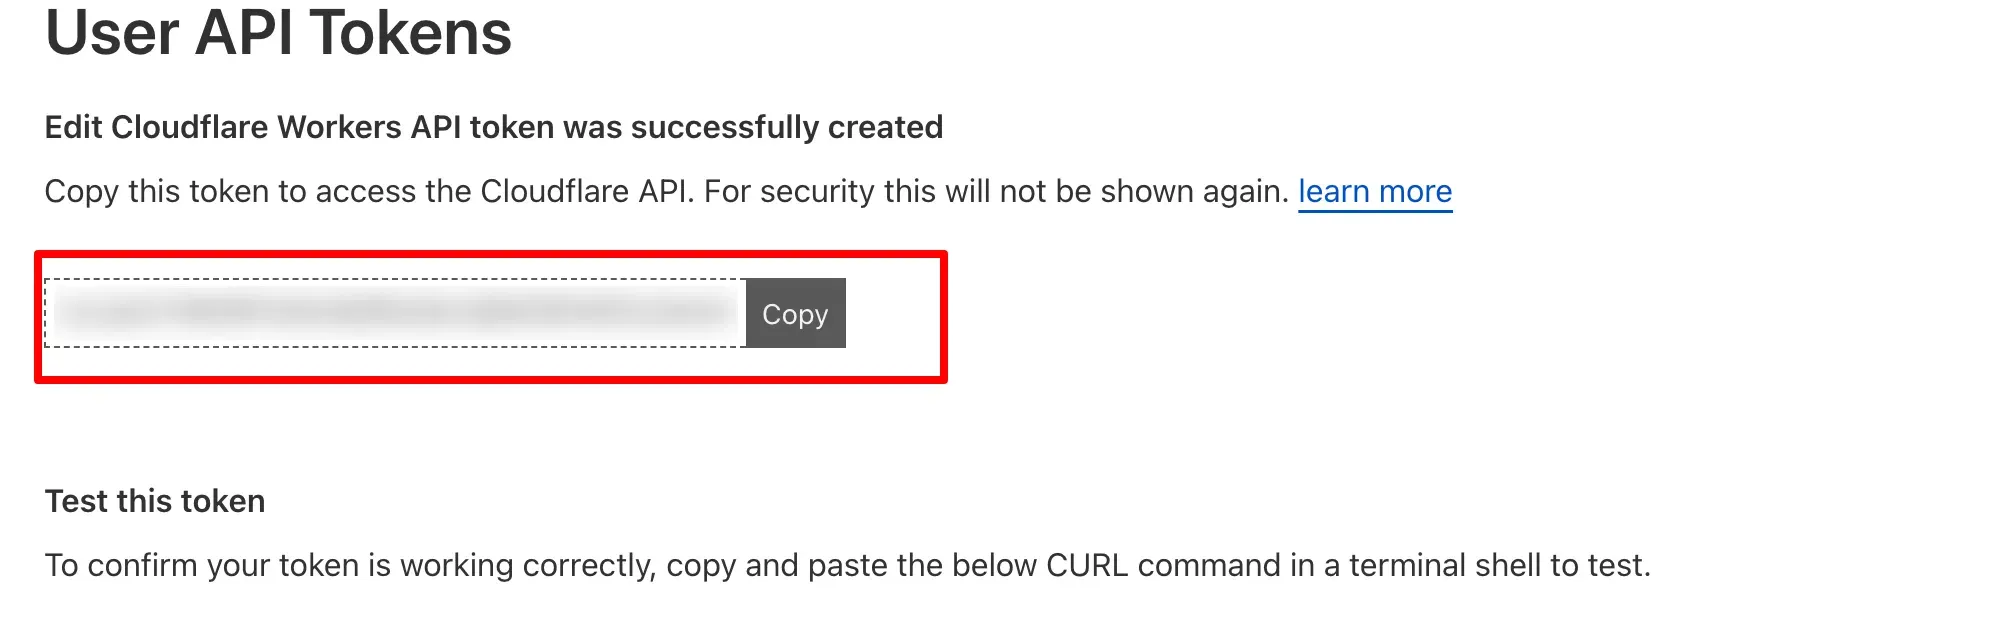
Copy the generated API token.
-
Paste the API token into the Cloudflare API Token field in CustomerLabs and click Save. You will be redirected to the 1P Domain Tracking dashboard.
-
After integrating your Cloudflare account, go back to the CustomerLabs home screen.
-
Click the 1P Domain Tracking Code tab, copy the updated tracking code, and reinstall it on your website.
Verification
Section titled “Verification”DNS Verification
Section titled “DNS Verification”You can check the “Verified” status in the 1P Domain Tracking dashboard in CustomerLabs to ensure that your DNS records are active and correctly mapped.
Installation Verification
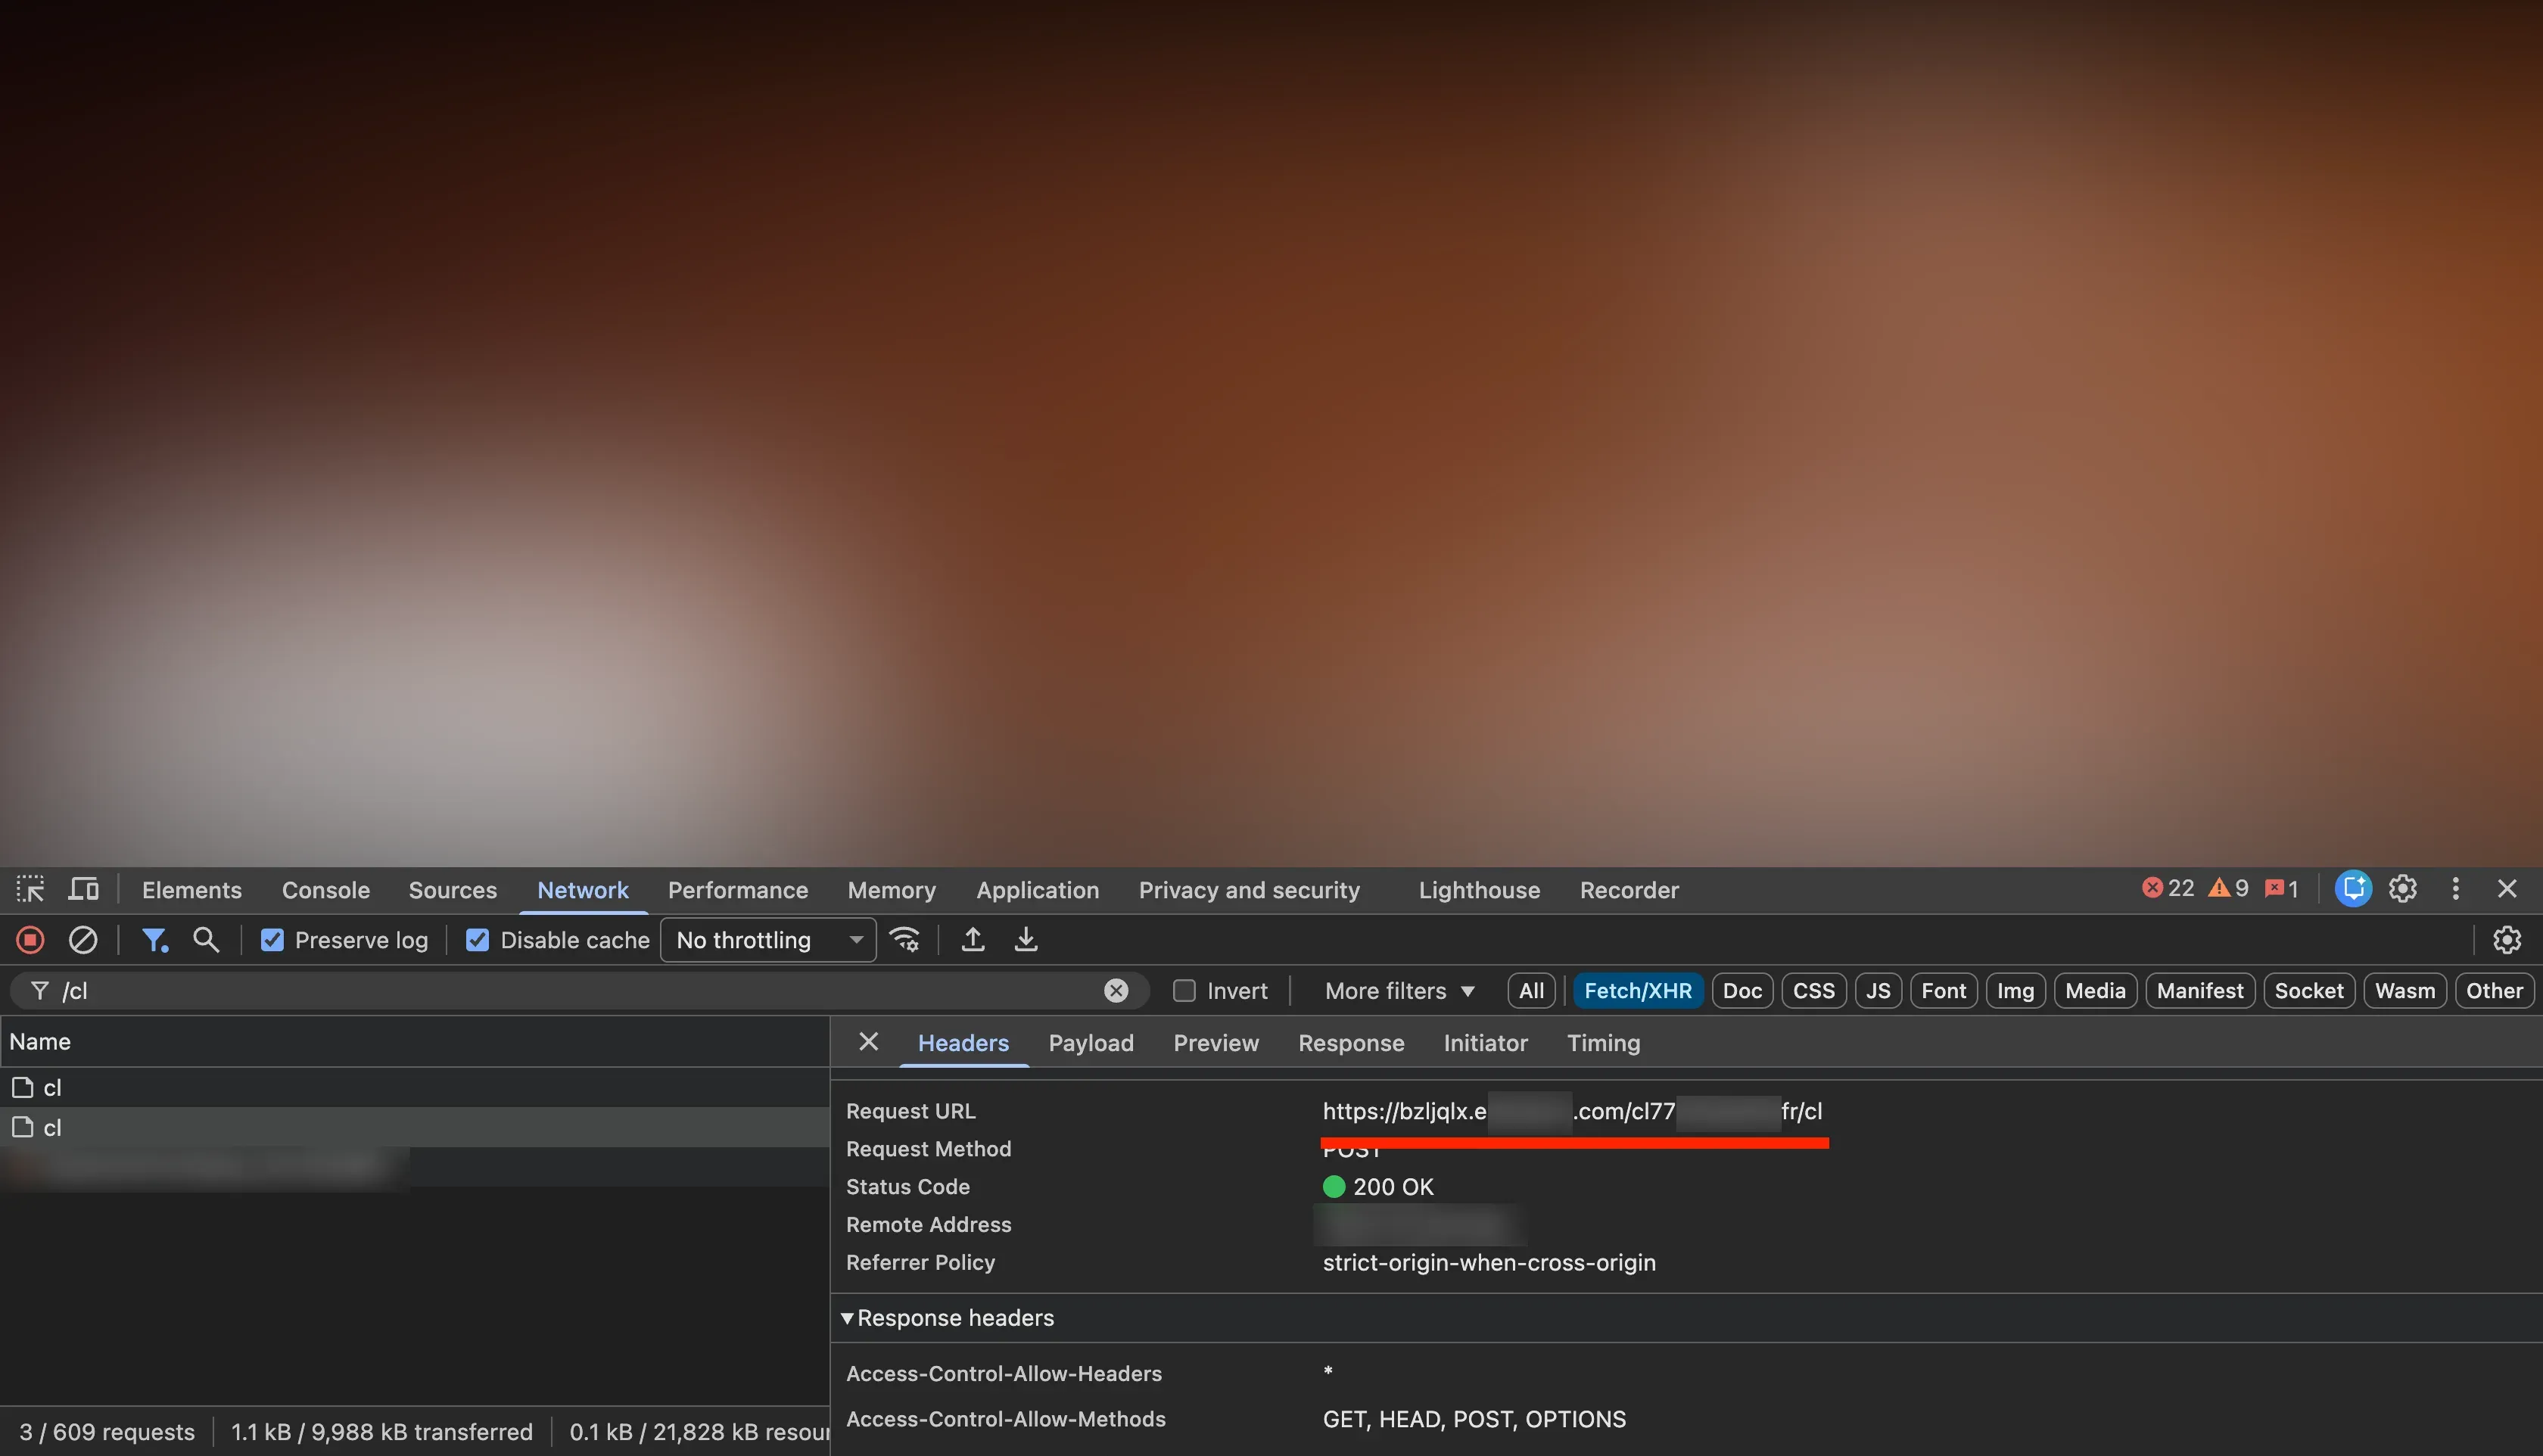
Section titled “Installation Verification”To verify that 1P Domain Tracking is successfully installed and functioning, inspect the cookies set in your browser’s developer tools:
- Before 1P Domain Tracking: The CustomerLabs cookie is set from the default tracking domain —
io.v2.customerlabs.co— even for your own domain (e.g.,example.com). - After 1P Domain Tracking: The CustomerLabs cookie will now be set directly from your own domain (e.g.,
www.example.com), confirming that all data collection is happening first-party.
You can verify this by:
-
Opening your website in Chrome.
-
Opening Website Inspect → Network tab.
-
In the filter search bar, type
/cl. -
Perform the activities and you will be able to see the events in the network tab.
-
Under the
headers, the request URL will be in the format ofhttps://<sub-domain>.<your-domain>.com/<tracking-id>/clinstead ofhttps://io.v2.customerlabs.co/cl.