TL;DR: Sending custom events to Google Tag Manager (GTM) requires creating dataLayer.push() snippets, setting up custom triggers, and configuring GA4 tags. However, manual coding often leads to developer bottlenecks and broken tracking schemas. Below is the step-by-step GTM setup guide plus how to automate the entire process without writing code.
Tracking standard user actions like page views or clicks isn’t always enough. As a performance marketer, you need to capture the non-standard interactions that truly matter. You should focus on actions that give you a clearer picture of user intent and behavior. This is where custom events come in.
With custom events in Google Tag Manager (GTM), you can track interactions that are specific to your business. This could range from adding items to wishlists to tracking engagement with embedded videos. Setting up these custom events lets you pinpoint key actions, optimize your campaigns, and improve your ROAS.
This guide walks you through the exact steps to build and send custom events to GTM, debug them, and map them in Google Analytics 4 (GA4).
So, let’s begin this guide with understanding what custom events are.
What are Custom Events in Google Tag Manager?
Custom events in Google Tag Manager (GTM) track user interactions that fall out-of-the-box triggers (like Page Views or All Link Clicks) don’t cover your specific requirements. Custom events fire conditionally based on data pushed to the browser’s Data Layer.
Common Custom Event Use Cases:
-
Form Submissions without Redirects: Ajax or single-page application (SPA) forms that don’t load a standard “Thank You” URL.
-
Custom UI Clicks: Interactions like “Add to Wishlist,” “Share,” or custom feature toggles.
-
Media Tracking: Time-threshold triggers on embedded videos (e.g., 50% or 75% watched).
Steps to Set Up Custom Events in Google Tag Manager
Step 1: Prepare a Data Layer Event Code
Before GTM can track an event, your website must send that event data to the browser’s Data Layer.
Work with your development team to define the event structure and include parameters in snake_case (lowercase with underscores) to align with GA4 standard naming rules:
window.dataLayer = window.dataLayer || [];
window.dataLayer.push({  event: "add_to_wishlist",  product_id: "1234",  category: "electronics"});
Adjust the variables to capture the specific details you want.
The Reality of Manual Data Layers: Developer Bottlenecks
-
The Delay: Every new custom event requires writing a technical spec, creating a Jira ticket, and waiting 2 - 3 weeks for developer sprint cycles.
-
The Risk: If your dev team updates your website’s UI, button classes, or page layout, your dataLayer.push() script can silently break, causing weeks of missing conversion data.
Step 2: Instruct Developers on Firing Conditions
Precision timing is critical for clean analytics:
-
Firing Timing: Ensure the event pushes immediately upon user interaction (e.g., as soon as the API response confirms the item was added to the wishlist).
-
Page Reload Edge Case: If the action triggers immediate page navigation or a form submission redirect, ensure your developer delays navigation slightly or fires the push asynchronously. Otherwise, the browser may refresh before GTM finishes firing the tracking tags.
Step 3: Test in GTM Preview and Debug Mode
Before creating GTM tags, verify that your site is pushing the code correctly.
-
Click Preview in your GTM workspace and connect your website.
-
Perform the target action (e.g., click “Add to Wishlist”).
-
Check the Tag Assistant panel on the left menu to ensure your custom event name (e.g.,
add_to_wishlist) appears under the event timeline.
Step 4: Configure and Set Up a Custom Event Trigger in GTM
Create Data Layer Variables:
-
Go to Variables > User-Defined Variables > New.
-
Select Data Layer Variable as the type.
-
Set Data Layer Variable Name to
product_id(must match your JavaScript code exactly). -
Name the variable
dlv - product_idand save.
Create the Custom Event Trigger:
-
Go to Triggers > New > Trigger Configuration.
-
Choose Custom Event.
-
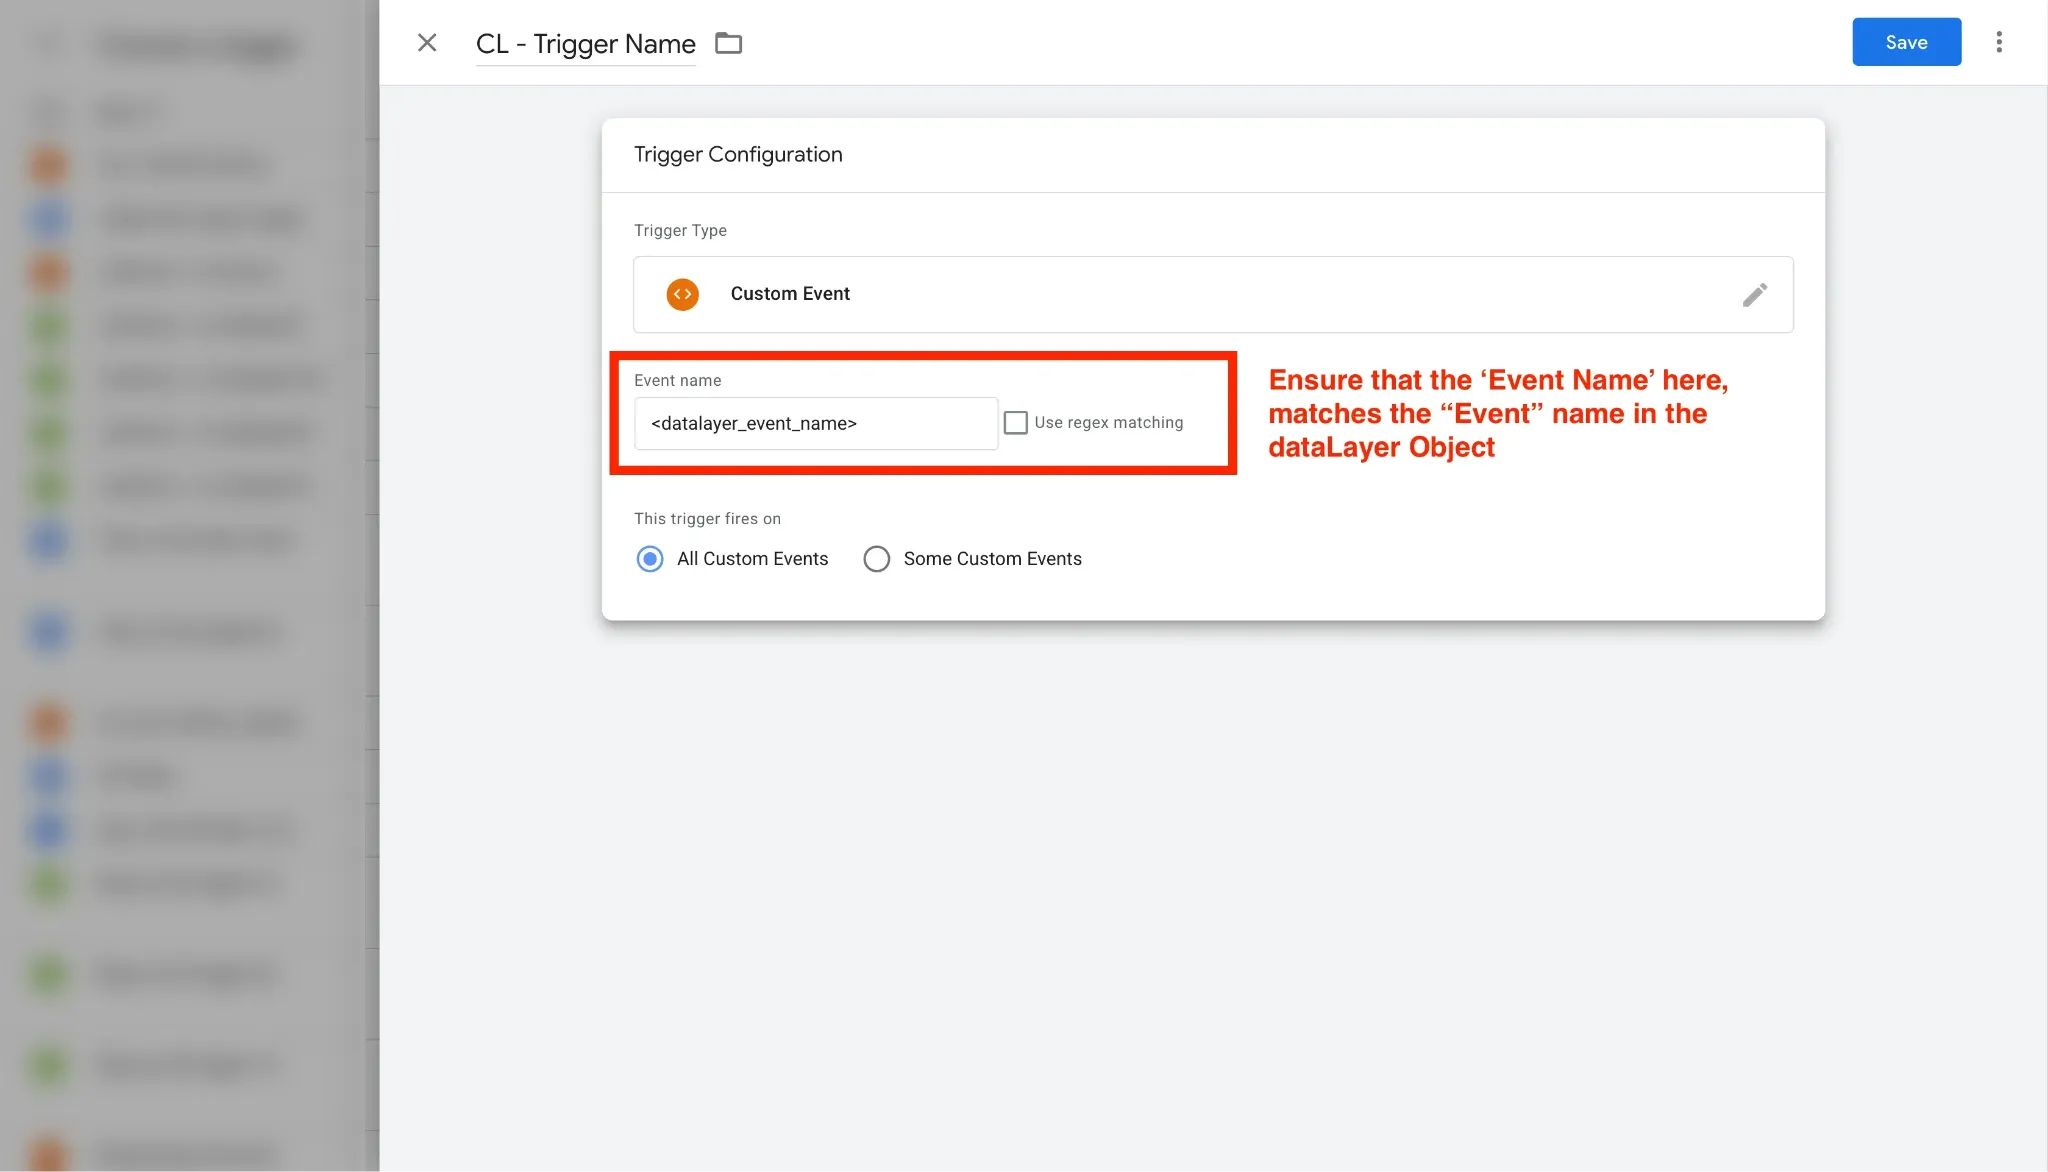
Set Event name to
add_to_wishlist.
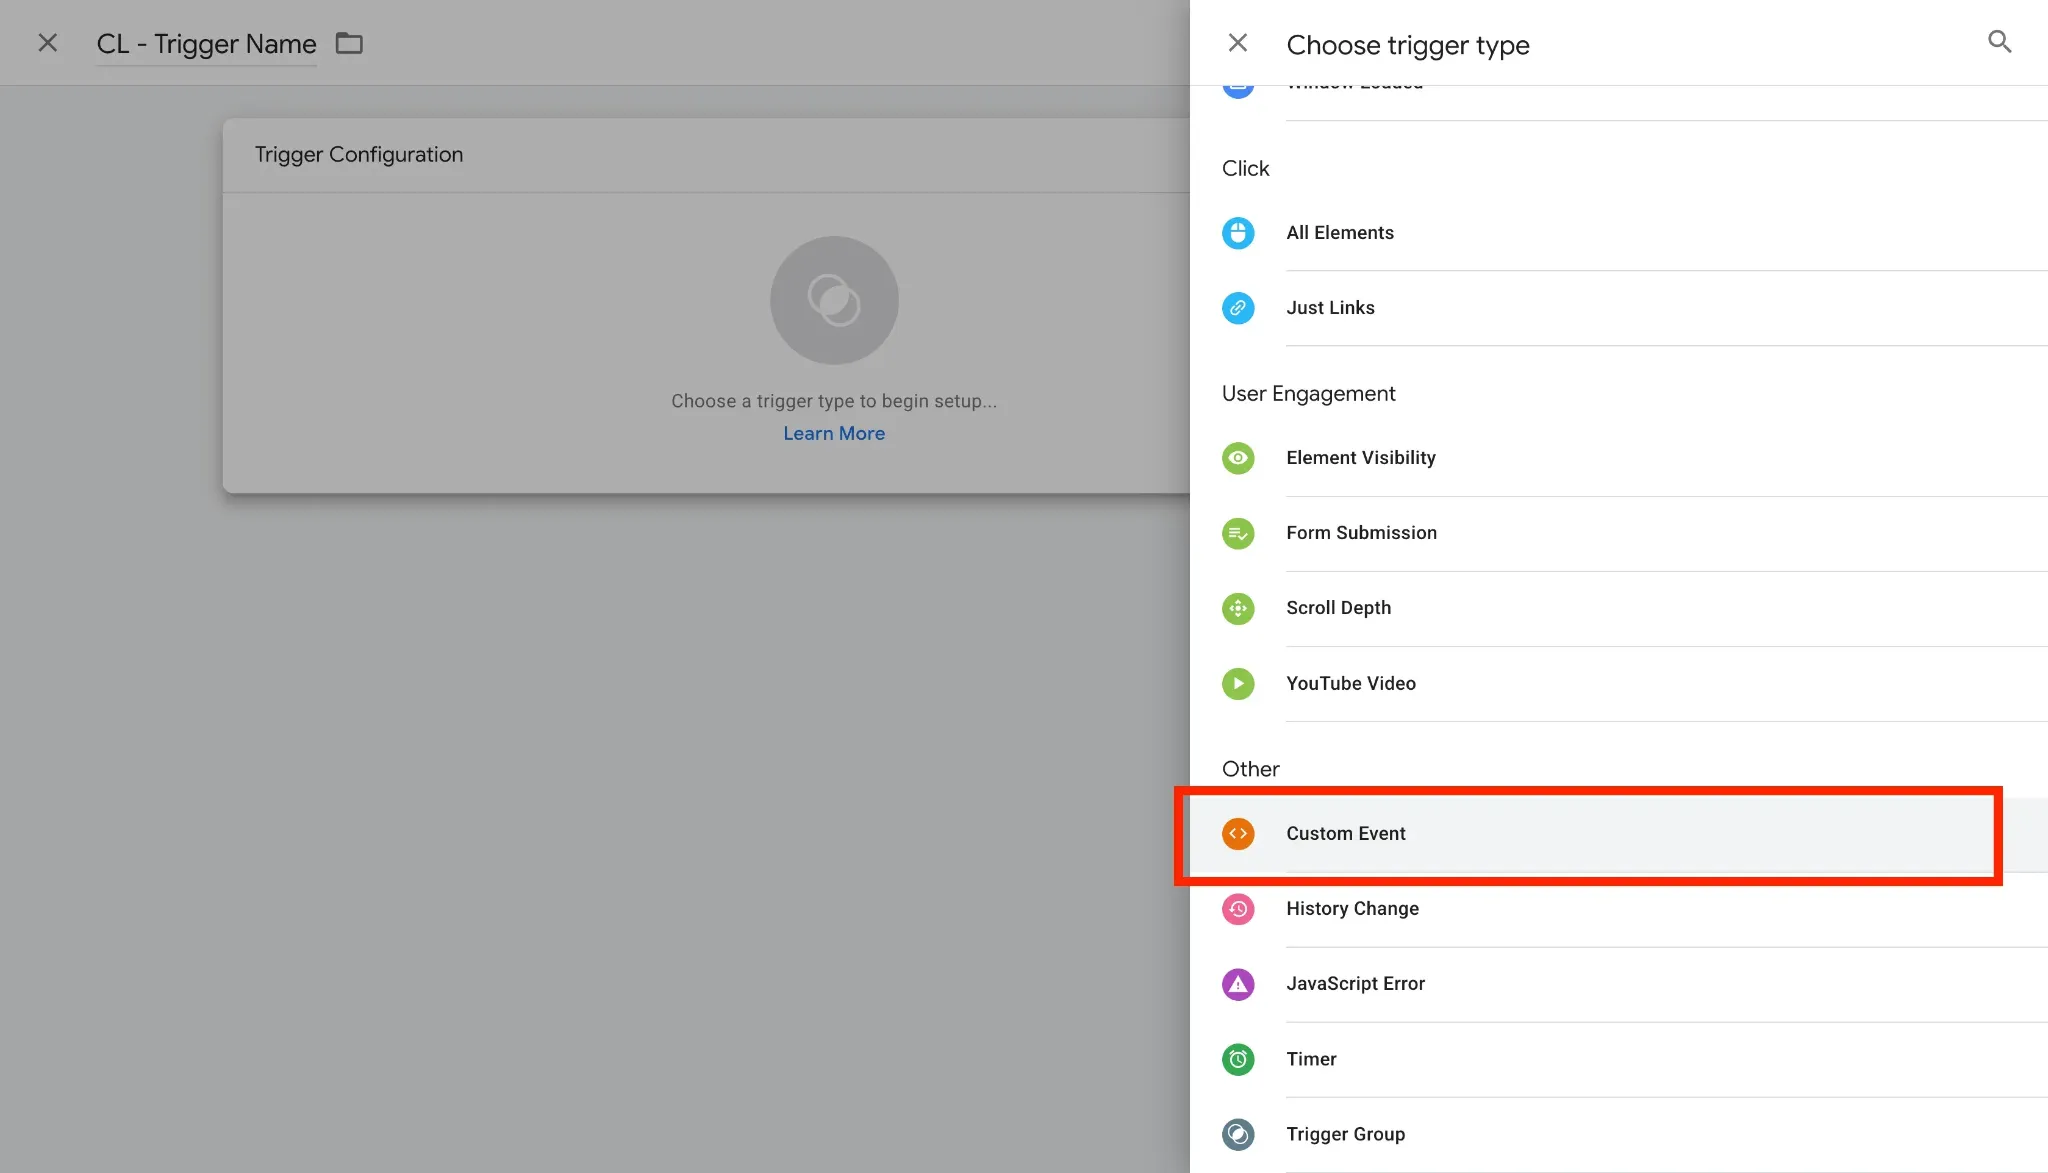
- Name the trigger Custom Event - add_to_wishlist and save.
Next, let’s dive into how to configure event tags, ensuring your custom events are properly logged in GA4 and other platforms for analysis.
Creating and Configuring Event Tags
Now that your custom event trigger is ready, the next step is to set up the event tag in Google Tag Manager. This is crucial for ensuring your event data is accurately sent to Google Analytics 4 (GA4) or any other platform you’re using for analysis.
Setting up a GA4 Event Tag in GTM
-
Create a New Tag: Go to Tags in Google Tag Manager. Then click New to create a new tag. Finally, click on Tag Configuration.
-
Select GA4 Event Tag: Choose Google Analytics: GA4 Event from the list of tag types.
-
Set the Event Name: For example, enter
sign_upas the Event Name. -
Add Event Parameters: Under Event Parameters, click Add Row.
-
For Parameter Name, enter
pricing_plan. -
For Value, enter
{{dlv – pricingPlan}}(this pulls the pricing plan from the Data Layer). -
Set the Trigger: Click Triggering and select the Custom Event Trigger for
registrationComplete. -
Save and Test: Click Save to save the tag. Test the tag by using Preview mode to ensure it fires when the
registrationCompleteevent is pushed to the Data Layer.
Also Read — Read our comprehensive guide on setting up GA4 server-side tagging.
Viewing Custom Events in Google Analytics 4
Once data reaches GA4, you must register custom parameters as Custom Dimensions to see them in custom reporting:
-
Log into GA4 and navigate to Admin (bottom-left gear icon) > Data display > Custom definitions.
-
Click Create custom dimension.
-
Set Dimension name to
Product ID. -
Set Scope to
Event. -
Set Event parameter to
product_id(matching your GTM parameter name). -
Click Save.
Testing and Debugging Custom Events
Once you’ve created and configured your event tags, you should test them before making them live. Testing ensures that the events are firing correctly and capturing the necessary data. Google Tag Manager’s Preview mode makes checking your setup in real-time easy.
Here’s how to Use Preview Mode to Test the Setup:
-
Enable Preview mode: In GTM, click on the “Preview” button. This will open a debug session on your website, allowing you to see which tags and triggers are firing as users interact with your site.
-
Simulate user actions: Perform the actions you’ve set custom events for, such as adding a product to the wishlist. Watch the Tag Assistant debug panel to ensure your custom event fires correctly and matches the expected event name.
-
Check data accuracy: Verify that all event parameters, such as product ID and category, are being passed correctly to Google Analytics 4 (GA4). This ensures that the collected event data is accurate and ready for reporting.
Now that you’ve successfully tested and debugged your custom events, the next step is configuring Data Layer variables to pass even more detailed data to your reporting tools like GA4.
Manual GTM Setup vs. No-Code Event Automation
Before spending developer hours writing custom Data Layer scripts for every new button or form, compare the manual GTM approach with automated First-Party Data Ops:
| Feature / Capability | Manual GTM + Data Layer Setup | CustomerLabs No-Code Event Builder |
|---|---|---|
| Setup Time | Days to weeks (Requires Developers) | Under 5 Minutes (Visual Point-and-Click) |
| Developer Dependency | High (Requires ongoing code updates) | Zero (Marketers set up events visually) |
| Maintenance & Site Audits | High (Breaks when site UI or DOM changes) | Self-Healing (Resilient to site UI updates) |
| Ad Blockers & Privacy Protection | ❌ None (Client-side scripts get blocked) | ✅ Built-In Server-Side First-Party CAPI |
| Multi-Platform Event Sync | Manual tag setup for every platform | 1-Click Sync to GA4, Meta, Google Ads & TikTok |
Next, we’ll explore how to view and utilize these custom events in Google Analytics 4, ensuring you can analyze and act on the data you’re capturing.
Viewing and Utilizing Custom Events in Google Analytics 4
Now that your custom events are firing and capturing important user interactions, the next step is to make sense of that data in Google Analytics 4 (GA4). You can extract meaningful insights by setting up custom definitions and creating reports.
Here’s how to set custom definitions in GA4 for viewing custom events:
-
Navigate to the Custom Definitions section: In GA4, go to “Configure” > “Custom Definitions.” This is where you can map your custom event data to make it easy to view in reports.
-
Add custom event parameters: Create a new custom definition by selecting the custom event parameters you’ve set up in GTM, like
productIDorcategory. This helps you monitor specific user actions in GA4. -
Ensure correct parameter mapping: Verify that the event names and parameters match exactly with what you used when you sent the event to Google Tag Manager.
Creating Custom Reports in GA4 to Analyze Event Data
Once you’ve set up custom definitions, you’ll want to create custom reports to analyze how users interact with your site.
-
Build custom reports: Head over to “Explore” in GA4 and create a custom report. Use custom event definitions to filter and segment the data for deeper insights.
-
Segment event data: Use filters like event name or parameters (e.g., product category) to break down user behavior and identify trends that can improve your campaigns.
The Smarter Alternative: Capture Custom Events Without Developer Bottlenecks
While Google Tag Manager is a powerful tool for setting up custom events, it requires collaboration with developers and a certain level of technical expertise.
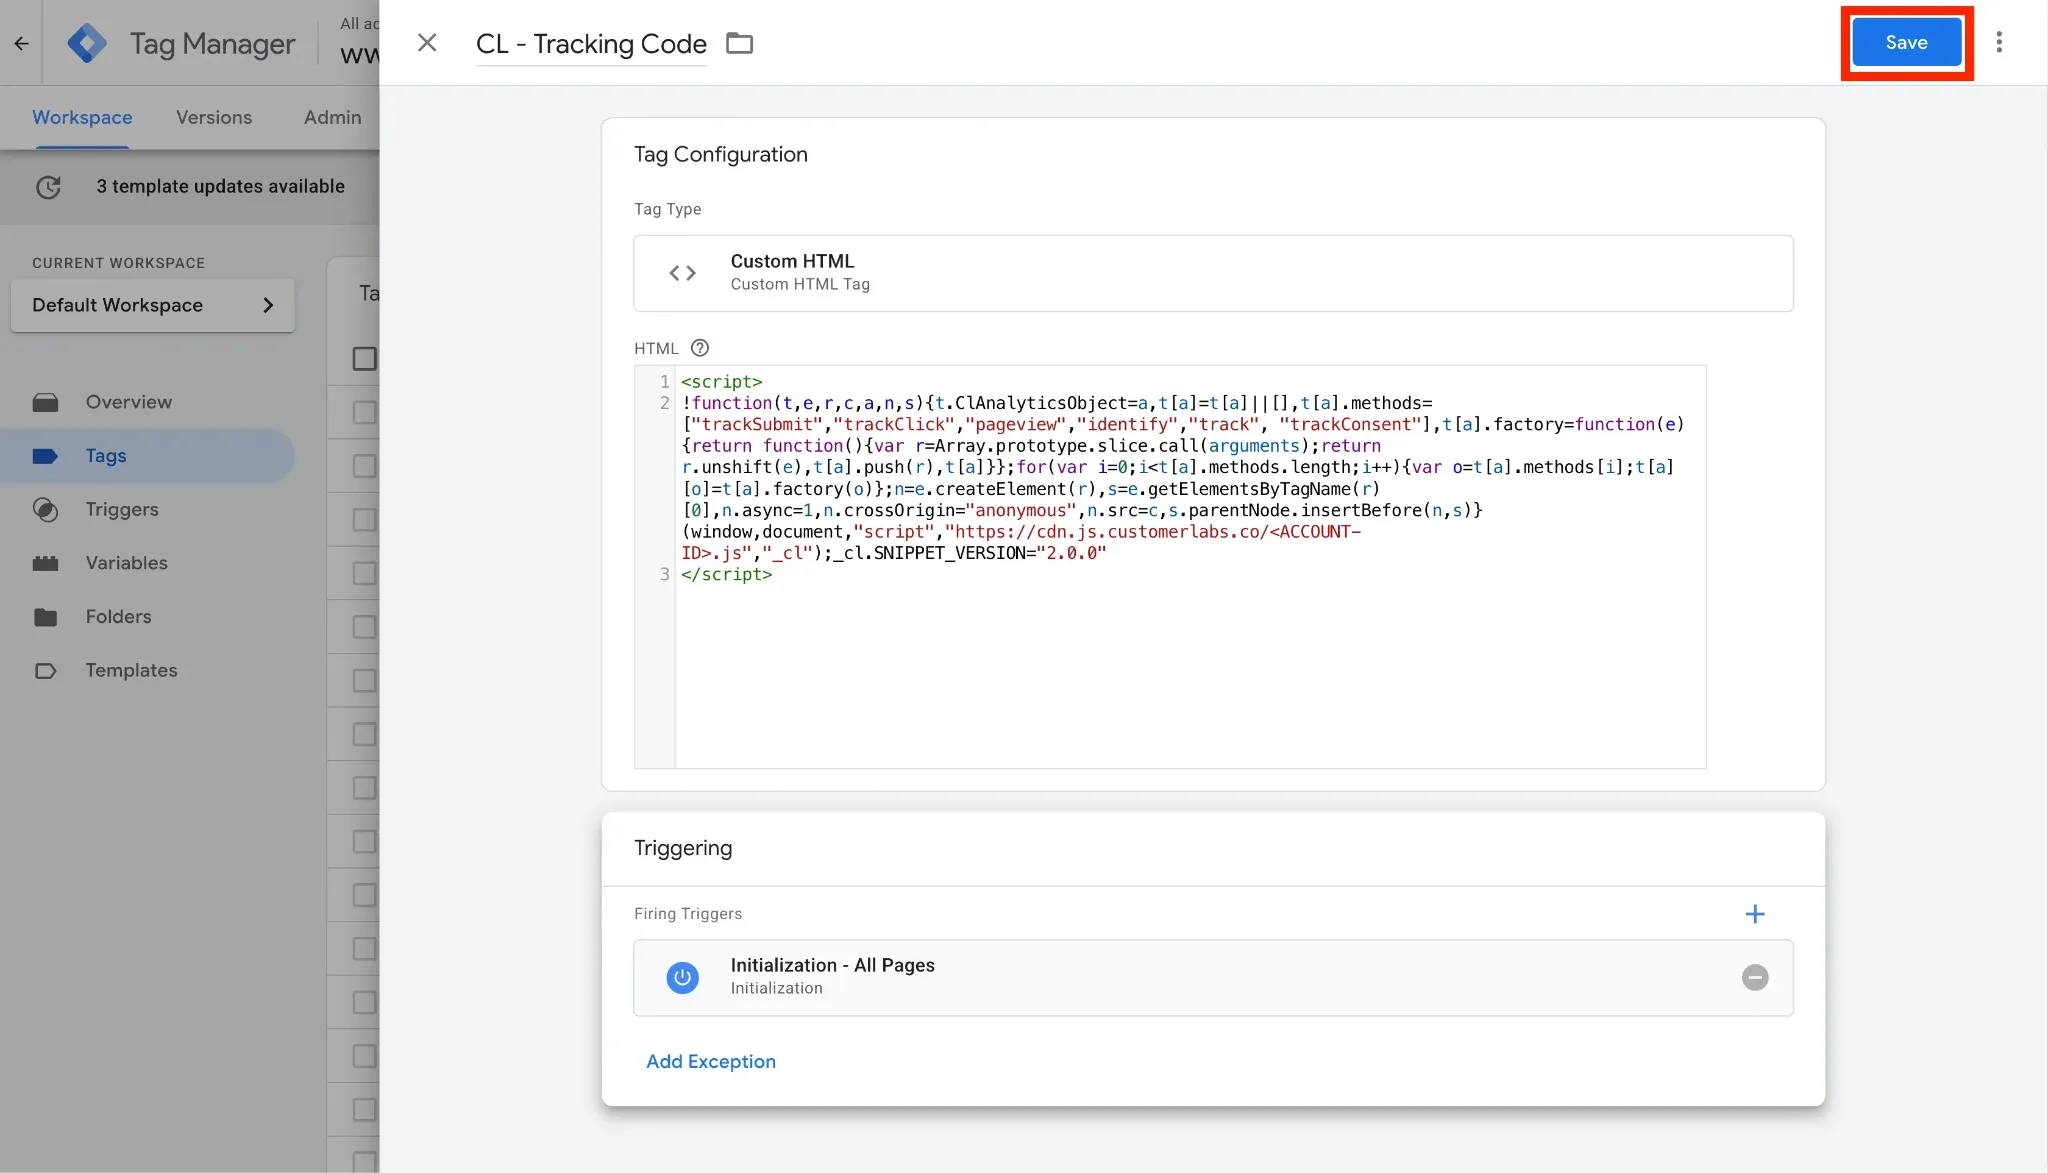
For those seeking a simpler alternative, there’s a solution designed with ease in mind.
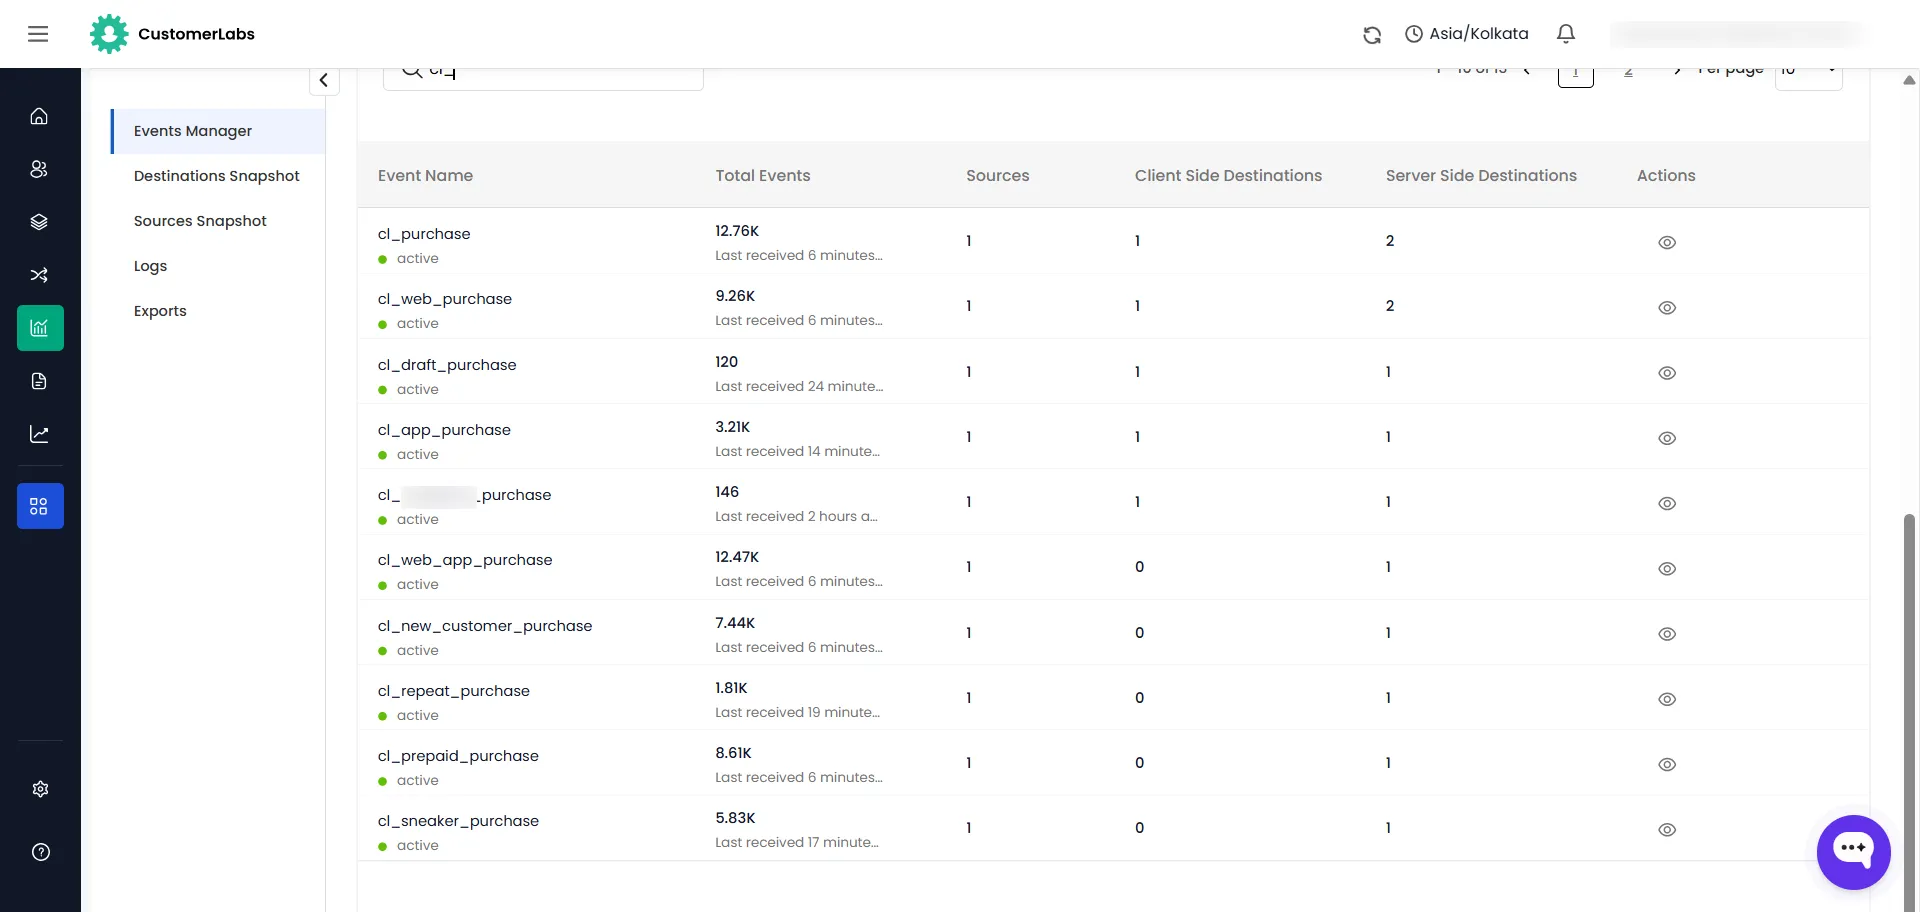
Traditional GTM Route: Marketer Idea ──> Dev Ticket ──> Code Sprint ──> QA Testing ──> Live (3 Weeks)
CustomerLabs Route: Marketer Idea ──> Visual Point-and-Click Builder ──> Live Immediately (3 Minutes)
Why Performance Marketers Combine CustomerLabs with GTM
Right now, growth teams are trapped between two bad options: waiting weeks for developers to write custom Data Layer code, or losing 30%+ of conversion data to browser privacy restrictions and ad blockers. CustomerLabs paired with Google Tag Manager bridges this exact gap, giving marketers visual, no-code control while routing clean, server-side signals (CAPI) straight to GA4 and ad platforms.
Most performance teams think tracking is just about firing an event when a user clicks a button. But in an era of strict privacy laws and AI-driven ad algorithms, raw data isn’t enough, you need Signal Engineering.
While Google Tag Manager simply passes raw JavaScript variables, CustomerLabs acts as a First-Party Signal Engine:
-
Zero Dev Bottlenecks: Marketers get a visual, point-and-click event builder to track button clicks, form submits, and custom funnel steps instantly, no JavaScript required.
-
Future-Proof Data Accuracy: Instead of relying on vulnerable browser pixels, CustomerLabs routes first-party data server-side (via CAPI) straight to Ad platforms.
-
Plug-and-Play Integration: You don’t need to rip out your existing setup. CustomerLabs connects directly into your current GTM container using pre-built templates, giving you the speed of a no-code tool paired with the full architectural control of GTM.
Follow our step-by-step Google Tag Manager Setup Documentation to connect CustomerLabs in under 5 minutes.
Conclusion
Setting up custom events in Google Tag Manager is a powerful way to track specific user interactions that go beyond standard actions. You gain deeper insights into user behavior by understanding how to send an event to Google Tag Manager, configuring Data Layer variables, and utilizing GA4 for analysis.
These custom events allow you to optimize campaigns, tailor your tracking to business needs, and unlock more advanced marketing strategies. Working closely with your developers ensures smooth implementation, enabling you to gather accurate data and maximize your results.
However, not all businesses have the technical resources to implement these events seamlessly. That’s why tools like CustomerLabs exist—to simplify event tracking without compromising on functionality. Whether you choose GTM or a no-code alternative, the goal remains the same: to capture the actions that matter and turn them into meaningful data.
Start building smarter campaigns today by selecting the tracking approach that best fits your team’s needs and expertise.
![How to Install Google Tag Manager on Shopify [with Steps]](/_astro/Setting-Up-Google-Tag-Manager-on-Shopify-Step-by-Step.C3-g4sbn_ZMO7VA.jpg)