In today’s privacy-first world, relying on browser-only tracking for your Shopify store is like driving blindfolded. Meta retired legacy attribution windows, Shopify updated its default data-sharing behaviors, and browser privacy restrictions continue to strip away client-side signals.
The Shopify Meta Conversions API (CAPI) routes key customer events like purchases, add-to-carts, and checkouts — directly from your server to Meta instead of relying on a customer’s browser. This bypasses ad blockers, iOS opt-outs, and 7-day cookie caps to deliver accurate conversion data and lower acquisition costs.
This guide breaks down why native setups fall short, how to implement a complete first-party server-side connection step-by-step, and how to verify your tracking with real performance benchmarks.
Why 2026 Privacy Updates Broke Native Tracking
-
Attribution Window Changes: Meta retired the 7-day-view and 28-day-view windows. Standard reporting now relies on 7-day click / 1-day view, causing reported conversions to drop overnight for stores without server-side signals.
-
Shopify Data-Sharing Shifts: App-pixel default settings moved from “Always On” to “Optimized,” giving lower-volume pixel signals less weight in ad delivery algorithms.
-
Conversion Reclassification: Meta narrowed click-through thresholds and updated video engagement definitions, making precise server-side data matching essential for campaign optimization.
Why is Meta data wrong even though it has a pixel?
If you already have a Meta Pixel and Shopify’s own Facebook integration, and your numbers still look wrong, the cause is usually one of four things.
Shopify’s Native CAPI Still Depends on the Browser: Shopify’s default Conversions API fires its server event via a browser-based Web Pixel. If a customer’s browser blocks scripts or fails to load the thank-you page, the server-side event fails alongside it.
Meta’s One-Click CAPI is a Black Box: While Meta’s native one-click setup handles basic server infrastructure, it cannot enrich events with offline CRM data, subscription statuses, or custom attributes. You also do not own the first-party cookie, leaving you vulnerable to short cookie lifetimes.
One-Click Checkouts Lose Purchases Outright: Tools like Fastrr (Shiprocket), GoKwik, Shopflo, and FlexyPe bypass standard Shopify checkout flows. Native CAPI fails to capture these bottom-funnel orders completely unless a dedicated webhook layer is configured.
For a deeper comparison of the two client-side and server-side methods themselves, see Meta pixel vs conversions API.
Step-by-Step Shopify CAPI (Conversions API) Setup
What you’ll need
- Shopify: admin access to your store backend
- Meta: Business Manager access, plus full access to the Ad Account and the Pixel
- CustomerLabs: an active account and your API key (Account Settings → API Key)
- Time: allow 45–60 minutes for a first setup, including verification
Part 1: Connect your Shopify store
Step 1 — Connect your domain. In CustomerLabs, go to the Default Ecommerce Events section and click Shopify. Click Add Domain, then copy your domain from Shopify → Domain Settings and paste it in. Add any sub-domains under URL Management.
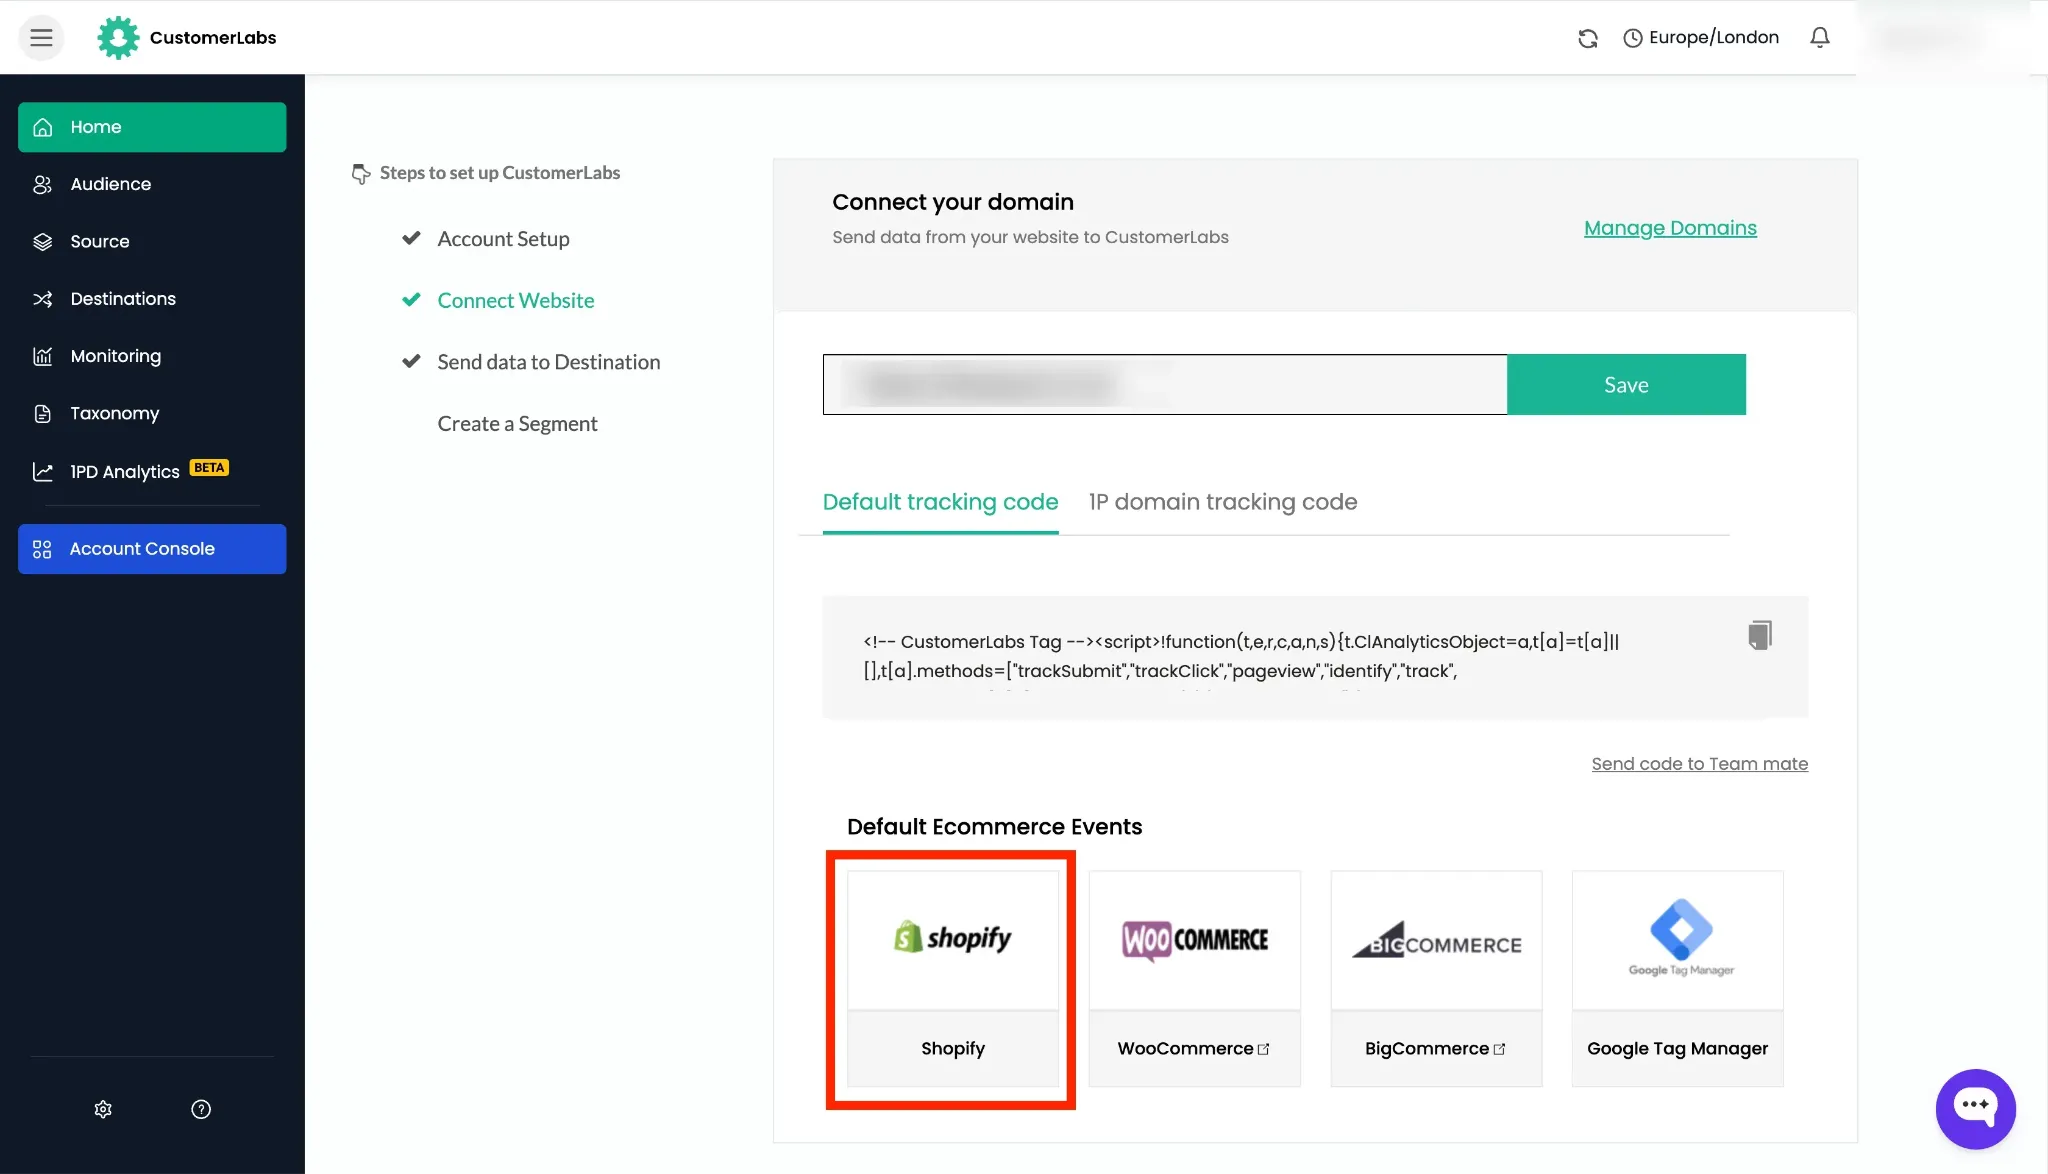
Step 2 — Install the CustomerLabs Shopify app. Click Open Shopify App Store and install the app. Authenticate with your CustomerLabs account email and API key.
Step 3 — Enable the tracking script. Open the Theme Editor, go to App embeds, and enable the CL script toggle. Save.
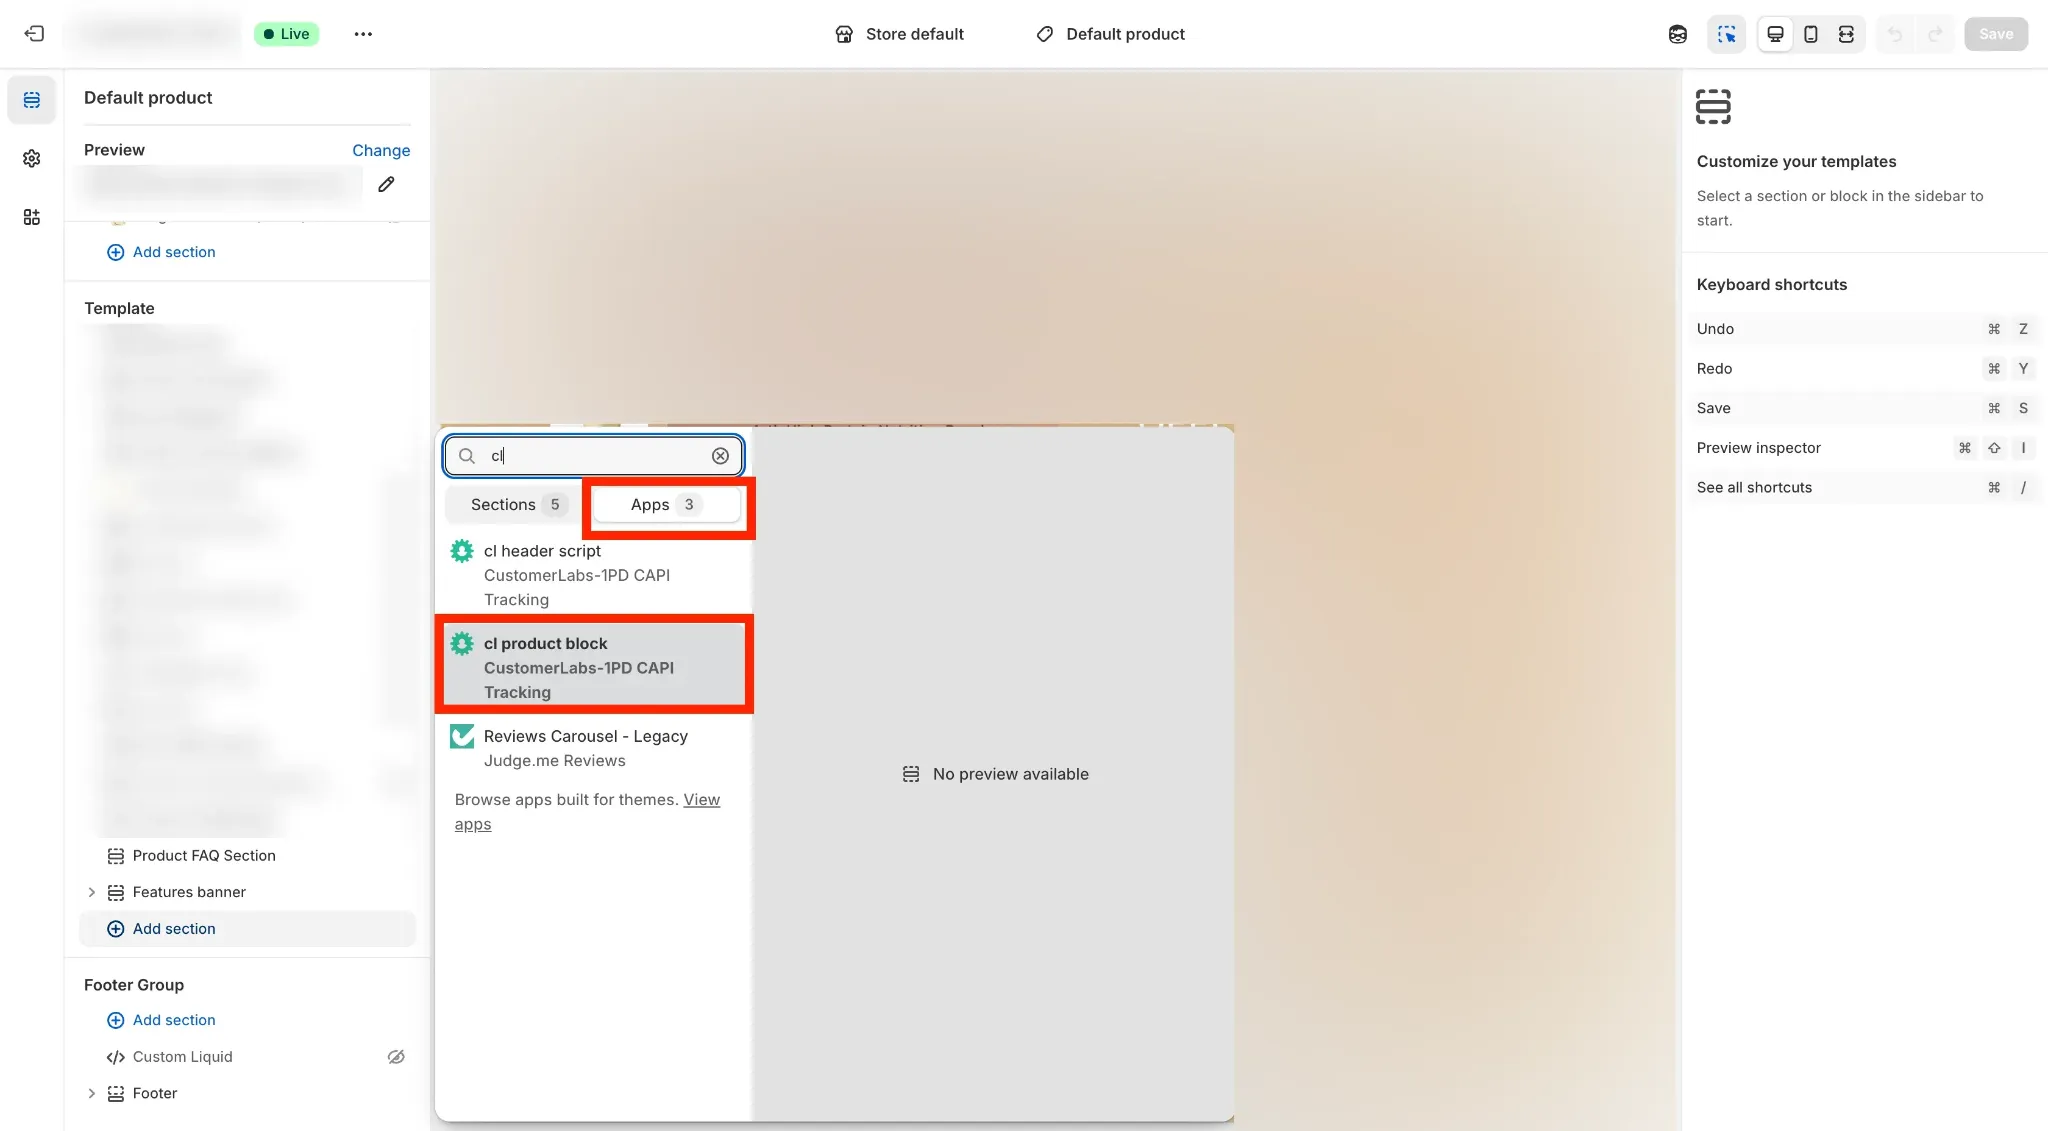
Step 4 — Add the product-page block. Open your Default Product Page, go to the Template section, click Add Section, open the Apps tab, and select the CL Product block. Save.
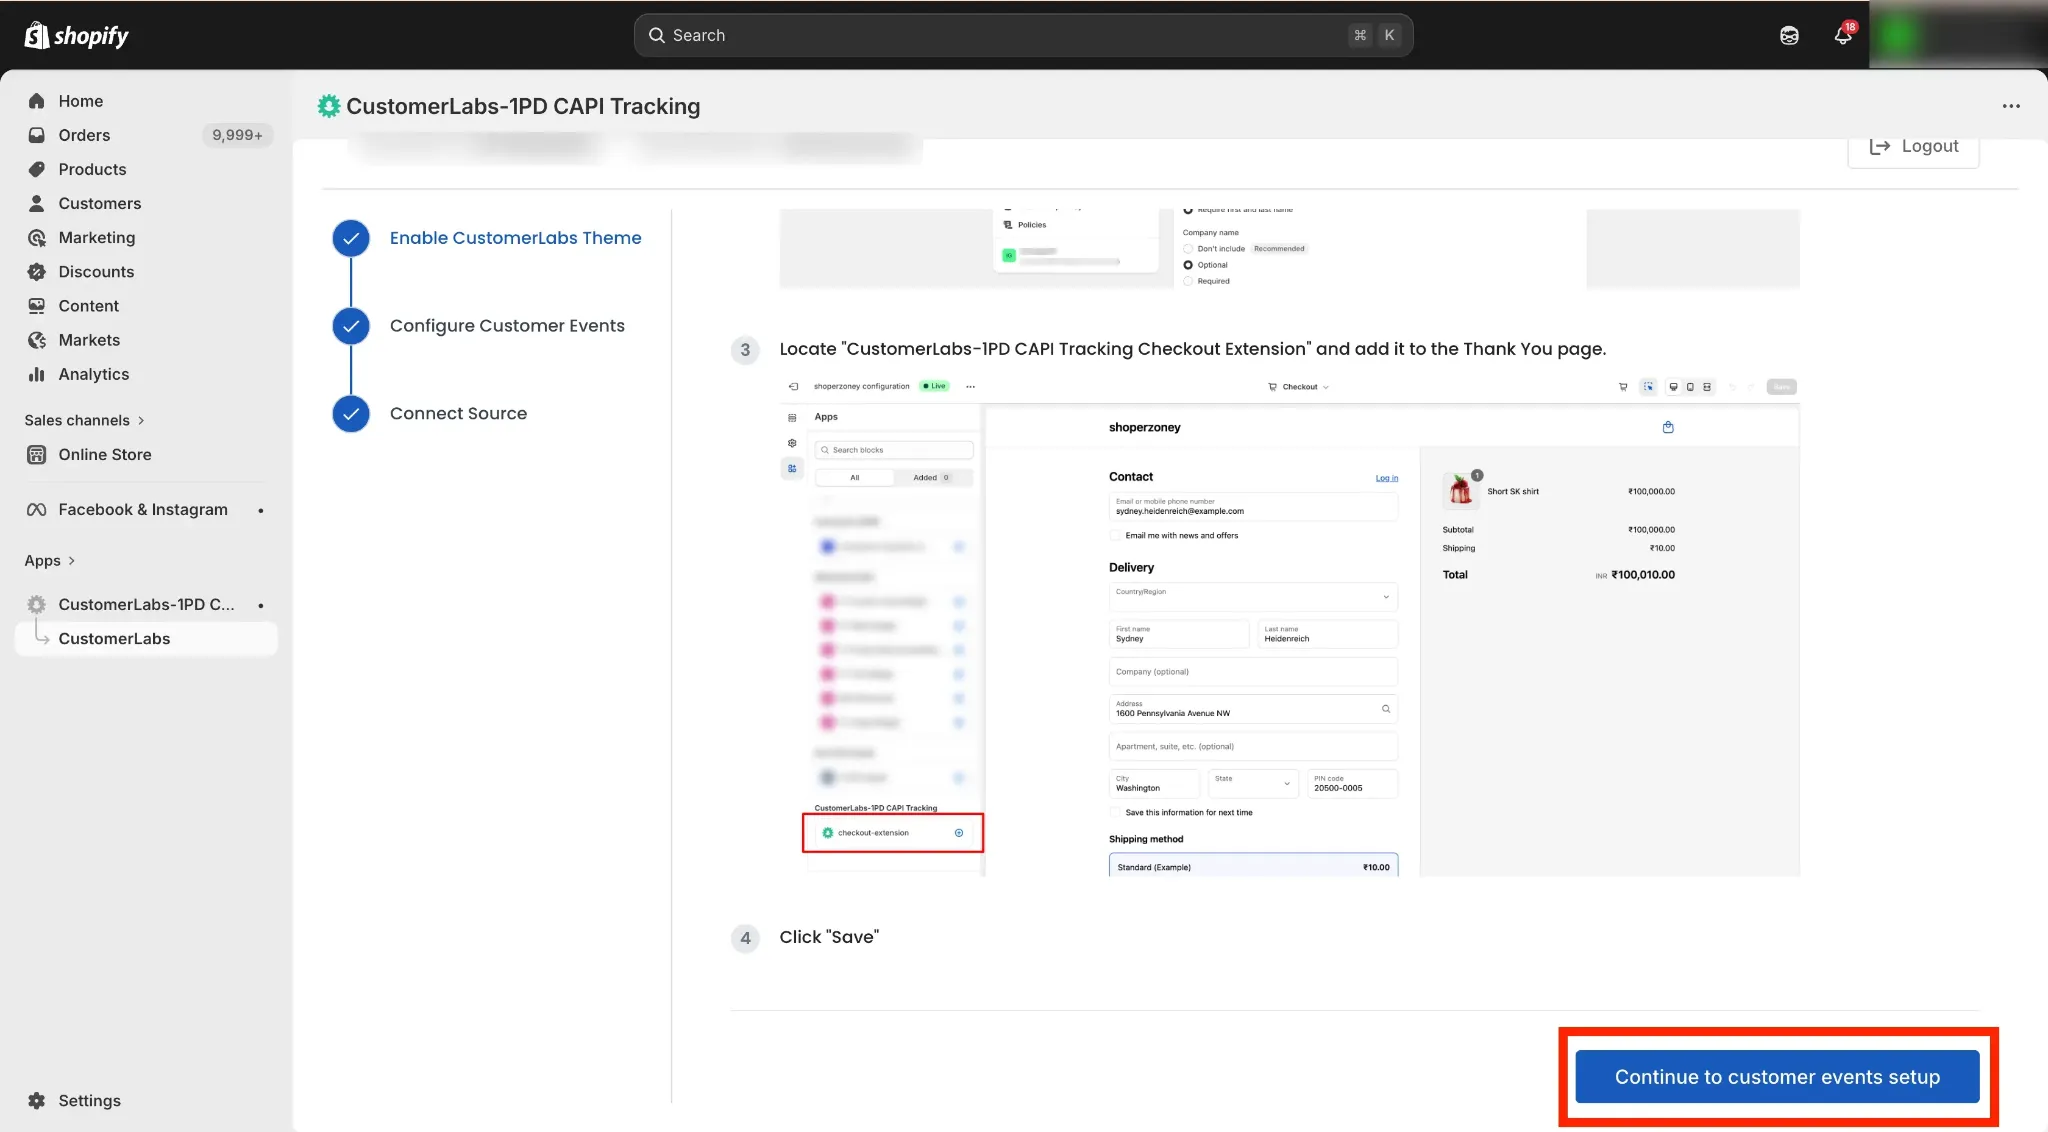
Step 5 — Add the checkout extension. Open Checkout Settings and click Customize. Go to App Embeds, scroll to the bottom of the left sidebar, and click the + icon in Checkout Extension. Add it to the Thank You page and save.
Step 6 — Add the custom pixel. In Shopify, go to Settings → Customer Events → Custom Pixel → Add Custom Pixel. Name it CustomerLabsPixel and paste in the code from CustomerLabs. Then update lines 53 and 54 to true:
track_cart_token_on_addToCart: true,use_variant_id_as_product_id: true,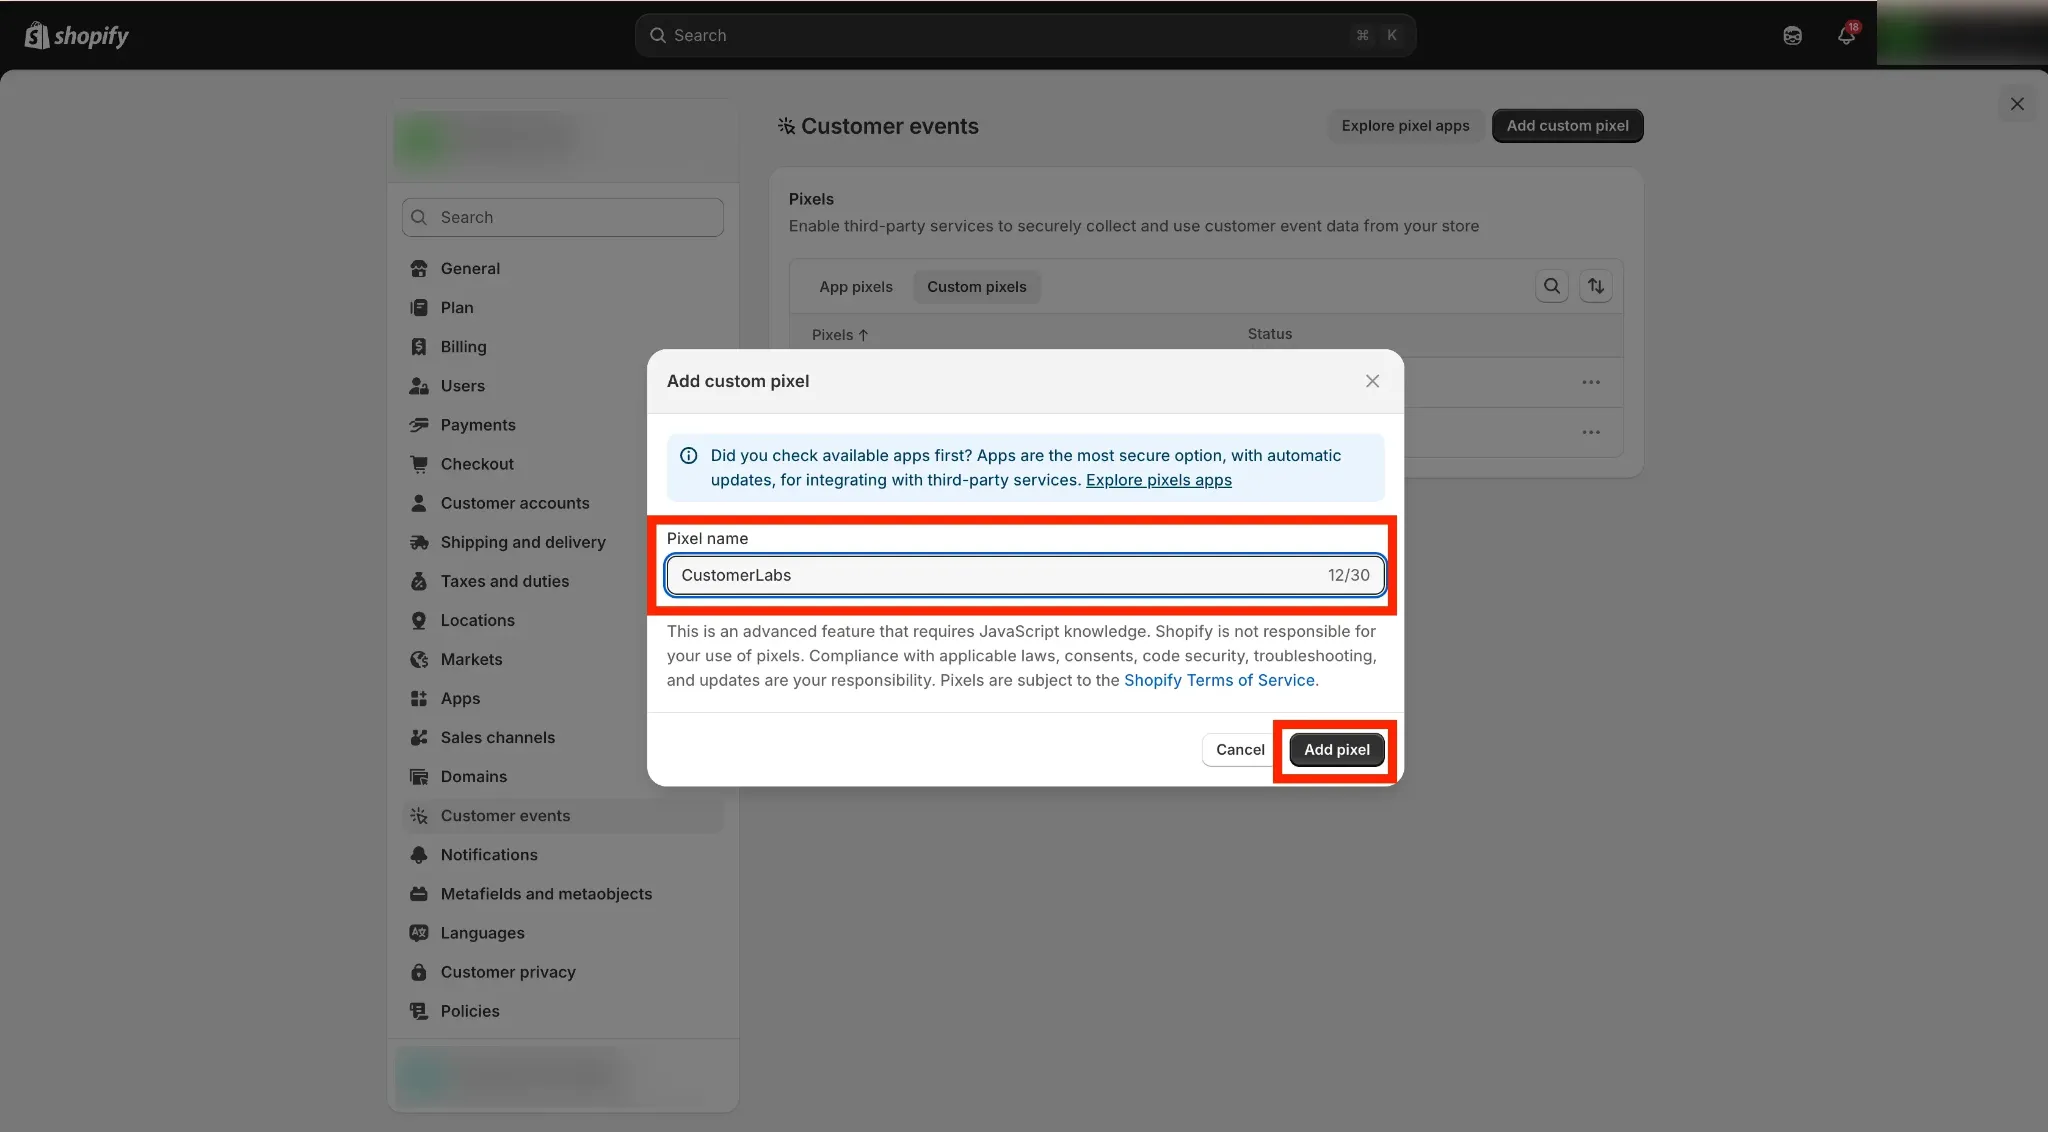
Adjust the permissions to match your region’s privacy laws, save, then click Connect.
Step 7 — Connect the purchase webhook. Click Connect to set up the webhook, then confirm the source appears under Sources in CustomerLabs. Purchase data now comes from Shopify’s backend rather than the browser, which is what makes the Purchase event reliable.
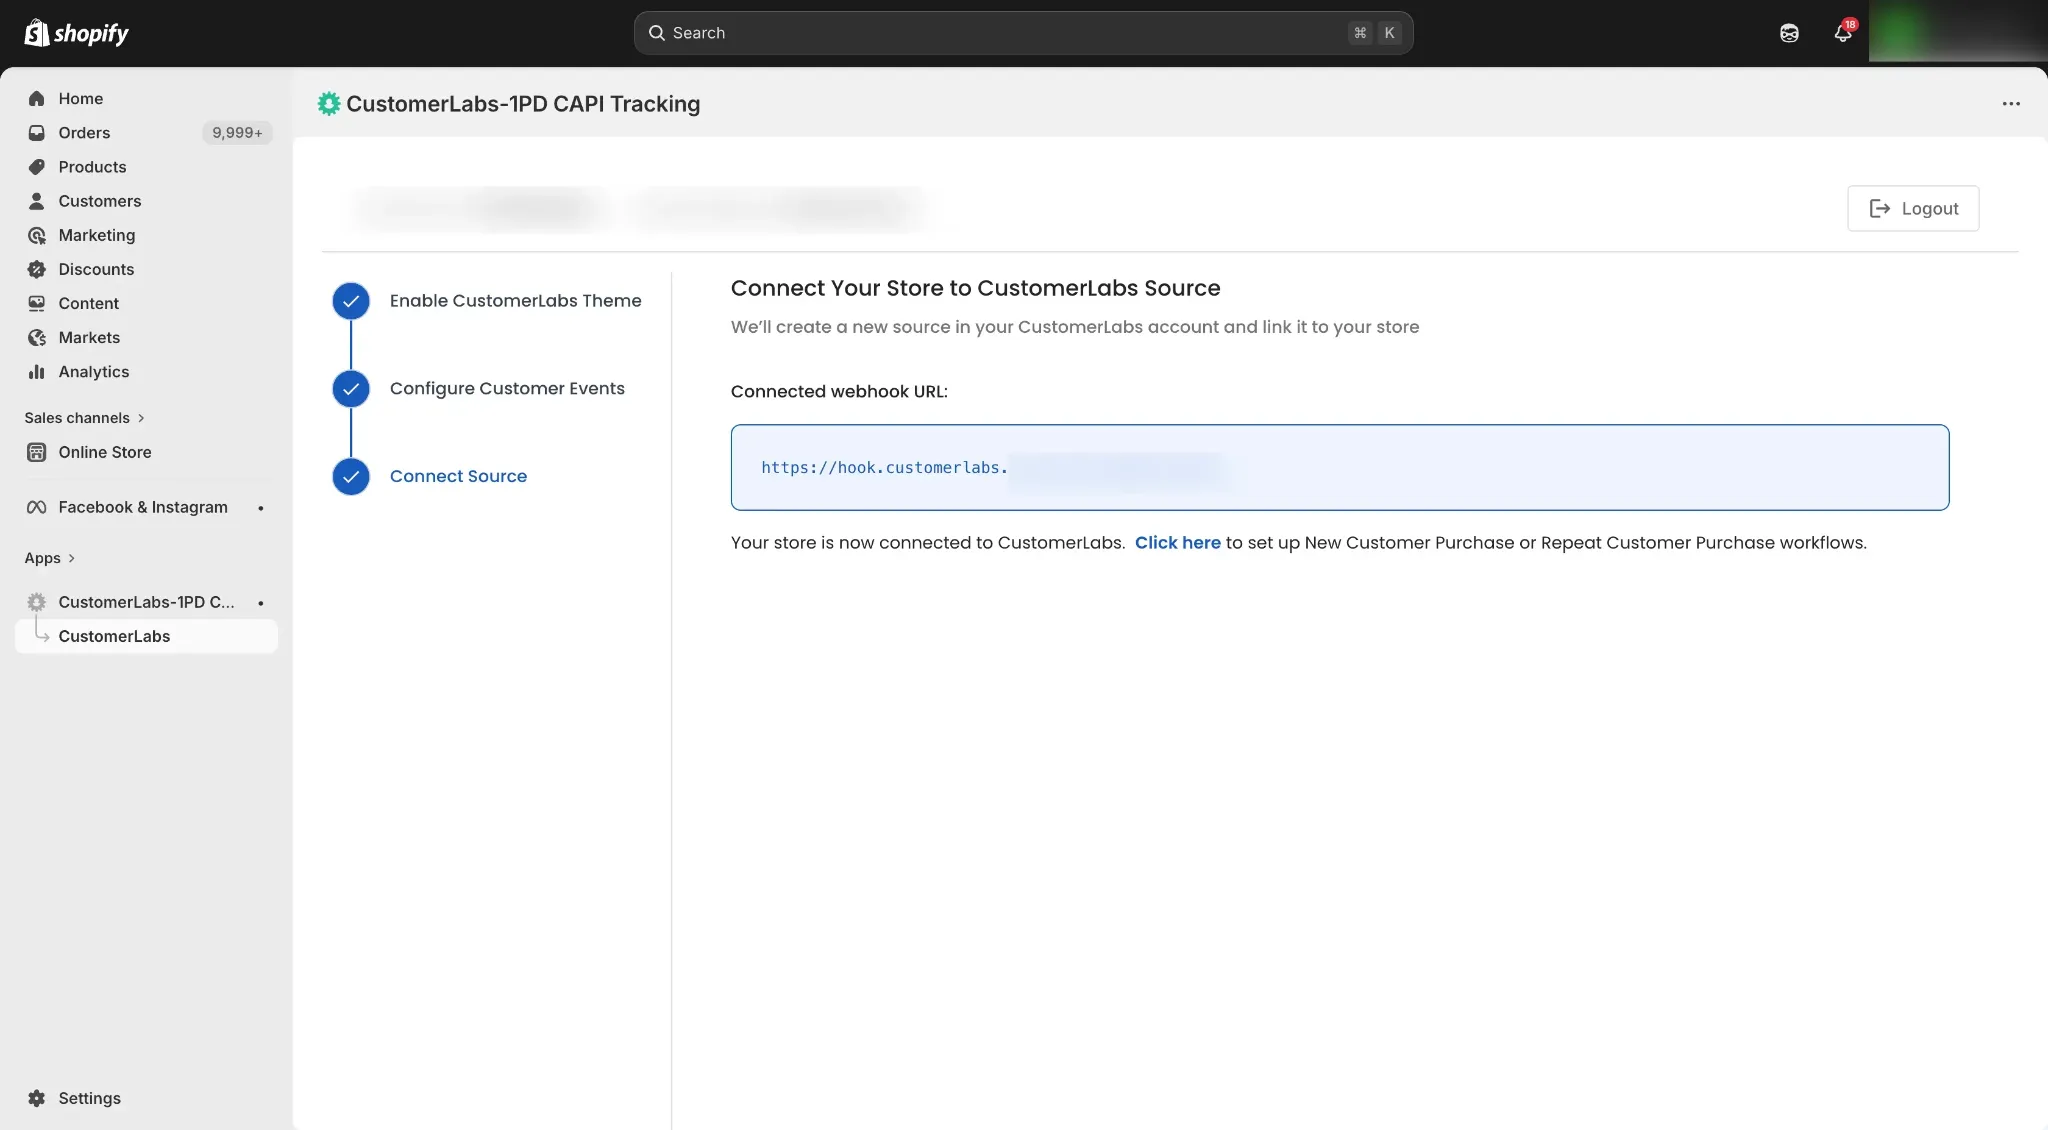
Part 2: Audit the purchase workflow
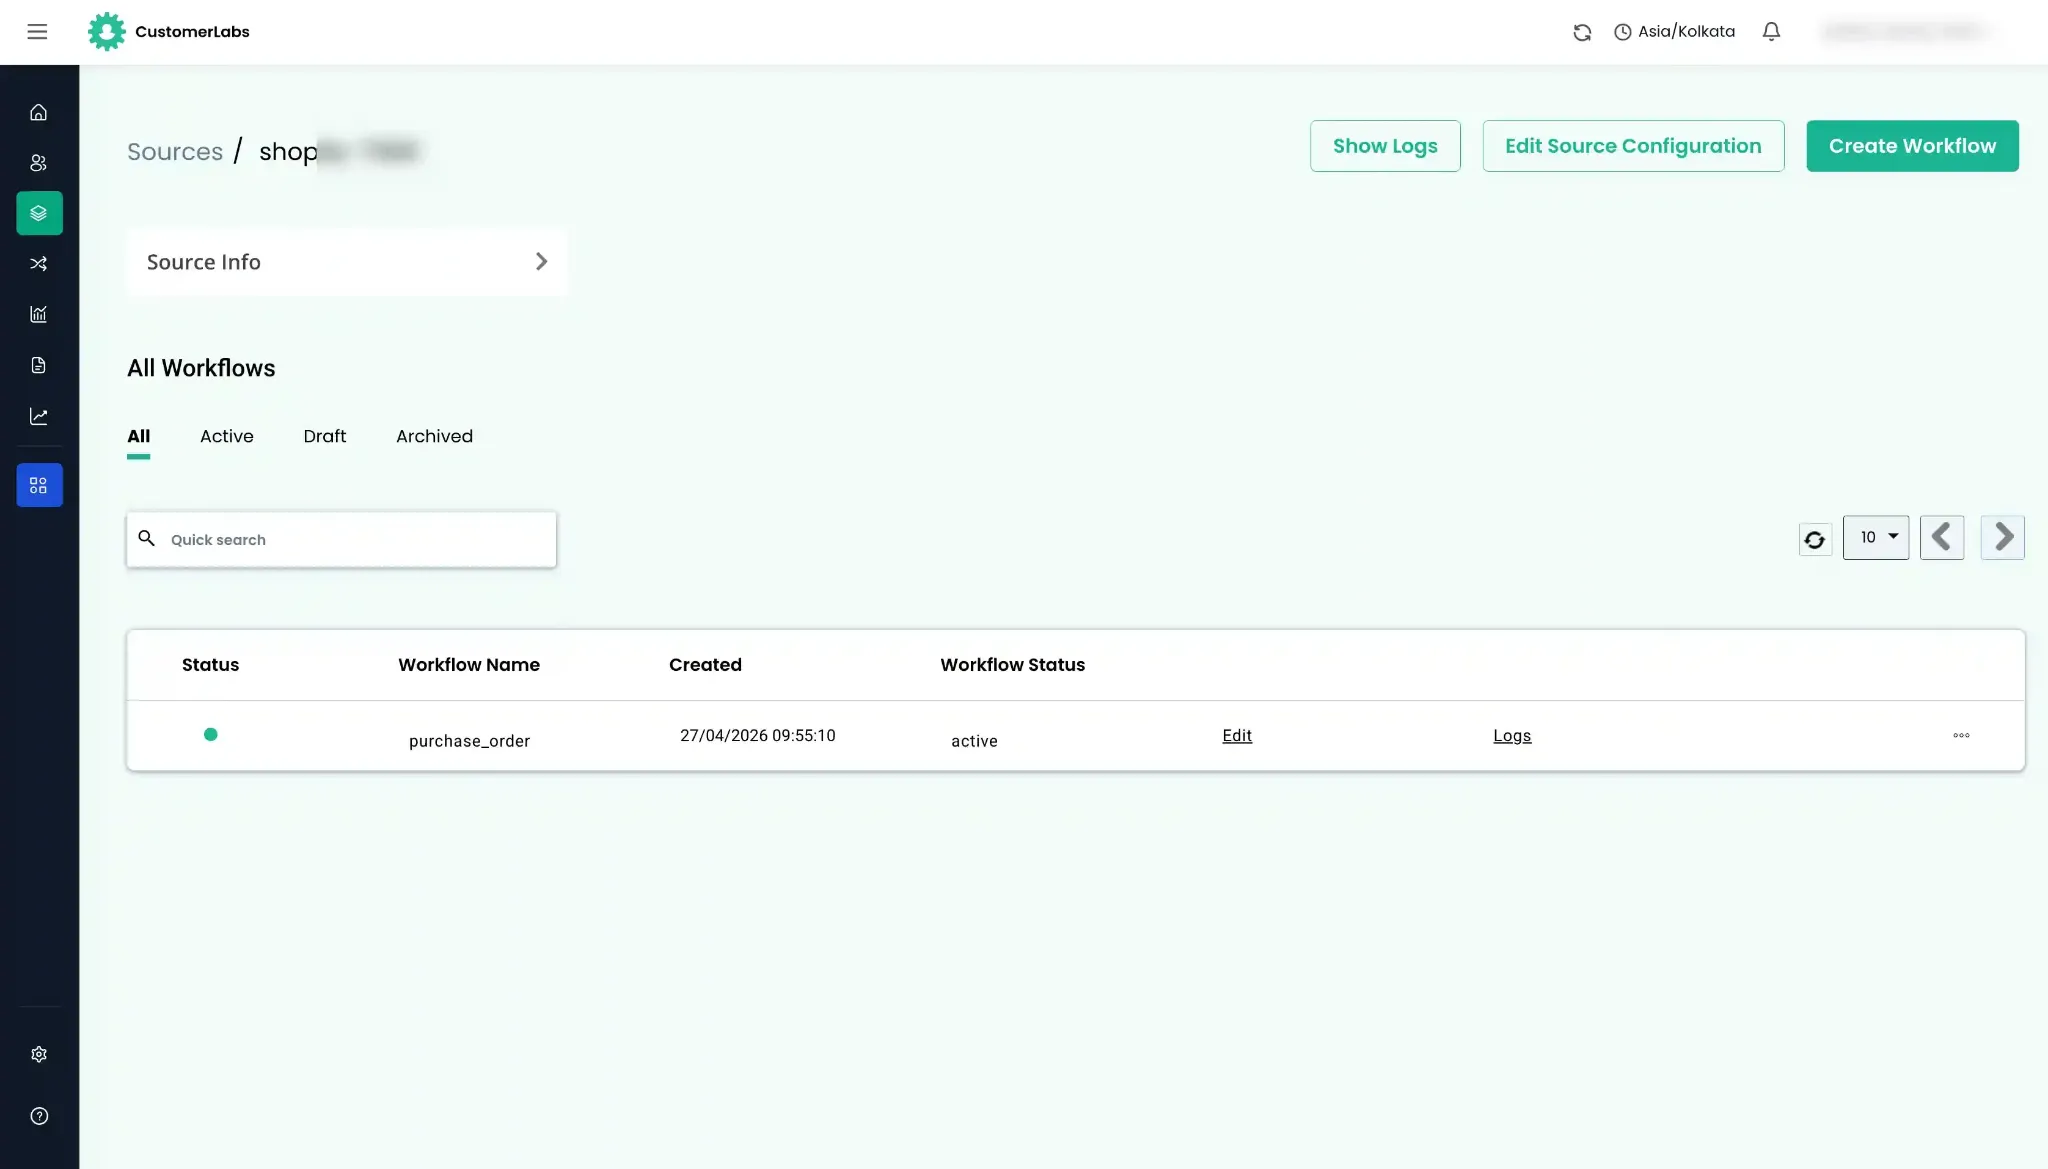
Connecting the webhook auto-creates a workflow from test data. You must verify it before it is trustworthy.
Go to Sources → your Shopify source → Edit the purchase_order workflow. Updating the delay is mandatory. Then click Choose Sample Data.
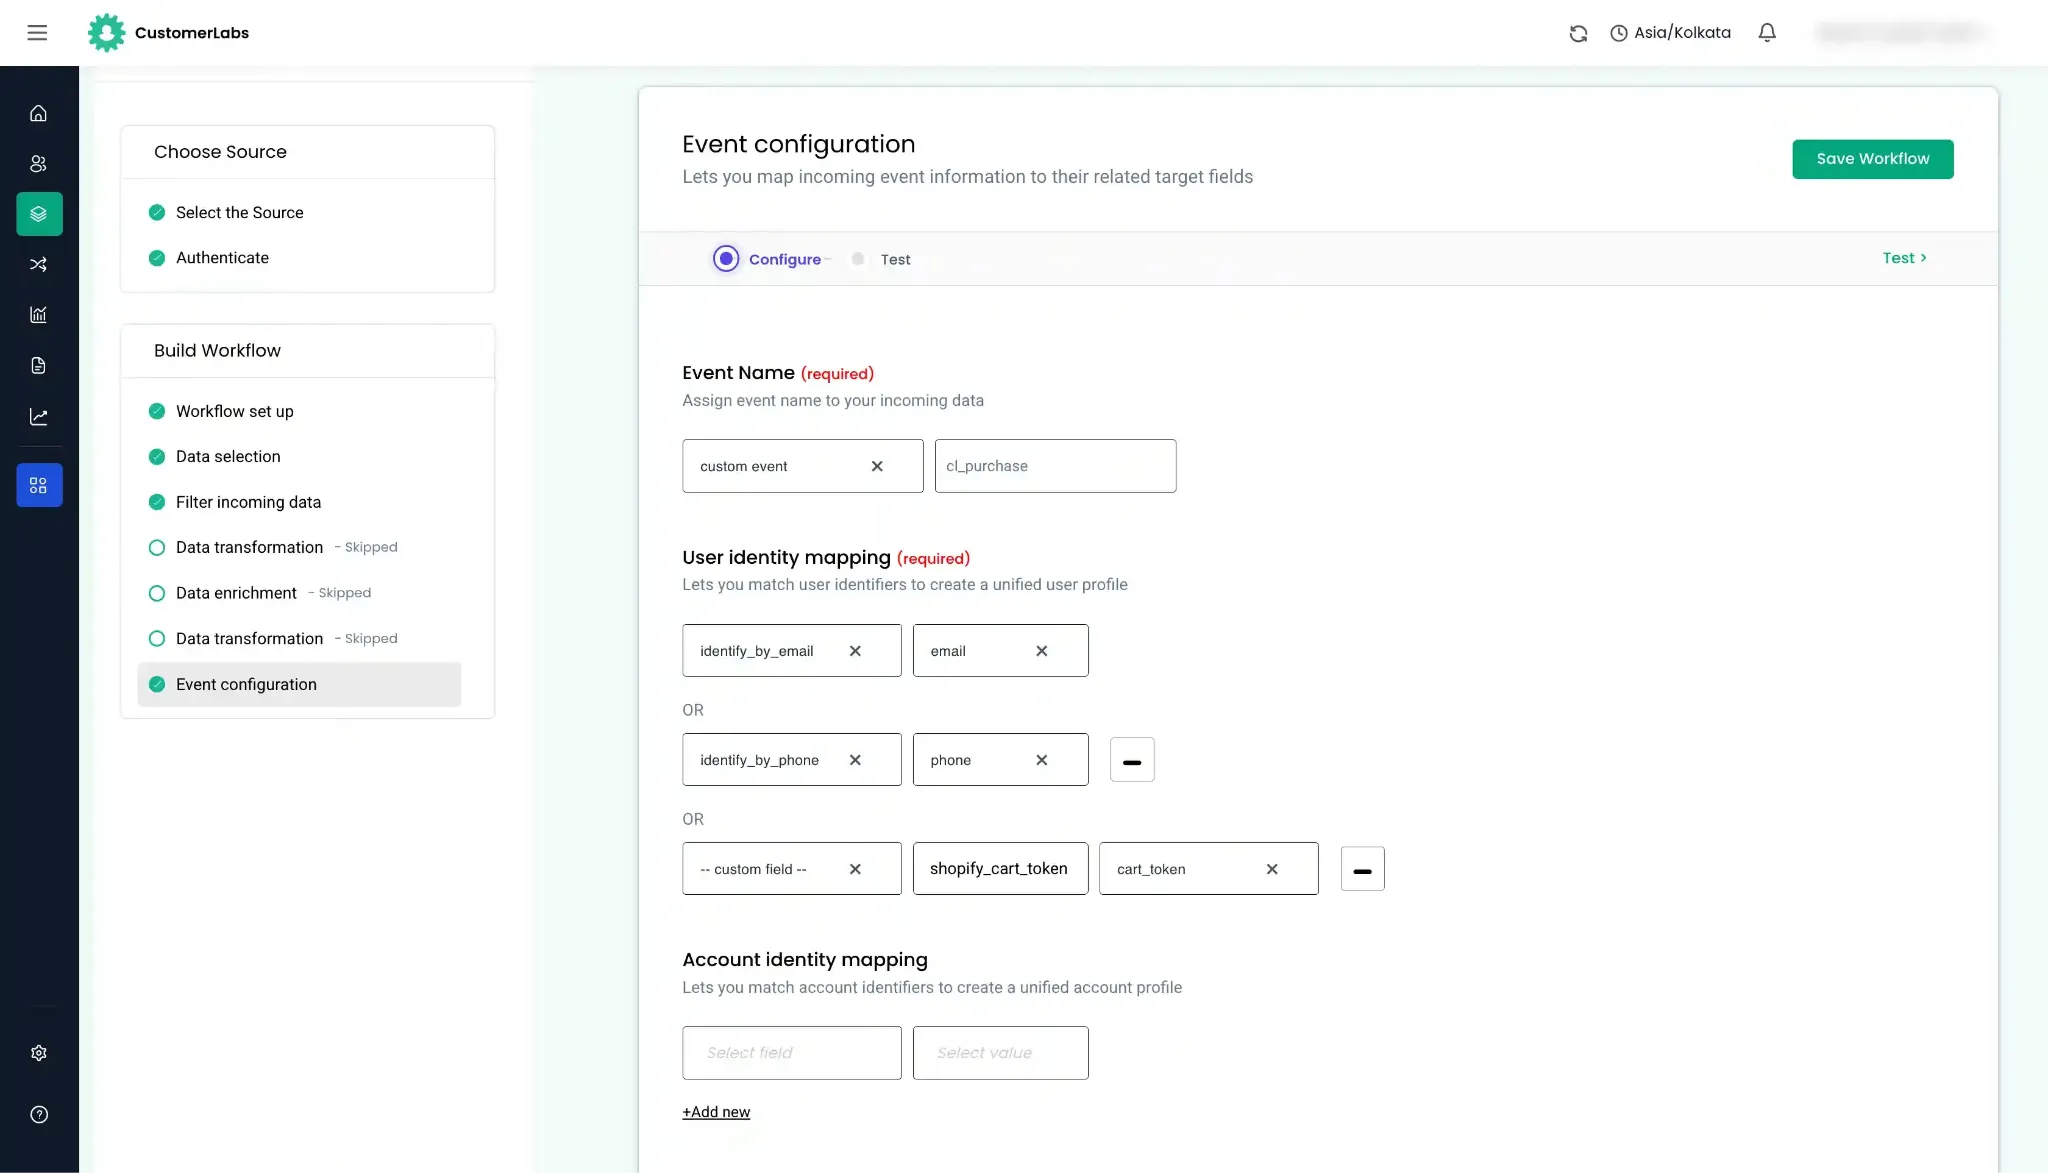
Rename the event to cl_purchase. In Event Configuration, set the event name to cl_purchase so it is distinguishable from the browser-side purchase event. This is the step that prevents double-counting — skip it and your server and browser purchases collide.
Confirm the cart token. Check that cart_token is present in the sample data and starts with hWN. Standard Shopify Checkout puts it in cart_token. Other checkout integrations put it inside note_attributes — worth knowing before you conclude it is missing.
Map your identities and attributes. Keep identify_by_email, identify_by_phone or shopify_cart_token. Then map user traits (first name, city), product details (sku, ID, variant, line_items) and event properties (value, currency, transaction_id, order_id). Save the workflow.
Part 3: Connect the Meta destination
Your events are now landing in CustomerLabs and correctly shaped. Nothing has reached Meta yet — this is the half that delivers them.
In CustomerLabs, go to Destinations → Facebook. Enter the last four digits of the pixel you are sending data to, then click Save and Enable. Open Configuration Settings and click Authenticate Facebook account. Select your Business Manager account, then the Pixel, then the Ad Account and Catalogue, and submit.
Use the recommended authentication method. It connects through a system user, which avoids data-sharing discrepancies and — more importantly — survives manual changes to your Meta account. The alternative method requires re-authentication every time someone edits the Ad Account or Pixel. Tracking that dies silently three weeks after a colleague reorganised an ad account is a common and expensive failure.
Then set three toggles:
- Audience type URL parameters — on, to attribute conversions to your first-party audience in Advantage+ Sales Campaigns
- Send data via server-side — on
- Enable all server-side callbacks — on, under Setup Event Workflow
Map any custom fields. Standard traits map automatically: email → em, phone → ph, purchase → Purchase. Anything outside the standard schema needs manual mapping — if you track order_ref and Meta expects order_id, add that pair here. Check the CustomerLabs event schema for what maps automatically and Meta’s Conversions API parameters for valid targets.
This is precisely the capability Meta’s one-click CAPI does not offer. Enrichment is the reason to run your own data layer.
For the full integration reference, see the CustomerLabs Meta Ads integration docs.
Part 4: Optional configuration many stores need
One-click checkout tools. If you use Fastrr/Shiprocket, GoKwik, Shopflo or FlexyPe, complete that tool’s own integration to push bottom-funnel events to the dataLayer or the CustomerLabs webhook. Each has its own documentation (Shiprocket, Shopflo, FlexyPe, GoKwik). Do not skip this — it is the gap that costs the most.
Events beyond the standard set. Workflow filters are how you build events Meta can optimise against more precisely than “any purchase”:
customer__user_type = new→ send ascl_new_customer_purchasesource_namecontainssubscription→ send ascl_subscription_purchase- Filter on
topic = order/create; exclude null emails and test-store orders
Those named events are what make new-customer acquisition cost, new-customer revenue contribution, repeat purchase and cost per repeat purchase measurable. The same pattern works for high-AOV segmentation and single-category optimisation — send Meta a cleaner signal and it optimises toward the purchases you actually want.
Audience sync. Turn on added_to_segment to sync audiences you have built in CustomerLabs, and removed_from_segment if you need to track removals. Refresh follows the minimum refresh interval set on the segment.
Privacy configuration. Limited Data Use is not a single toggle, despite how it is often described. It requires consent already collected and stored in a cookie on your site. You then configure the cookie name and cookie value in CustomerLabs and define the opt-out logic — a value of 1, true or y means the user opted out, and CustomerLabs flags them for LDU. It applies to California, Colorado and Connecticut, after which Meta processes that data as a service provider.
For restricted categories, run this check: Events Manager → your pixel → Settings → scroll to Core setup. If Core setup is on, your business falls under Meta’s restricted categories and the Restrict Health and Wellness Data toggle applies to you.
Meta runs its own consent framework. Configuring gtag consent does nothing for your Conversions API events, and assuming otherwise is a compliance risk.
For the full integration reference, see the CustomerLabs Shopify integration docs.
Verification
A setup you have not verified is a setup you do not have.
Confirm your events are landing
Perform real actions on your store — view a product, add to cart, complete a test purchase. Then open Meta Events Manager and confirm the events arrive. In CustomerLabs, check Sources → your Shopify source → Workflow Status shows active.
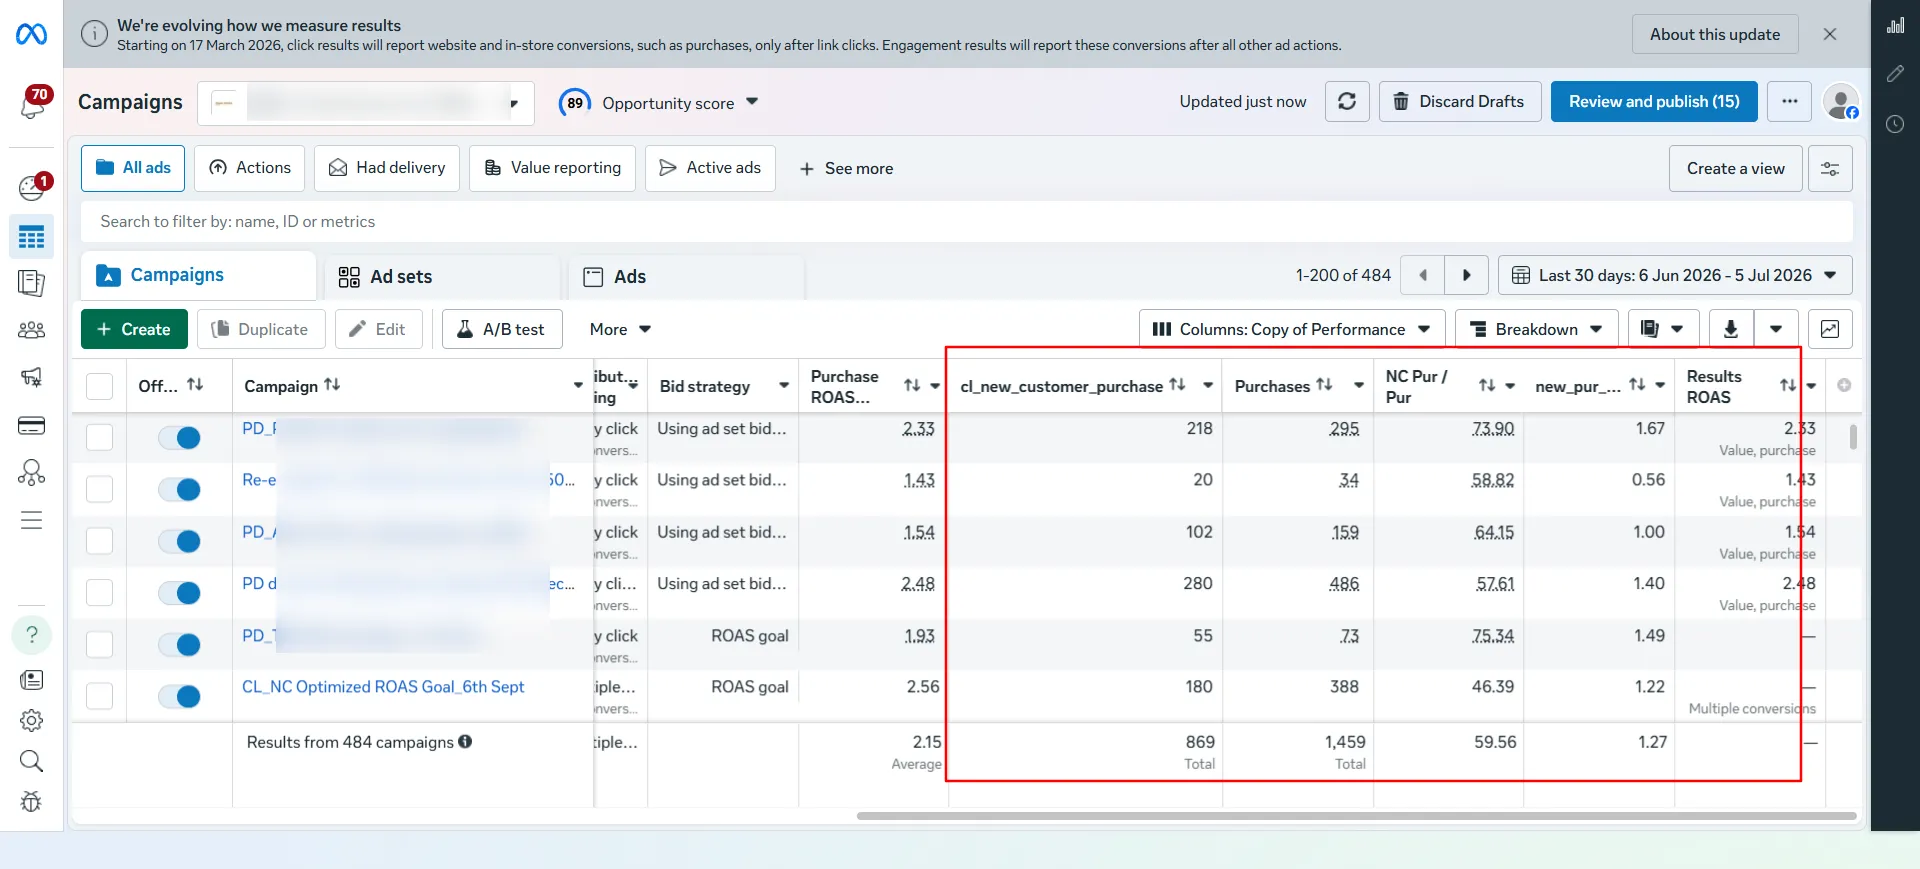
A continuous data flow improves algorithmic efficiency; interruptions degrade campaign performance, and they rarely announce themselves.
Final Wrap
Setting up the Shopify Meta Conversions API in 2026 comes down to four moves:
- Connect your store — app, script, product block, checkout extension, custom pixel, webhook
- Audit the purchase workflow — set the delay, rename to
cl_purchase, confirm the cart token - Connect the Meta destination — system-user auth, server-side on, custom fields mapped
- Verify — EMQ 8+, deduplication above 90%, conversion count within 5% of orders
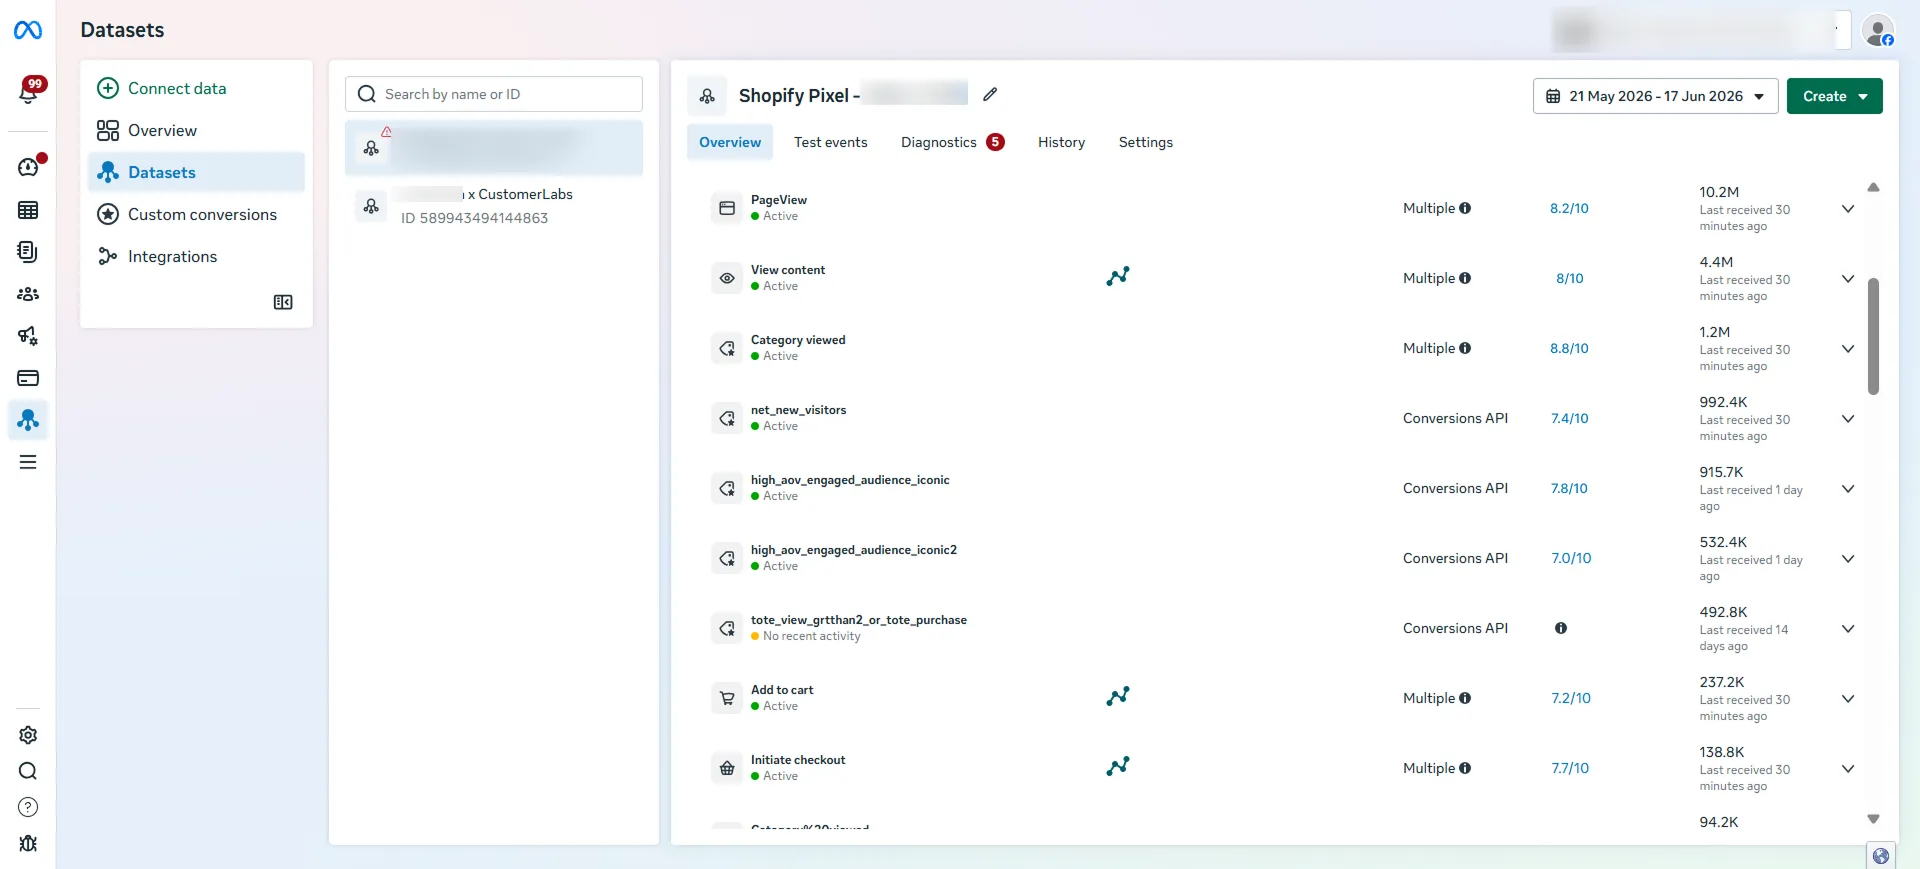
What that buys you beyond a native connection is the part that compounds: events enriched with data Meta never sees, purchase events that survive a one-click checkout, audiences you can segment, and a first-party cookie you own rather than rent.
If you want that data layer without building it yourself, start a CustomerLabs trial and connect your Shopify store — no developer required.